I've built several control cabinets and really like using DIN rail components. I keep all that kind of stuff when I tear down equipment at the end of its life. I've also got rolls of all the different sizes of pneumatic tubing and connectors. Doing your own repairs or modifications is way cheaper than using a tech and you get to know what makes it tick.They have Mini Din Blocks
-
Welcome back Guest! Did you know you can mentor other members here at H-M? If not, please check out our Relaunch of Hobby Machinist Mentoring Program!
You are using an out of date browser. It may not display this or other websites correctly.
You should upgrade or use an alternative browser.
You should upgrade or use an alternative browser.
Just bought an old 1994 -12 X 36 Enco Lathe 110-2075
- Thread starter Mr Mike
- Start date
- Joined
- Jul 30, 2017
- Messages
- 476
Over the weekend I finished welding up the center web support and welded the base for the Leveling casters, everything went better than I expected.
I am pretty much a hobby welder, so I had a couple welding hurdles to overcome and learn to problem solve issues such as filling gaps & different metal thickness being welded together. I got the caster bases welded up and everything was going well except for a mistake I made while getting the caster bases ready to mount up.
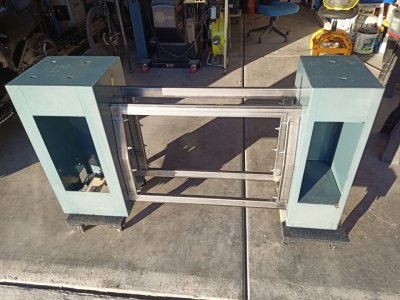
I used 3/8" x 3" hardware to mount the 1" x 2" 14-gauge tube center supports in place, If I had to do it over again, I would use 5/16" hardware. It's overkill and built like a tank.
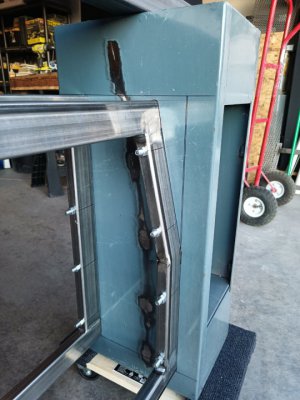
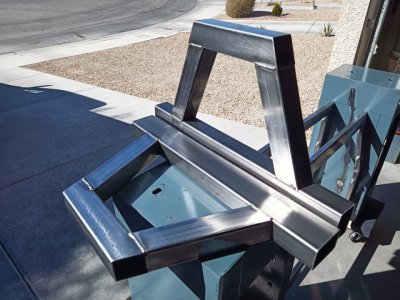
After welding up the bases, my train of thought got de-railed from work calls and what not, and instead of drilling the socket access holes on the exposed side I started drilling the holes on the flush side of a base that mates with the pedestal, I was drilling the 2nd hole before I realized what I had done... needless to say I went into panic mode trying to figure out how I was going to continue.
I didn't want to recreate a new base, so I watched a few videos looking for ideas how to close the holes up and found one that uses a copper plate to close the holes with... I looked around but could not find any copper plates on a Sunday. then it hit me I have washers the same thickness as the metal with a 3/8" hole that is the same size as the hardware I'm using... I welded them in leaving the same size hole I need.
Boy did I luck out and divert what I thought was a disaster, 30 minutes later I was back in business and moving along.
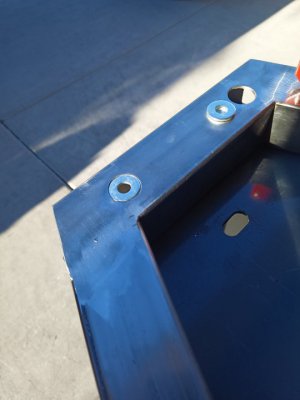
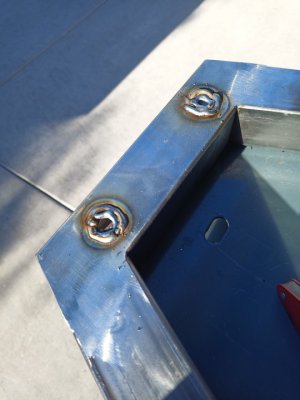
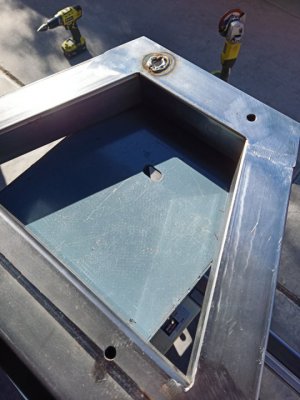
With all my self-made drama out of the way the rest of the day went great.
I used 3/8" x 1" hardware to mount the 2"x 3" x 1/8" caster base
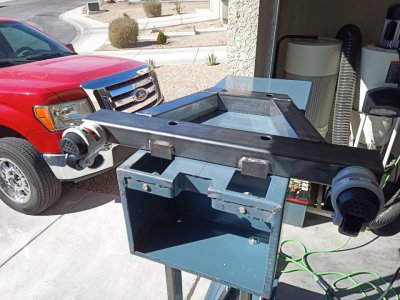
The Leveling casters uses a 1/2" stud, washer and bolt to mount it.
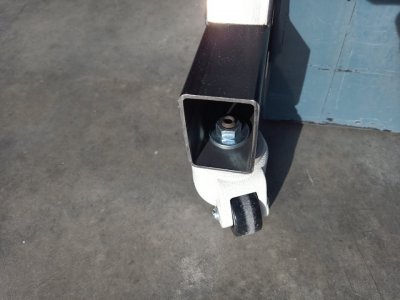
The casters hold the stand about 3/16" off the ground which is all I should need to gain access the back of the lathe when needed.
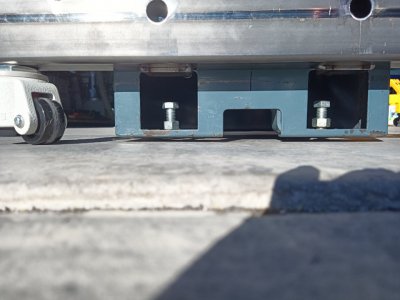
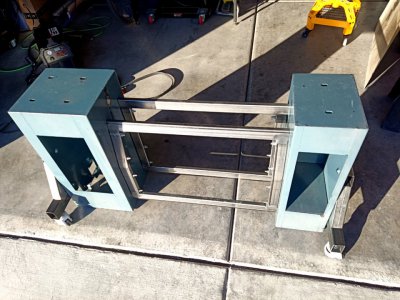
During the week I'll try and add a floor to the left pedestal, Thanks for looking.
I am pretty much a hobby welder, so I had a couple welding hurdles to overcome and learn to problem solve issues such as filling gaps & different metal thickness being welded together. I got the caster bases welded up and everything was going well except for a mistake I made while getting the caster bases ready to mount up.

I used 3/8" x 3" hardware to mount the 1" x 2" 14-gauge tube center supports in place, If I had to do it over again, I would use 5/16" hardware. It's overkill and built like a tank.


After welding up the bases, my train of thought got de-railed from work calls and what not, and instead of drilling the socket access holes on the exposed side I started drilling the holes on the flush side of a base that mates with the pedestal, I was drilling the 2nd hole before I realized what I had done... needless to say I went into panic mode trying to figure out how I was going to continue.
I didn't want to recreate a new base, so I watched a few videos looking for ideas how to close the holes up and found one that uses a copper plate to close the holes with... I looked around but could not find any copper plates on a Sunday. then it hit me I have washers the same thickness as the metal with a 3/8" hole that is the same size as the hardware I'm using... I welded them in leaving the same size hole I need.
Boy did I luck out and divert what I thought was a disaster, 30 minutes later I was back in business and moving along.


With all my self-made drama out of the way the rest of the day went great.
I used 3/8" x 1" hardware to mount the 2"x 3" x 1/8" caster base

The Leveling casters uses a 1/2" stud, washer and bolt to mount it.

The casters hold the stand about 3/16" off the ground which is all I should need to gain access the back of the lathe when needed.


During the week I'll try and add a floor to the left pedestal, Thanks for looking.
Last edited:
- Joined
- Jan 2, 2019
- Messages
- 6,526
I have a similar lathe and like what you’re doing but I have to ask a question.Over the weekend I finished welding up the center web support and welded the base for the Leveling casters, everything went better than I expected.
I am pretty much a hobby welder, so I had a couple welding hurdles to overcome and learn to problem solve issues such as filling gaps & different metal thickness being welded together. I got the bases welded up and everything was going well except for a mistake I made while getting the bases ready to mount up.
View attachment 396473
View attachment 396474
View attachment 396472
After welding up the bases, my train of thought got de-railed from work calls and what not, and instead of drilling the socket access holes on the exposed side I started drilling the holes on the flush side of a base that mates with the pedestal, I was drilling the 2nd hole before I realized what I had done... needless to say I went into panic mode trying to figure out how I was going to continue.
I didn't want to recreate a new base, so I watched a few videos looking for ideas how to close the holes up and found one that uses a copper plate to close the holes with... I looked around but could not find any copper plates on a Sunday. then it hit me I have washers the same thickness as the metal with a 3/8" hole that is the same size as the hardware I'm using... I welded them in leaving the same size hole I need.
Boy did I luck out and divert what I thought was a disaster, 30 minutes later I was back in business and moving along.
View attachment 396478
View attachment 396480
View attachment 396481
With all my self-made drama out of the way the rest of the day went great.
View attachment 396499
The Leveling caster uses a 1/2" stud, washer and bolt to mount it.
View attachment 396497
The casters hold the stand about 3/16" off the ground which is all I should need to gain access the back of the lathe when needed.
View attachment 396496
View attachment 396503
During the week I'll try and add a floor to the left pedestal, Thanks for looking.
Every time I think about changing my stand I just want to start fresh and put a toolbox or two underneath it. Maybe it’s just that my shop is small but the only thing the stock stand has going for me is it came with the machine.
Don‘t get me wrong, I like your concept. Just seems like too much wasted space for me.
John
- Joined
- Jul 30, 2017
- Messages
- 476
Hello Sir. I've seen lathes on toolbox's and it's a fantastic idea... I was actually considering making the center of my stand all drawers and putting a hinge on the original center webbing cut in half like a cabinet door so I could access them, I might do that as future project if I need more space.I have a similar lathe and like what you’re doing but I have to ask a question.
Every time I think about changing my stand I just want to start fresh and put a toolbox or two underneath it. Maybe it’s just that my shop is small but the only thing the stock stand has going for me is it came with the machine.
Don‘t get me wrong, I like your concept. Just seems like too much wasted space for me.
John
For now, it's a project about having a cool utility lathe that's serviceable, later I'll worry about the ancillary aspects of it.
Last edited:
- Joined
- Jul 30, 2017
- Messages
- 476
I cutout the floor piece for the left pedestal and installed it, and now I have a place to store fluids for the lathe, I have no idea why the pedestal didn't have a floor from the factory.
One thing I need to figure out is how to keep fluids from the chip pan leaking into the pedestals - RTV silicon maybe...?
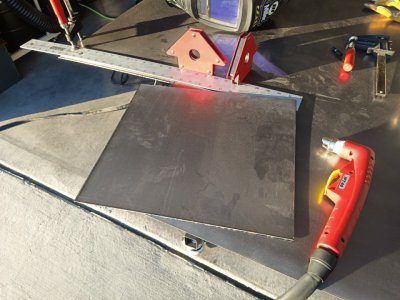
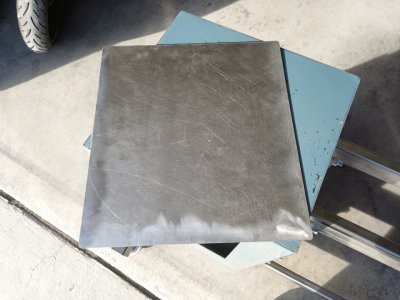
Business cards make great spacers.
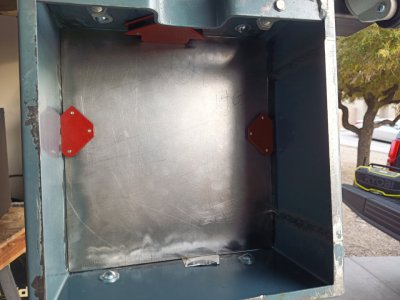
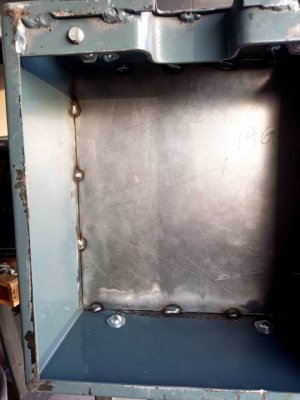
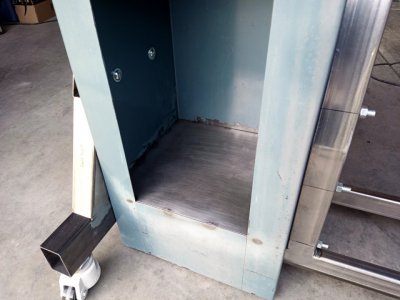
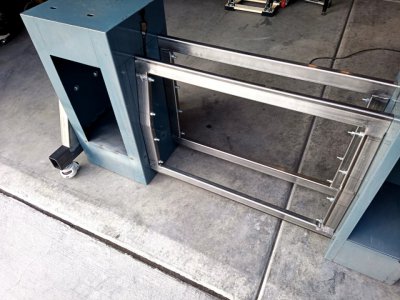
Not now but one day I may use the empty space in the center to add drawers for tooling and what not, future project maybe. this weekend Ill start working on a simple upper drawer that sits over it and install the original center web...
Thanks for looking.
One thing I need to figure out is how to keep fluids from the chip pan leaking into the pedestals - RTV silicon maybe...?


Business cards make great spacers.


Not now but one day I may use the empty space in the center to add drawers for tooling and what not, future project maybe. this weekend Ill start working on a simple upper drawer that sits over it and install the original center web...
Thanks for looking.
- Joined
- Jul 30, 2017
- Messages
- 476
Today I trimmed off the center web upper and lower lip and installed it.
it still amazes me the power of a plasma torch vs a trusty old grinder...!
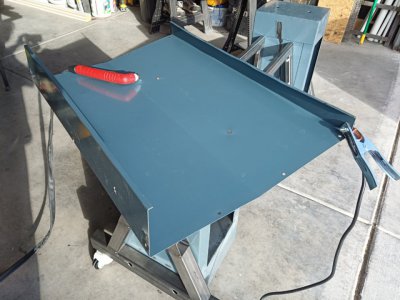
Less than 8 seconds to trim off each lip, so glad I didn't have to grind them off.
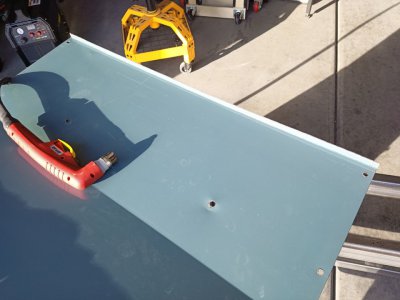
I bolted the webbing back in place with 1/4-20 x 1.5" hardware to help keep the original appearance of the stand.
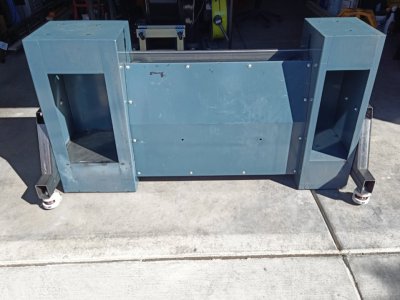
There is now plenty of space for a drawer that I'll start working on tomorrow.
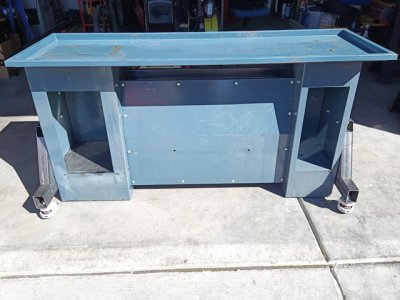
I'm happy with how the stands turning out, I just hope the lathe appreciates it too. Just a couple more things and the stand will be ready for paint...!
Thanks for Looking.
it still amazes me the power of a plasma torch vs a trusty old grinder...!

Less than 8 seconds to trim off each lip, so glad I didn't have to grind them off.

I bolted the webbing back in place with 1/4-20 x 1.5" hardware to help keep the original appearance of the stand.

There is now plenty of space for a drawer that I'll start working on tomorrow.

I'm happy with how the stands turning out, I just hope the lathe appreciates it too. Just a couple more things and the stand will be ready for paint...!
Thanks for Looking.
Last edited:
- Joined
- Jul 30, 2017
- Messages
- 476
The weather was bad last weekend, we got a break Wednesday, I cut out most of the drawer panels and beveled them for welding. This weekend I welded the drawer up and installed it on the stand, It came out spot on and looks pretty good. The only issue I ran into was the drawer slides from Home Depot that were rated to 50 lbs... The 14ga Drawer is 12 Lbs and when extended was deflecting, so I ordered some 80 lb slide replacements.
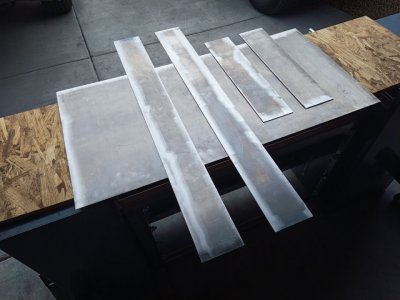
I beveled all the mating edges so I could grind off the excess weld to keep a flat profile on the drawer.
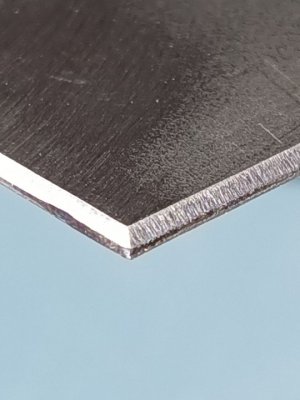
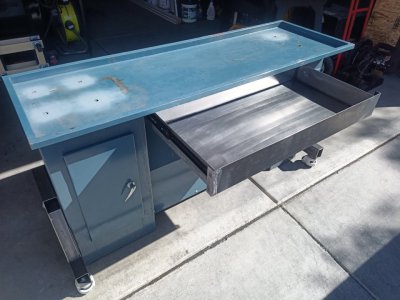
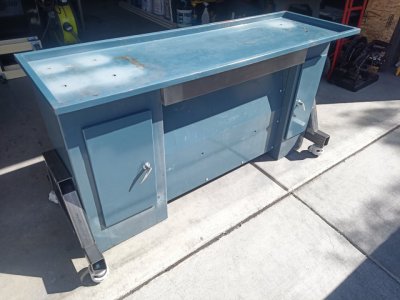
The rest of the hardware such as the tube end caps & drawer pulls are on the way, I may alter a set of drawer pulls for the doors too so they match.
I think it's ready for prep and paint unless someone knows other nifty enhancements it's missing... I hope to have the paint completed by the end of next week so I can mount the lathe bed and start on it...! If all goes well fingers crossed, I'll have a pretty neat mobile base next week.
If anyone has reason to think I've under built the stand to be mobile or I'm missed something, please let me know before I mount the lathe bed and I'll fix it, thanks for looking.

I beveled all the mating edges so I could grind off the excess weld to keep a flat profile on the drawer.


The rest of the hardware such as the tube end caps & drawer pulls are on the way, I may alter a set of drawer pulls for the doors too so they match.
I think it's ready for prep and paint unless someone knows other nifty enhancements it's missing... I hope to have the paint completed by the end of next week so I can mount the lathe bed and start on it...! If all goes well fingers crossed, I'll have a pretty neat mobile base next week.
If anyone has reason to think I've under built the stand to be mobile or I'm missed something, please let me know before I mount the lathe bed and I'll fix it, thanks for looking.
Last edited:
- Joined
- Jul 30, 2017
- Messages
- 476
I see you did it the smart way and follow the kiss method... I really should too, but where is the fun in that...Looks plenty stout to me, this is all I did on mine to be able to move it around.
John
What brand is your lathe? Pretty nifty you have three V ways on your lathe bed. Also, how do you like those leveling casters, do they roll easy with all the weight...?
- Joined
- Jan 2, 2019
- Messages
- 6,526
Mine is branded Samson but it’s a Tida according to the manual, seems to work fine for my needs.I see you did it the smart way and follow the kiss method... I really should too, but where is the fun in that...
What brand is your lathe? Pretty nifty you have three V ways on your lathe bed. Also, how do you like those leveling casters, do they roll easy with all the weight...?
I bought the cheap leveling casters, if I were to do it over I’d buy better ones or just regular casters and separate leveling feet.
Here’s my thread about it.

Samson (Tida) TD-5AA lathe
Just picked this up today. And.... So I can check it against what Mr. Fang found in 1981 :grin: John
 www.hobby-machinist.com
John


