Mike's CNC G0704 - Block 4 Upgrades

Started off by measuring the actual geometric errors of the machine. I have finished most of them measurements, but still have a few left and will post them here when I'm done. Everything is so loose it is hard to tell what is a geometric error and what is backlash and poor fit. But overall it will serve as a good starting point for scraping, and I've recorded the exact test methodology for each measurement so I can repeat them as I go.

I also purchased a new saddle and Z axis slide from Grizzly for $175. This will let me scrape those critical items in and machine the complex oiling passages without needing access to another mill (which I don't have). I received these in the mail and found them to be produced in better condition than the originals were back in 2013 when I bought the mill. The surface finish on some of the ways is very strange and doesn't match any machining process I know of. Perhaps it was very fast grinding with a very rough and out of balance wheel.

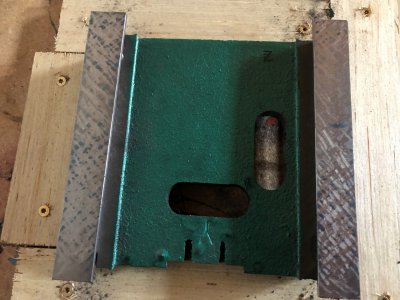
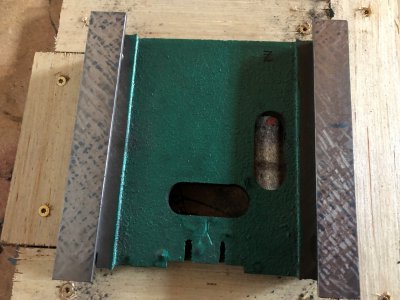
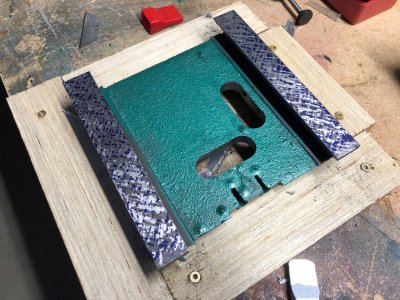
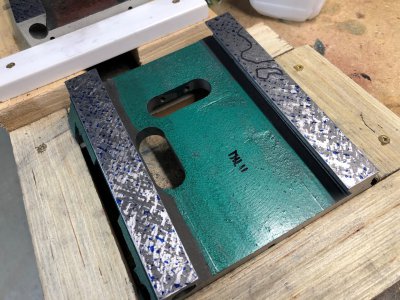
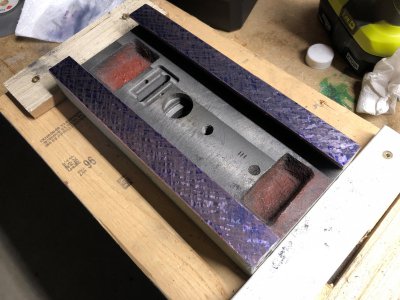
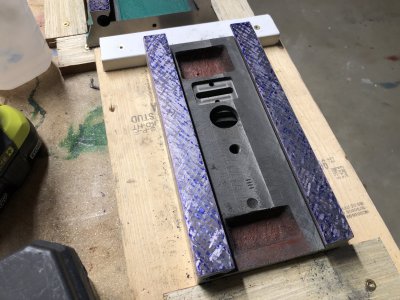
I'll do a more in-depth post soon regarding my scraping, but here is a sneak peek at the progress made of flattening the new saddle way faces.

Photo after 5 scraping cycles:
image030.jpg

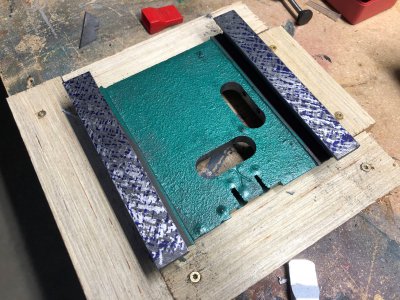
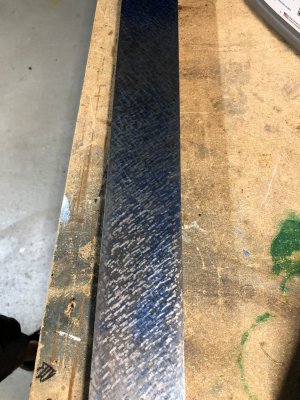
Photo after 7 and a slightly heavier blue transfer more appropriate for roughing:
image029.jpg

Overall, this first surface was not too far out with the exception of some big burrs, and the "grinding" somewhat rolling off the ends of the ways. I'm not sure I'm up for scraping deep enough to bring in the last 1/4" of contact.

One other neat thing is I found a local company willing to lap and calibrate my no-name import grade "B" 18x24" surface plate to grade A with certificates for $100 cash next time they come by a local business. I'm sure this was a special deal with me delivering the plate directly to them. After that, I should be able to trust my plate.

More to come soon.
 
Alright, this is going to be a bit of a long post. I've held off on writing this up until I had completed all my measurements and generated some graphics to go with each. Taking these measurements took a long time and I have much less free time now with a newborn.

My goal was to assess my machine in the exact state I've been using it, with the exception of the Z axis slide needing to be tightened to the ballnut (this was loose and was the original reason for kicking off this project. I wanted to get measurements for all of the geometric machine errors listed above, however I found this to be impossible without some additional specialized equipment like a laser interferometer. Instead I took some composite measurements that show the contributing effects of several basic errors. This will be good enough for my purposes to show the (hopeful) improvement after scraping.

Another note is that these measurements were terrible! Seriously, had I known the machine was in this sorry state, I would have fixed it a long time ago. Amazingly though, I've made plenty of decently accurate parts (+/-0.003" or better). I contribute this to techniques to minimize the contribution of machine errors to part inaccuracy. Hopefully when I'm done here, setups will go much faster since I hope to be able to trust the machine accuracy.

One final note, the machine was so loose that I don't trust many of these measurements in great detail. It was hard to determine if the table was bowed like a banana or the gibs were just loose and the table slumped off the side with gravity. However, I chose not to tighten everything up since this is how the machine has been for the past few years.

I'll go into each measurement in detail, but the composite measurements taken were as follows:
  • Lead Error - X
  • Lead Error - Y
  • Lead Error - Z
  • Backlash - X
  • Backlash - Y
  • Backlash - Z
  • Straightness/Wobble of X slide in Y direction
  • Straightness/Wobble of X slide in Z direction
  • Straightness/Wobble of Y slide in X direction
  • Straightness/Wobble of Y slide in Y direction
  • Straightness/Wobble of Z slide in X direction
  • Straightness/Wobble of Y slide in Y direction
  • Squareness X - Y
  • Squareness X - Z
  • Squareness Y - Z
  • Slop of X slide in Y direction
  • Slop of X slide in Z direction
  • Slop of Y slide in X direction
  • Slop of Y slide in Z direction
  • Slop of Z slide in X direction
  • Slop of Z slide in Y direction
  • Spindle Tram - X
  • Spindle Tram - Y
  • Spindle Runout
Lead Error - X, Y, Z

I did not have a good way of measuring lead error in the ballscrews directly, so this will be the only measurement pulled directly from a datasheet. When I built this CNC conversion back in 2013, the C7 ballscrew market on eBay didn't exist so I bought the recommended Roton brand rolled ballscrews from the Hoss Machine conversion plans. This isn't a dig at Roton, they market these as transport grade ballscrews which have a very loose lead accuracy and backlash tolerance.

The lead error tolerance is 0.0090" per 12"

Backlash - X


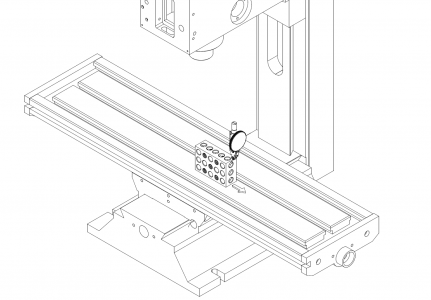
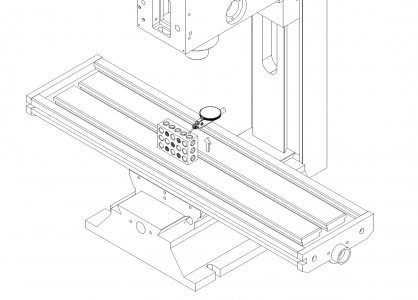
My X axis ballnut has been repacked with oversize balls on two different occasions to minimize this error. The test setup involved clamping a 1-2-3 block to the table. The indicator was first brought into contact with the block, then jogged in X+ direction until all backlash was taken up in the screw. The indicator was zeroed, then the X axis was jogged in the X- direction, 0.0001" at a time, until indicator movement was noted. Several repeated measurements verified the result. Backlash was only taken at one location on the screw to save time.

Backlash in X is 0.0010"

1686063083090.png

Backlash - Y

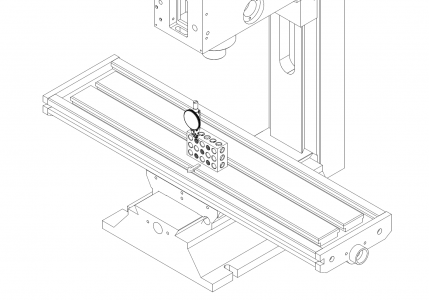
My Y axis ballnut has also been repacked with oversize balls on two different occasions to minimize this error. The test setup involved clamping a 1-2-3 block to the table. The indicator was first brought into contact with the block, then jogged in Y- direction until all backlash was taken up in the screw. The indicator was zeroed, then the Y axis was jogged in the Y+ direction, 0.0001" at a time, until indicator movement was noted. Several repeated measurements verified the result. Backlash was only taken at one location on the screw to save time.

Backlash in Y is 0.0030"

1686063322124.png


Backlash - Z


My Z axis ballnut has been repacked with oversize balls once to minimize this error. Similar to X and Y, the test setup involved clamping a 1-2-3 block to the table. The indicator was first brought into contact with the block, then jogged in Z+ direction until all backlash was taken up in the screw. The indicator was zeroed, then the Z axis was jogged in the Z- direction, 0.0001" at a time, until indicator movement was noted. Several repeated measurements verified the result. Backlash was only taken at one location on the screw to save time.

Backlash in Z is 0.0005"

1686063474135.png


I'll break this post here. To be continued...
 
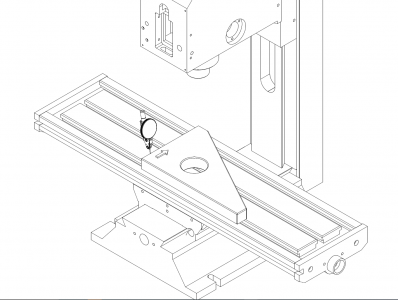
Squareness X to Y

This measurement represents the accuracy of the orthogonality of the ways of the saddle. It is a measure of how square the X and Y axes are to each other.

The standard to which the measurements were taken was a Shars brand 6x10" granite square. This has a squareness accuracy of +/-0.0001" over the full length of the square.

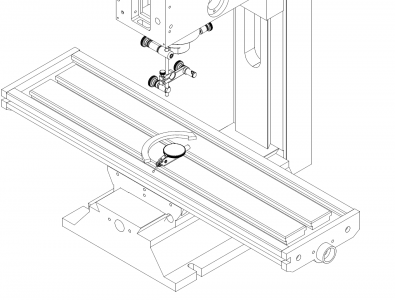
The granite square was first indicated true in the X axis and gently clamped to the table to prevent accidental movement, then the indicator was moved to the Y axis face and the Y axis was jogged. Full indicator movement was noted .

For this measurement, the value was only reported for the movement while the saddle was fully supported by the base. The saddle can overhang the front of the base for additional travel, however accuracy dramatically declines likely due to looseness in the Y axis gibs and ways.

Squareness is represented as a error over 12" since this error is angular. The travel of the Y axis is less than 12", so the value is normalized to 12" travel for easy comparison to other axes. The actual measurement was 0.0007" over 5".

Squareness X to Y is 0.0017" per 12"
1686063810831.png

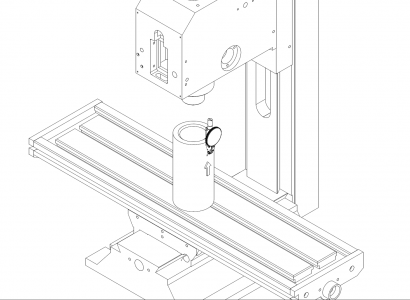
Squareness X to Z, Wobble of Z slide in X direction

This measurement represents the orthogonality of the column to the table top in the X direction. This can also be stated as how much the column leans to the left or right.

The standard to which the measurements are taken is a Fowler 3x6" cylindrical square with a stated accuracy of +/- 0.0001".

The cylindrical square was cleaned and placed on a gently stoned and cleaned table. The indicator was aligned in the X direction and jogged in Y to find the high point of reading. Then the X and Y were locked and the indicator was jogged in the Z direction.

Squareness is represented as a error over 12" since this error is angular. The travel of the Z axis is less than 12", so the value is normalized to 12" travel for easy comparison to other axes. The actual measurement was 0.0037" over 5.05".

The wobble in the indicator reading above or below the straight line reading from end to end represents the wobble or straightness error in the Z ways in the X direction. Overall test distance is 5.4". Wobble is cyclic with a 0.2" period indicating a bent screw

Squareness X to Z is 0.0088" per 12"

Straightness/Wobble of Z slide in X direction is 0.0020"
1686064543176.png

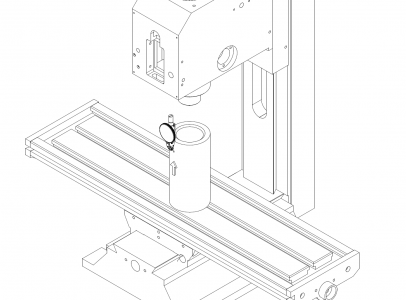
Squareness Y to Z, Wobble of Z slide in Y direction

This measurement represents the orthogonality of the column to the table top in the Y direction. This can also be stated as how much the column leans forward to back.

The standard to which the measurements are taken is a Fowler 3x6" cylindrical square with a stated accuracy of +/- 0.0001".

The cylindrical square was cleaned and placed on a gently stoned and cleaned table. The indicator was aligned in the Y direction and jogged in X to find the high point of reading. Then the X and Y were locked and the indicator was jogged in the Z direction.

Squareness is represented as a error over 12" since this error is angular. The travel of the Z axis is less than 12", so the value is normalized to 12" travel for easy comparison to other axes. The actual measurement was 0.0005" over 5.23".

The wobble in the indicator reading above or below the straight line reading from end to end represents the wobble or straightness error in the Z ways in the Y direction. Overall test distance is 5.4". Wobble is cyclic with a 0.2" period indicating a bent screw

Squareness Y to Z is 0.0010" per 12"

Straightness/Wobble of Z slide in Y direction is 0.0020"
1686064655790.png


Straightness/Wobble of X slide in Y direction


This measurement represents the combined contributions of a bent ballscrew, table yaw, and a little bit of table roll. Way looseness also affects this measurement.

This measurement was also taken against the Shars granite square.

The square is first aligned in the X direction such that the indicator reads 0 at both ends of the square. The Y axis is locked. The X axis is then jogged back and forth over the length of the square and the total indicator reading (max-min) is reported. If the ways were straight, then this should show zero indicator movement. Overall test distance is 8"

Straightness/Wobble of X slide in Y direction is 0.0007"
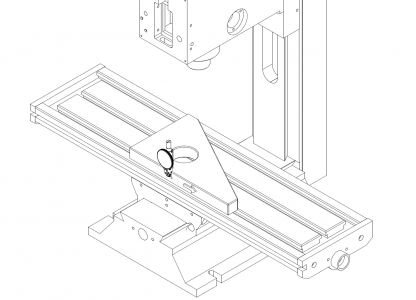

1686064837792.png

Straightness/Wobble of X slide in Z direction & Table Wedge in X

This measurement represents the combined contributions of a bent ballscrew, table wedge, and table roll. Way looseness also affects this measurement.

This measurement was also taken against the Shars granite square.

The Y axis is locked. The indicator is placed on the top face of the granite square and zeroed at the far left end. The X axis is then jogged back and forth over the length of the square and the total indicator reading at the far right is noted as well as the movement of the indicator along the length of travel.

The end to end reading is the table wedge or pitch error in X. This reading is heavily influenced by the slop in the X axis ways and the weight of the table under gravity. The wobble in the indicator reading above or below the straight line reading from end to end represents the wobble or straightness error in the X ways in the Z direction. Table wedge is normalized to error over 12" since it is an angular error. Actual measurements were taken over a 9.4" test distance. Measurements were always taken over distances divisible by 0.2" to avoid contributions of a bent ballscrew.

X table wedge is 0.0037" over 12"

Straightness/Wobble of X slide in Z direction is 0.0024"
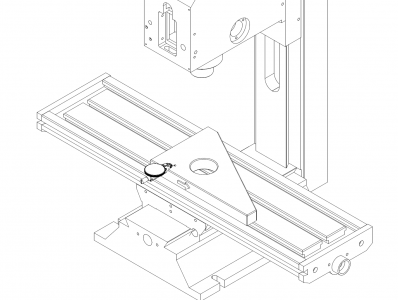
1686066140683.png


Straightness/Wobble of Y slide in X direction


This measurement represents the combined contributions of a bent ballscrew, table yaw, and a little bit of table roll. Way looseness also affects this measurement.

This measurement was also taken against the Shars granite square.

The square is first aligned in the Y direction such that the indicator reads 0 at both ends of the square. The X axis is locked. The Y axis is then jogged back and forth over the length of the square and the total indicator reading (max-min) is reported. If the ways were straight, then this should show zero indicator movement. Overall test distance is 5"

Straightness/Wobble of X slide in Y direction is 0.0003"
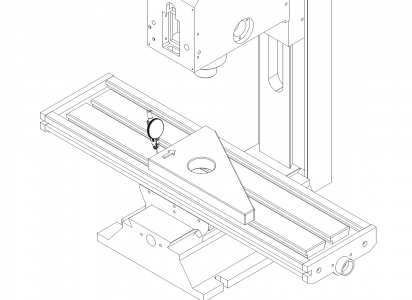
1686066515175.png

Straightness/Wobble of Y slide in Z direction & Table Wedge in Y

This measurement represents the combined contributions of a bent ballscrew, table wedge, and table roll. Way looseness also affects this measurement.

This measurement was also taken against the Shars granite square.

The X axis is locked. The indicator is placed on the top face of the granite square and zeroed at the far left end. The Y axis is then jogged back and forth over the length of the square and the total indicator reading at the far right is noted as well as the movement of the indicator along the length of travel.

The end to end reading is the table wedge or pitch error in Y. This reading is heavily influenced by the slop in the Y axis ways and the weight of the table under gravity. The errors are highly amplified when the saddle is not fully supported by the base, so measurements were stopped when the saddle reached the end of the base. The wobble in the indicator reading above or below the straight line reading from end to end represents the wobble or straightness error in the Y ways in the Z direction. Table wedge is normalized to error over 12" since it is an angular error. Actual measurements were taken over a 5.4" test distance. Measurements were always taken over distances divisible by 0.2" to avoid contributions of a bent ballscrew.

Y table wedge is 0.0015" over 12"

Straightness/Wobble of Y slide in Z direction is 0.0006"
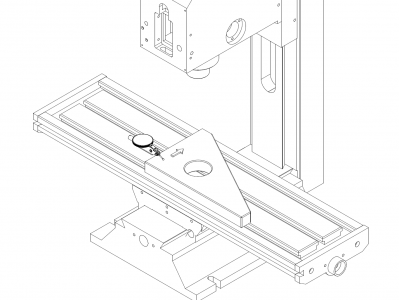
1686066357672.png


To be continued...
 
Last edited:
Spindle Tram - X Axis

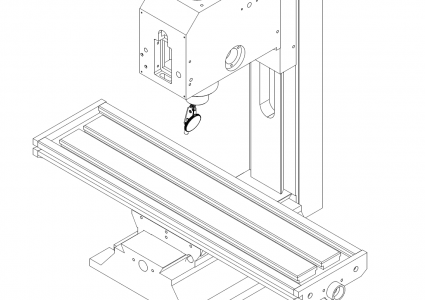
Classic measurement of head tilt left to right. Since no axis motion occurs, this measurement is independent of column alignment. Indicator is held in an Indicol indicator mount and swept across the table at a wide radius. Total indicator movement is reported. Actual test diameter was 6.90" and is reported normalized to measurement over 12" for easy comparison.

Spindle Tram - X Axis is 0.0223" over 12"

1686067891688.png

Spindle Tram - Y Axis


Classic measurement of head nod front to back. Since no axis motion occurs, this measurement is independent of column alignment. Indicator is held in an Indicol indicator mount and swept across the table at a wide radius. Total indicator movement is reported. Actual test diameter was 6.90" and is reported normalized to measurement over 12" for easy comparison.

Spindle Tram - X Axis is 0.0089" over 12"

1686067946848.png

Spindle Runout


Measurement was taken directly at the conical taper of the R8 spindle at 3 depths. Total Indicator Reading is reported.

Spindle Runout is 0.0004"

1686068578388.png


To be continued...
 
Last edited:
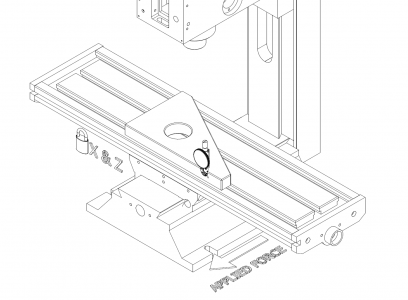
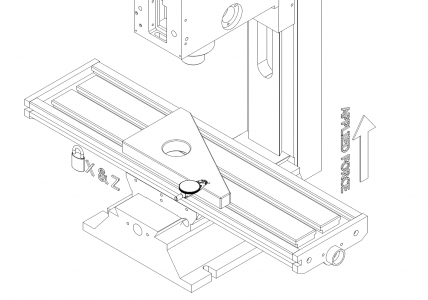
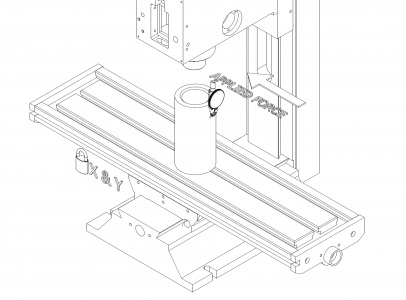
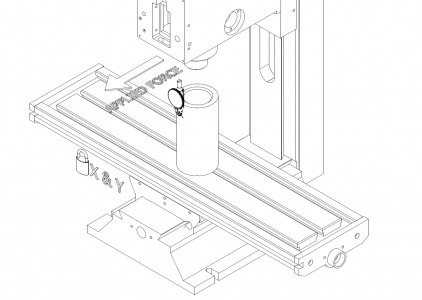
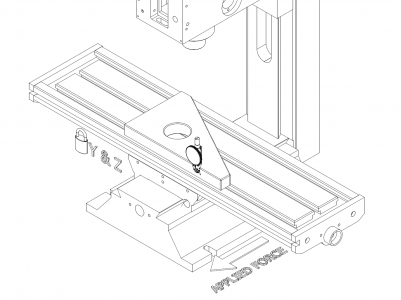
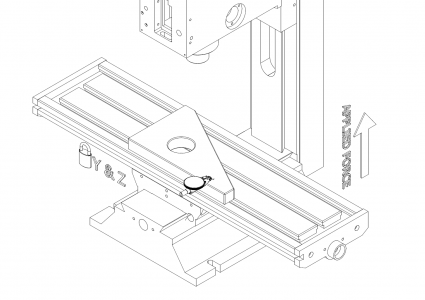
These measurements represent the looseness or slop in each axis' ways.

X Ways Slop in Y Direction

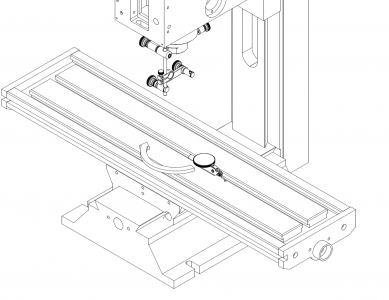
This measurement represents the looseness in the X Axis ways to forces applied in the Y direction. This simplifies to a torque about the imaginary centerline of the X axis ways centered over the saddle. Measurement is taken at a 4" distance from this imaginary centerline. Total Indicator Reading (TIR, max - min) is reported.

Y and Z axes are locked.

Force is manually applied at the end of the table, bidirectionally in the Y direction as shown in the graphic below. Exact force was not measured but roughly 20lbs force was applied.

X Ways Slop in the Y Direction is 0.0085"

1686068709530.png

X Ways Slop in Z Direction

This measurement represents the looseness in the X Axis ways to forces applied in the Z direction. Measurement is taken at a 4" distance from the center of the saddle. Total Indicator Reading (TIR, max - min) is reported.

Y and Z axes are locked.

Force is manually applied at the end of the table, bidirectionally in the Z direction as shown in the graphic below. Exact force was not measured but roughly 20lbs force was applied.

X Ways Slop in the Z Direction is 0.0080"

1686068740902.png

Y Ways Slop in X Direction

This measurement represents the looseness in the Y Axis ways to forces applied in the X direction. This simplifies to a torque about the imaginary centerline of the Y axis ways centered over the saddle. This is one of two measurements I didn't love, but there was no good way to measure Y movement when torque is applied in the X direction. However, since this is a torque, I measured the movement with a Y axis reading and a Y axis force. The measurements should be equivalent. Measurement is taken at a 4" distance from this imaginary centerline. Total Indicator Reading (TIR, max - min) is reported.

X and Z axes are locked.

Force is manually applied at the end of the table, bidirectionally in the Y direction as shown in the graphic below. Exact force was not measure but roughly 20lbs force was applied.

Y Ways Slop in the X Direction is 0.0004"

1686068772766.png

Y Ways slop in Z Direction

This measurement represents the looseness in the Y Axis ways to forces applied in the Z direction. This is one of two measurements I didn't love, but there was no good way to measure Z movement when torque is applied along the X axis. However, since this is just looseness in the ways, I measured the movement with a Z axis reading and a Z axis force but applied along the X axis displacement. The measurements should be equivalent. Measurement is taken at a 4" distance from this imaginary centerline. Total Indicator Reading (TIR, max - min) is reported.

X and Z axes are locked.

Force is manually applied at the end of the table, bidirectionally in the Z direction as shown in the graphic below. Exact force was not measure but roughly 20lbs force was applied.

Y Ways Slop in the Z Direction is 0.0030"

1686068799496.png

Z Ways Slop in X Direction, Column Stiffness in X Direction

This measurement quantifies the slop in the Z axis slide ways to the column. It is also linked to the column stiffness, so both values are reported.

When ~20lbs bidirectional force was applied to the top of the column in the X axis direction, a total indicator movement reading was taken. This is very approximate but represents the column stiffness.

Column Stiffness in X direction is 0.0060" with 20lbs applied bidirectionally at 18" from base

The slop was measured by applying as little force as possible (as to not flex the column) and collect a TIR measurement of the way slop before the movement stopped without excessive force applied. This is imprecise, but did work. It might have been better to mount the indicator on the column directly to isolate the column flexure, but I didn't think of it at the time.

Z Axis Way slop in the X direction is 0.0006"


1686068830152.png

Z Ways Slop in Y Direction

This measurement quantifies the slop in the Z axis slide ways to the column. It is also linked to the column stiffness, so both values are reported.

When ~20lbs bidirectional force was applied to the top of the column in the Y axis direction, a total indicator movement reading was taken. This is very approximate but represents the column stiffness.

Column Stiffness in Y direction is 0.0040" with 20lbs applied bidirectionally at 18" from base

The slop was measured by applying as little force as possible (as to not flex the column) and collect a TIR measurement of the way slop before the movement stopped without excessive force applied. This is imprecise, but did work. It might have been better to mount the indicator on the column directly to isolate the column flexure, but I didn't think of it at the time.

Z Axis Way slop in the Y direction is 0.0005"

1686068942119.png
 
In Summary:

Test DescriptionTest ResultNotes
Lead Error X0.0090" per 12"
Lead Error Y0.0090" per 12"
Lead Error Z0.0090" per 12"
Backlash X0.0010"
Backlash Y0.0030"
Backlash Z0.0005"
Squareness XY0.0017" per 12"
Squareness XZ0.0088" per 12"
Squareness YZ0.0010" per 12"
Wobble X Slide in Y Direction0.0007"over 8.0" test distance
Wobble X Slide in Z Direction0.0024"over 9.4" test distance
Wobble Y Slide in X Direction0.0003"over 5.0" test distance
Wobble Y Slide in Z Direction0.0006"over 5.4" test distance
Wobble Z Slide in X Direction0.0020"over 5.4" test distance
Wobble Z Slide in Y Direction0.0020"over 5.4" test distance
Table Wedge X0.0037" per 12"
Table Wedge Y0.0015" per 12"
Spindle tram X0.0223" per 12"
Spindle Tram Y0.0089" per 12"
Spindle Runout0.0004"
X Ways Slop in Y Direction0.0085"with +/-20lbs applied at 12" distance. Measured at 4" from imaginary pivot. Y axis locked
X Ways Slop in Z Direction0.0080"with +/-20lbs applied at 12" distance. Measured at 4" from imaginary pivot. Y axis locked
Y Ways Slop in X Direction0.0004"with +/-20lbs applied at 12" distance. Measured at 4" from imaginary pivot. X axis locked
Y Ways Slop in Z Direction0.0030"with +/-20lbs applied at 12" distance. Measured at 4" from imaginary pivot. Z axis locked
Z Ways Slop in X Direction0.0006"with +/- 1lbs applied at Z axis slide. Measured at 4" from head casting pivot
Z Ways Slop in Y Direction0.0005"with +/- 1lbs applied at Z axis slide. Measured at 4" from head casting pivot
Column Stiffness in X Direction0.0060"with +/- 20lbs applied on column 18" from base. Measured at 12" from base.
Column Stiffness in Y Direction0.0040"with +/- 20lbs applied on column 18" from base. Measured at 12" from base.
 
Saddle Scraping:

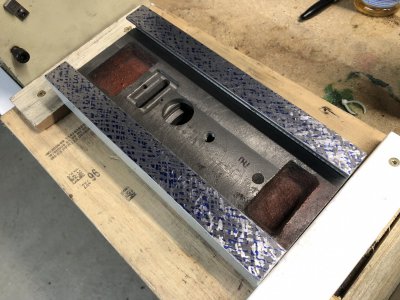
As I showed in an earlier post, I have started scraping the new saddle of the mill. As a warm up my goal was to scrape the flat ways to flatness and bearing, as well as planar parallelism (removing saddle wedge).

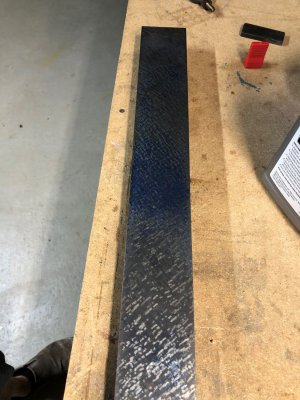
All of my scraping starts with two passes at 90 degrees to each other with medium heavy scraping, medium stroke length, and 50% coverage. This breaks up the surface and helps me see what is going on. The saddle started high at all 4 corners with no bearing in the middle of the ways. I took 5 roughing passes to bring these ways into better flatness. You can see the top ways of the saddle (X axis) showing decent flatness but poor bearing.

image047.jpg

And again at 7 passes. This shows more even contact all over. The evenness and density of the points is quite poor, but I've found it foolish to try to improve this before scraping the lower ways and checking the actual geometry. If additional roughing is needed, then any effort spent refining the surface was wasted.

image048.jpg

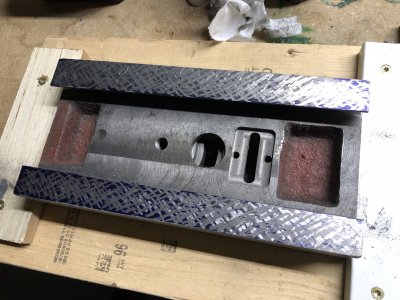
Initial contact on the bottom of the saddle (Y axis) after the initial 2 passes to break the surface.

image049.jpg

After 4 roughing passes. Much more even contact all over.

image041.jpg

And 7 passes with very thin hi-spot blue on the plate. This shows fairly even distribution of points, but 2 hollows bounded by sharpie. It is interesting that you can make your scraping look much better by increasing the thickness of blue on your plate, but this is a false reading.

image033.jpg

At this point I took some plate measurements using a tenths indicator and an optical flat to bridge the high points. The surface has been significantly improved, however I have a compound twist of roughly 0.0006" TIR that looks like a Pringles chip. I am working to fix this error right now. Once that is good and the surfaces are planar and parallel, I can start working for higher bearing and density of points.

I started to look at scraping the dovetails and have run into some speed bumps. First off, the dovetails are tiny and require me to relive the back of one of the edges of my scraper blade in order to access the bottom of the way. Since I don't have a motorized diamond grinder or lapper, this is a very tedious process of hand stoning the carbide to shape.

Second, my Arkansas oilstone I use to deburr does not fit in the dovetail either. This also requires me to shape the oilstone against a bench stone to shape a wedge that can access the dovetail surface.

Finally the straightedge I have is in pretty good shape but it did not print as well against my surface plate as I would have liked. At 37", it is too long for my 18x24" plate so I cannot touch it up myself. I may reach out to a local scraping shop to see if they'll take a couple passes to get it running true. Even if I don't do this, the local flatness over a 6" span is probably good enough to use without touch up. Certainly better than the quality of the ways as they stand today.

image051.jpg

image052.jpg
 
Z Axis Slide Scraping:

Similar to the saddle I took two passes to break up the flat ways of the new Z axis slide. The print below shows decent flatness on one way, but high corners on the other.

image050.jpg

After 3 passes, I was getting much more coverage on the ways.

image042.jpg

After 4...
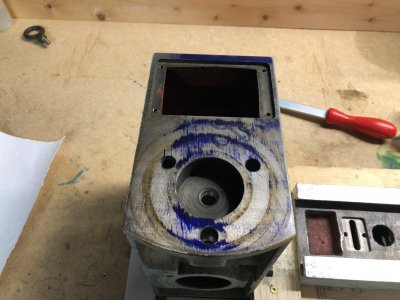
image044.jpg


And after 5 passes with much lighter bluing. Coverage is fairly even and well distributed. Another 5-10 passes should fill in the light areas and increase overall bearing and density.
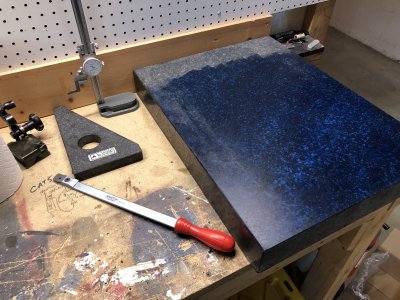
image034.jpg


The Z axis slide is relatively easy since any issues with parallelism to the front face do not contribute to the machine errors. I will likely scrape the front face for the spindle tram and to increase bearing/rigidity with the head casting
 
Head Casting Scraping:

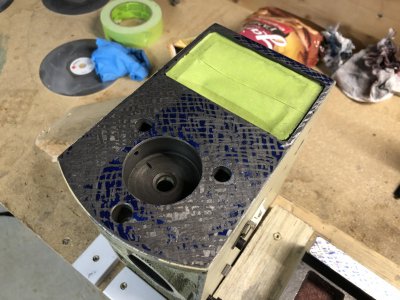
I'm just getting started on the mill head casting. The initial contact was very poor and shows the face is bowed outward in the center. I guarantee this reduces rigidity, especially since the bolts are in the center, so no forces act to flatten this against the Z axis slide.

image040.jpg

After initial breakup of the surface and 1 pass.

image035.jpg

I think I'm at pass 6 or 7 and still have a long way to go. No pictures to share yet.

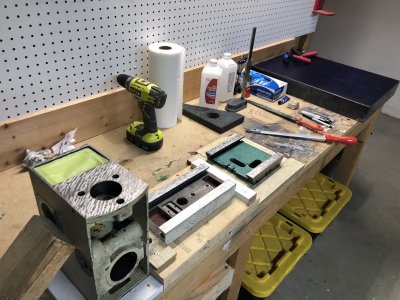
Here is a photo of my plate setup. I'm using a Sandvik 20mm scraper. The blue is either Dykem hi-spot blue or Charbanol oil pigment (the more purple colored medium). The Dykem is very greasy and colors more lightly. The Charbanol is much more sticky and has a much more intense coloring.

I prefer the Charbanol for roughing since it is easy to see, but it does tend to smear a bit when trying to get very fine printing. I switch to the Dykem for the finishing work even though it is harder to see.

image054.jpg

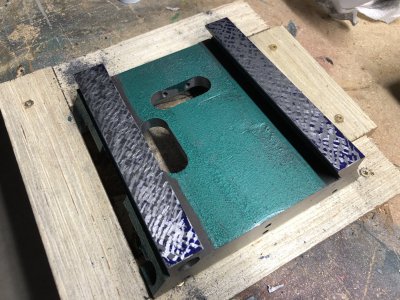
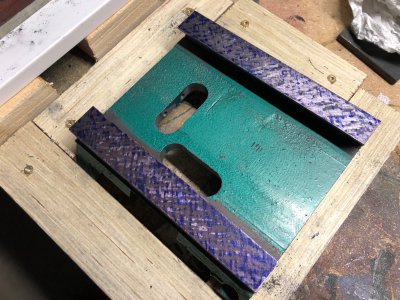
I've built custom wood blocking to hold all the parts securely while I work on them.

image032.jpg
 
Glad to see you're still active. I too have a g0704 that I converted to CNC. I thought about upgrading it but realized I didn't want to rebuild the whole machine, as you are doing. Your cnc conversion is very nice, hopefully I can be as good one day. My CNC build has cables wrapped in aluminum foil for shielding!
Keep up the good work.
 
Back
Top