POTD- PROJECT OF THE DAY: What Did You Make In Your Shop Today?

Spring collet rack:

View attachment 411558

Turned out so well started a coupke R8 collet racks:

View attachment 411559
They’re meant to hang off a set on DIN rails. But, those are nearly impossible to find around here.

So I cruised the local hardware store and came up with some deck edging which had a perfect “Z” section that fits the racks perfectly. Best part was they were on clearance for a buck a piece. So I grabbed ten 3 foot sections. Only thing is they’re a sage green color, but a quick rattlecan pass will fix that right up.
why isn't there a smooth top layer coveringing the fill?
 
why isn't there a smooth top layer coveringing the fill?
It is “smooth” and what you’re looking at is the top layer (well, bottom as this was printed face down), but I’m printing with a big 1.0 mm nozzle. The bigger the nozzle, the more visible the layers.

But you need a new hotend if you plan to print with the bigger nozzles. You just can’t put that much flow through a stock heater and expect it to be able to keep up with the melting. Most printers are sized for a 0.4 nozzle and barely can handle that. I’m using an e3d “volcano” hot end, which can handle some crazy big nozzles.

Doesn’t effect anything but looks. A little acetone smoothing, spot putty and rattlecan will make it smoother than any printer can make.

But using a big nozzle cuts the print tine fron a couple days to 5-6 hours. 3D printing, I find, is about making compromises to get the most suitable result for what you want to use it for. I traded off time for a little more layer vis, which I’m going to fix in post print processing anyways….
 
Last edited:
Was printing off a collet rack for my er32 spring collets. Somehow, pressure built up in the hit end head and it blew out the threads holding the heat break to the heater block. Melted abs went absolutely everywhere!

With the threads gone, I needed a new heater block. I run an e3d volcano hot end, so it was going to take several days to a week to get replacements.

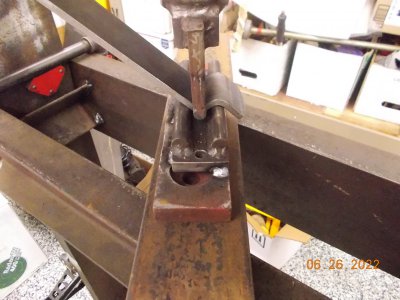
So down to my new mill and start taking stock of what I have to work with. I’ve literally had the lathe 3 days now, so nearly no tooling for it. So I took the drill press vice and bolted it to the table on the mill. I only have a couple end mills and nothing to hold them in. So I had to use the drill chuck to hold the cutters. Not ideal for many reasons, but I kept the cuts very light and only shaved half width at a time.

To sum up, i got it done after a couple hours fiddling around and the 3d printer is up and running again. Should be able to pull the collet rack off the print bed within the hour.

So I’m not sure if my POTD is the 3d printed collet rack or the heater block I had to make for the printer on the mill so I could make the rack for the mill….o_O
I got tools to make tools to fix tools

John
 
It took me 9 hours to countersink these bolts. This was my first time using a boring head on my new milling machine. I was boring to a shoulder.

I had to modify all of the bolts. I shortened the bolts just short enough to do the job (i.e. the bolts are as long as they can possibly be). I also had to face off the top of the bolt heads in order to allow the maximum amount of material under the washer because this plate is going to have a lot of stress on it.

D2EF21B0-7DD1-4AB8-A420-8BD196C7D887.jpeg
3A2CC176-9E86-4B2E-8FE9-FB99910FCDE3.jpeg
8FEA2874-C05E-4622-8E4C-C08237C501C7.jpeg
 
It took me 9 hours to countersink these bolts. This was my first time using a boring head on my new milling machine. I was boring to a shoulder.

I had to modify all of the bolts. I shortened the bolts just short enough to do the job (i.e. the bolts are as long as they can possibly be). I also had to face off the top of the bolt heads in order to allow the maximum amount of material under the washer because this plate is going to have a lot of stress on it.

View attachment 411638
View attachment 411639
View attachment 411640
Sounds like there were a few other options you could have did but what you did looks just fine. Good job!
 
Today i had to recover the white elephant No:2 it had a dead battery, and its not charging. I did replace the regulator but the copper contacts on the rotor in the alternator have worn down to the insolation. It charged for a minute but then stopped again. So it needs an alternator, like on any VW it is very difficult to replace. By the book the entire front needs to come out, also both radiators need to be disconnected and coolant and freon drained. I don't plan to do that especially how expensive R134 freon is. I call around got a rebuilt alternator 50$ and began the disassembly. I had to remove the power steering pump as well to get space and the fan belt tensioner. Those tensioners are very hard to install back, they have a strong spring and the absorber is hard to push, so i got an idea i place it in my Lathe, 3 jaw chuck grabs it perfectly. Then i used a pry bar to tension it and an drill bit to lock it. With the belt back on i just pull out the drill bit. With everything assembled It is charging. I'm glad to be done it took awhile.
IMG_20220602_195752.jpgIMG_20220602_185316.jpgIMG_20220602_192409_1.jpgIMG_20220602_192416.jpgIMG_20220602_195735.jpgIMG_20220602_195820.jpg
 
Making another run of this part.
Making the 2 bends is the worst of it but my approach seems to do the trick.
These are the lift arm bracket for front mounted implements on a narrow frame Cub Cadet garden tractor.
 

Attachments

  • DSCN9400.JPG
    DSCN9400.JPG
    443.7 KB · Views: 17
  • DSCN9401.JPG
    DSCN9401.JPG
    508.6 KB · Views: 17
  • DSCN8884 (2).JPG
    DSCN8884 (2).JPG
    157.9 KB · Views: 17
Back
Top