POTD- PROJECT OF THE DAY: What Did You Make In Your Shop Today?

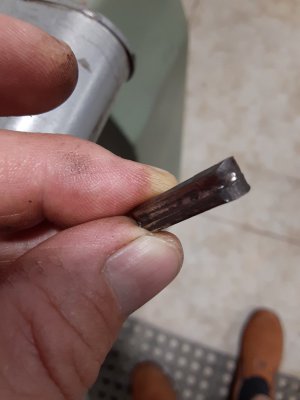
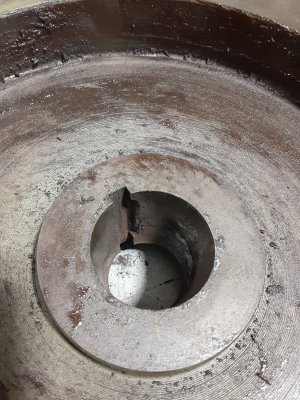
Well one step forward and one step back. I got the big Jet lathe under power finally. Nice to see it finally run. Unfortunately, there was a noise coming from the back of the headstock. I think I have tracked it down. The drive pulley that turns the input shaft into the headstock was loose. After taking off the belts and removing the pulley I found some issues. The retaining nut had backed off or was not tight enough, and this allowed the pulley to back off the tapered shaft and wobble around. Prolonged use like this damaged the taper in the pulley and the keyway. So looks like the fix is going to be to bore out the pulley bore. Then sleeve it and cut the taper in it. Then cut the keyway. So what do you think the best material is to use to sleeve it with? The pulley is cast iron. I was thinking bronze.
pulley.jpg

key cock eyed.jpg
pin.jpg
 
how's the shaft look?
It really won't matter what material. it is a non-moving fixed part. if it was a moving part, bronze. With the expense of bronze, any handy metal will work, just glue it in with loctite or press fit it in.
 
Well one step forward and one step back. I got the big Jet lathe under power finally. Nice to see it finally run. Unfortunately, there was a noise coming from the back of the headstock. I think I have tracked it down. The drive pulley that turns the input shaft into the headstock was loose. After taking off the belts and removing the pulley I found some issues. The retaining nut had backed off or was not tight enough, and this allowed the pulley to back off the tapered shaft and wobble around. Prolonged use like this damaged the taper in the pulley and the keyway. So looks like the fix is going to be to bore out the pulley bore. Then sleeve it and cut the taper in it. Then cut the keyway. So what do you think the best material is to use to sleeve it with? The pulley is cast iron. I was thinking bronze.

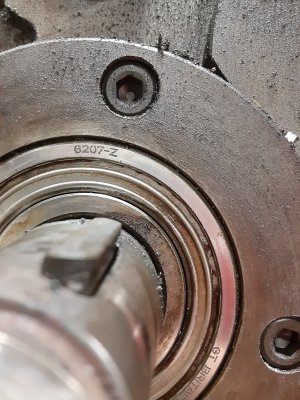
Yes, how did the shaft survive?

The material is important. Unless you can guarantee that the axial compression from the retaining nut will always (100%) be sufficient to prevent torque from spinning the pully (in which case you don't need a key at all, HaHa), make the sleeve from at least CRS. Can't you buy an OEM replacement pully? OEM replacement should insure correct taper and you don't have to mess with it.

Add torqueing that nut to your Preventative Maintenance list.

If you make a sleeve, I recommend press fit and putting a Dutch key or two in.

Dutch key: best explanation I could quickly find. Pins are as good as screws for permanent assemblies.
 
I would just make a plug. The dutch key is a good idea too. I would go with a set screw, not a pin. That way you can remove it if needed.
I don't like just installing a screw and cutting it off if I can avoid it. Also the threads lock it in so it can't come out of the sheave. So it does the job two ways... win, win.
 
Last edited:
Why use hex bolts instead of like low head cap screws? Im just curious.

When I first designed this project in my head, I did not realize that the top surface needed to be flush. I bought Grade 8 bolts & washers.

Later, while I was actively working on the project, I went to the local hardware store, but their “flush profile” hardware only went up to 1/4”.
 
The drive pulley that turns the input shaft into the headstock was loose. After taking off the belts and removing the pulley I found some issues. The retaining nut had backed off or was not tight enough, and this allowed the pulley to back off the tapered shaft and wobble around. Prolonged use like this damaged the taper in the pulley and the keyway.
I would just try cleaning both pieces with a file, Loktite in a new key and give it a try. If runout and wobble are OK, then you're done except for a vigilant eye on it for a while. If not, then proceed with a more aggressive rebuild. It's only a pulley.
Aaron
 
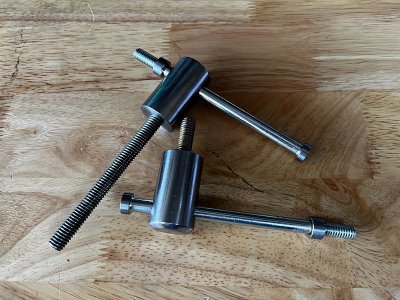
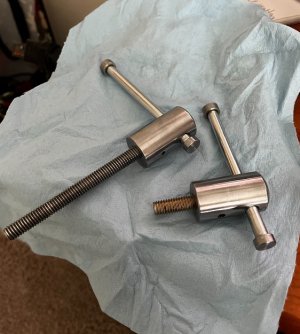
Judge away for taking shortcuts... I learned the correct way, well, several correct ways, for making these. Thanks to the folks here. But did I try to do them that way... nope. I have several more that I need to make and will give it a try later. For now, I just wanted this finished.

Two 5/16"x5" bolts would do for now... a little bit of time on the lathe and voila... handles. I will finish them off when I get to Orlando.

IMG_6493.jpeg

Handles.jpeg

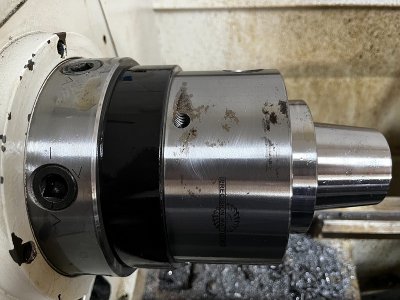
The other thing I was not paying attention is my sweat falling on the chuck... son of a gun... I sweat just thinking about it... and as I have learned from you folks, blood and sweat are no good for the machines...

IMG_6494.jpeg

Took a 3M pad and tried cleaning it... apply some way oil... but already stained for life...

IMG_6495.jpeg
 
Last edited:
Back
Top