POTD- PROJECT OF THE DAY: What Did You Make In Your Shop Today?

If the water separator is auto draining, that is your drip leg. If you want to do more, add a 10 micron (or finer) auto draining coalescing filter after the separator! Used on Ebay, of course.

Either way, that looks great! You will not be disappointed with the results.
This is what is there

- THB 1/2" Heavy Duty Particulate Filter Moisture Trap Water seperator w/Auto Automatic Drain - has a 5 micron filter in it. So add another one? Let me search for that description

Edit: found it. Add this as well. Understood. Thank you

- PneumaticPlus SAFD400-N04B-MEP Compressed Air Coalescing Filter, 0.01 Micron 1/2" NPT - Metal Bowl, Manual Drain, Bracket
 
Last edited:
This is what is there


has a 5 micron filter in it. So add another one? Let me search for that description

Edit: found it. Add this as well. Understood. Thank you

That is a coalescing filter, just not super fine. I collected parts for a while and found really good deals on Ebay. My first filter is a centrifugal separator then a .5 micron coalescing filter, both rated for 50 CFM. The compressor only puts out 24 CFM.

Run it into the summer and see where you stand. I went overkill because I supply air to a crew of guys and a plasma cutter. I'm sure you'll be happy.
I am taking notes. I need to setup the one in the workshop to run the plasma cutter... so I will need clean air for that one.

Thanks again for the recommendations! :beer mugs:
 
So I bought this old MasterCraft Model 500 X-Y table for locating holes under the drill press.

IMG_1312-dsqz.JPG


It came mounted on a block of wood. And I thought I’d just run its center bolt through the holes in the dress press table. But something’s missing—the handle on the lower dovetail screw won’t clear the table:

IMG_1313-dsqz.JPG


I thought about buying a cast iron raw disk, but I found a guy on eBay who is selling various sizes of mild steel plate for much less. I bought a piece of 1-1/2” plate that was plasma cut to 8” square.

I mounted it in the 4-jaw. This is 11” corner to corner, so it’s probably the biggest thing the old South Bend 14-1/2 has made in decades. First, I faced off one side. I used a CNMG432 insert in a tool holder that uses the obtuse angle for facing to make a roughing pass just to make a flat side.

IMG_1268-dsqz.JPG


It was an interrupted cut and I was running the back gears. Noisy! And probably too slow. But it wasn’t as noisy as turning down a round section about half the thickness of the plate.

IMG_1277-dsqz.JPG


Also a CNMG432 insert, but it turning configuration. I was roughing at .020 per rev and depth of cut and the chips were hot and blue.

IMG_1276-dsqz.JPG


I used a CCMT insert for a finish pass, which worked pretty well for a .005 cut. Then, I drilled a 5/8 hole for the X-Y table center bolt. The round section leaves tabs for hold-down bolts.

IMG_1278-dsqz.JPG


I then turned it over and spent about half an hour indicating it in, using the hole in the middle. But I struggled to indicate on the back side of those tabs. I ended up using gauge blocks to measure the space from the face of the chuck to the round machined surface. That worked better than it had any right to. I took .020 off the face to make a flat surface, and it ended up within a couple of tenths of parallel. I used a CCMT insert and much higher speed (250 RPM) just to see what would happen. That was about 700+ sfpm in the outer interrupted cut. Worked perfectly but it was a finishing cut so I was only feeding at .004 per rev.

IMG_1282-dsqz.JPG


Then, I used a brazed carbide boring bar to create a 2” diameter by 3/4”counterbore for the X-Y table’s mounting nut. I was taking big chucks with that one—.015 feed and .050 depth of cut. That made long curls but the finish was good enough.

IMG_1284-dsqz.JPG


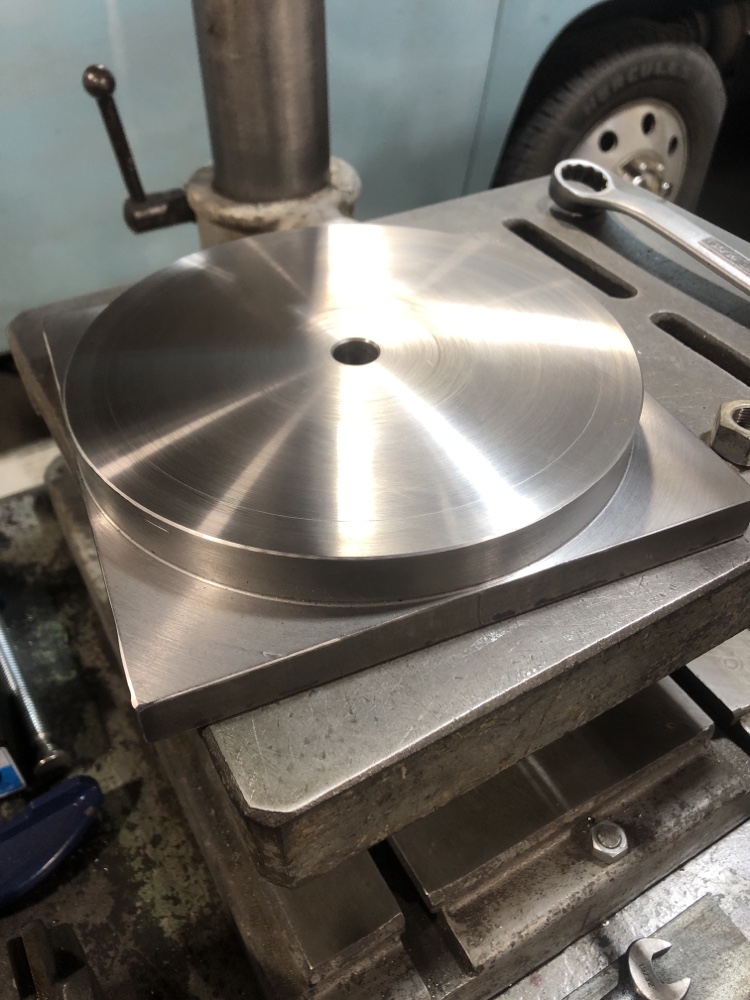
Finished product, except I’ve not yet drilled the holes for hold-down bolts:

IMG_1289-dsqz.JPG


IMG_1287-dsqz.JPG


IMG_1288-dsqz.JPG


Rick “$35 for the steel plate and $75 for the X-Y table” Denney
 
Last edited:
I'm no chemist, but I believe the concentration varies by product/brand, and thus the coverage. I used the GhostShield 4500 hardener and GhostShield 8505 sealer (water and oil resistant). The 4500 I used claims 1000 sq ft per gallon. There are a couple of different chemical make-ups for the hardeners. I picked what I did from an old post somewhere on here, and the manufacturer's website recommendations, so I'm definitely not an authority. Sounds like @ChazzC might have more experience.
My experience is from the design/specification side of things. Typically the high-end products are not available to anyone other than certified installers as the manufacturers don't want to have to deal with problems arising from application rather than materials.

For small projects like we usually have, I have found that you can reach out to local (or at least those that work locally) installers and see if you can time your floor finishing project to coincide with a larger job so that you minimize mobilization & material costs (as long as you are OK with whatever color the larger job is using if an epoxy/urethane coating). That said, I have heard that a lot of folks get good results from DIY systems, as long as the prep is done correctly.
 
First thing first. None of the tools are the right tool for the job. Had to convert the bandsaw from a 6" to 6.51" bandsaw to cut something 6.5" wide steel. Turns out grinding some casting flash off of the support for the blade allowed it open just a bit wider. Then pulling the practically worthless yellow blade guard off gave just enough room. Not much clearance here, but it gets the job done.
FirstThing.jpg HardFoughtBattle.jpg

These are all parts and pieces for the crane project. Needed some standoffs for some cheap import self aligning pillow block bearings. The bearings themselves needed some clearance hand roughed in with a Dremel so the bearing itself would align somewhat easily. Whoever put these together must have used a hydraulic press to jam the outer race in to the pillow block. After clearance they're just a bit stiff, but can be swiveled to align them to the shaft at least.

I wanted somewhat good alignment between the top and bottom plates of the standoff. Turned a little shaft to span the larger and smaller plate. This thing doesn't really carry much weight, so smaller bolts holding it to the bridge. The alignment shaft is smaller on one end (3/8"), and passes through the larger plate bolt holes (1/2").

LongerThanItShouldHave.jpg

Hopefully some welding tonight.
 
Knocking a few small pending projects... tonight it was shaping the engine block seal cap so it would clear the screw on the Wilton vise. This was a vise I purchased without the cap. Original one is more cone shaped than flat.

End cap2.jpg
Started with this:

WV-14.jpeg

I still want to work it a bit more, but it fits, it clears the screw... so it is working fine for now. I do not have a ball pein hammer here, so had to do with a small regular hammer and a block of wood that I carved a shape into it... amazing how metal is easily shaped with constant small hits...

When I get the ball pein hammer I will finish it and then sand the outside so I can get rid of those marks...

Wilton vise-2.jpeg
Wilton vise-1.jpeg
 
Last edited:
Back
Top