Shop built CNC Mill Project

RebelJD

H-M Supporter - Gold Member
H-M Supporter Gold Member
Joined
Mar 16, 2020
Messages
129
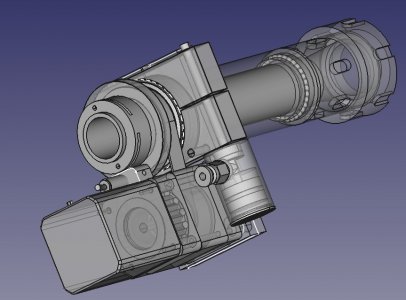
I'm building my own CNC Mill and I'm looking for some advice/experience regarding the Z Axis. I'm using a Fehlmann (Swiss made) X-Y table with ball screw conversion, but I'm fabricating my own Z Axis Column with Linear Rails and a double nut ball screw. The NEMA 34 stepper motor is mount at the top. I'm on a budget so I'm using conventional stepper motors and digital drivers, some of which I have left over from other projects. Ultimately, I'd like to upgrade to closed loop servos.

The Z Axis motion is nice and smooth, but as expected it will drift down when not powered. So, my question is should I use a power off brake or a counterbalance. I know Teknics sells a NEMA 34 brake but it's for 1/2" shafts and my motor is a14mm shaft. Does anyone know of a source for similar brakes.

Any help would be appreciated.

Jim

CNC Mill.JPG
 
I would use a counterbalance. I don't like the weighted type, adds too much mas to the system. But an air spring or a gas spring works very well. If you use a gas spring, get one with minimum damping. My personal preference is to just use an air cylinder as an air spring.
 
Looks like a solid approach. Have you thought about how to align the mill in all directions?
 
Looks like a solid approach. Have you thought about how to align the mill in all directions?
The base is 1/4" wall 3" square tube, very heavy. The top of the base where the X Y table sits has been milled flat and in the same plane as the rear of the base where the column mounts. The X Y table bolt down holes have clearance so it can be adjusted to run true with column. Since the table was made in Switzerland I am assuming the X runs perfectly perpendicular to Y. The spindle can also be trimmed to tram it on the X Axis. And if you look closely at the base of the column you'll see there are two jacking screws in each corner so I should be able to tilt the column in any direction as needed. I made some very quick checks with a machinist square and it looks very close already. I've tried to provide enough adjustability to get it accurate.

Maybe I should start a build thread on this, I'll likely need some more help as I go.
 
And if you look closely at the base of the column you'll see there are two jacking screws in each corner so I should be able to tilt the column in any direction as needed. I made some very quick checks with a machinist square and it looks very close already. I've tried to provide enough adjustability to get it accurate.
The column, resting on that jacking screw, will flex at that point. I would add 4 more bolts to reduce the flex at the column base. The holes in the rails can be used to tram the Z-axis in one direction and a tapared spacer on the motor mount for the other direction.
edit: Do not use jacking screws to tram the mill
 
Last edited:
The base is 1/4" wall 3" square tube, very heavy. The top of the base where the X Y table sits has been milled flat and in the same plane as the rear of the base where the column mounts. The X Y table bolt down holes have clearance so it can be adjusted to run true with column. Since the table was made in Switzerland I am assuming the X runs perfectly perpendicular to Y. The spindle can also be trimmed to tram it on the X Axis. And if you look closely at the base of the column you'll see there are two jacking screws in each corner so I should be able to tilt the column in any direction as needed. I made some very quick checks with a machinist square and it looks very close already. I've tried to provide enough adjustability to get it accurate.

Maybe I should start a build thread on this, I'll likely need some more help as I go.
Definitely following, very similar design to mine....


John
 
Last edited:
Well, I decided on a different approach to brake the Z-Axis. Electromechanical brakes that mount on the motor are expensive and I really don't want to hang counterbalance weights or mount gas/air cylinders. I measured the torque on the ballscrew to hold headstock up and it was surprising low at less than 2 in lbs ( < .2Nm). So, I designed a "drum brake" that sits below the lower ballscrew mount and is activated by a small short stroke air cylinder. I basically moved the bearing mount up 1 inch by turning the ball screw in the lathe to extend the bearing surface. I then mounted the brake drum on the now extended shaft. I did mill a small flat on the end of the ballscrew. The brake shoe mount uses the old bearing mount holes and the shoes are pulled together with a small spring. The air cylinder pushes a wedge between the brake shoes to deactivate the brake. It is a "fail safe" design in that a loss of air or electrical power will deactivate the air cylinder which will set the brake. Based on my initial tests it works great.

The entire mill is modeled in Fusion 360 so it was a quick effort to design it and generate the shop drawings. The air cylinder, solenoid valve, fittings, hoses, etc., were less than $50. I had already cut an access hole in the back of the column, so it worked great for this. The only issue I've had was that Mr. Bozo showed up when I removed the double nut ball-nut from the ball screw and I had to reload the ball bearings. I did not realize at the time the two sections of the ball-nut are not connected together. Lesson learned and two hours lost.

I still need to fabricate a mount for the air cylinder and test it with the solenoid valve, but I'm confident that will work. I've decided to do a build log on this project and I'll start that in a few days.

Jim


IMG_1017[1].JPG IMG_1016[1].JPG IMG_1018[1].JPG IMG_1019[1].JPG

IMG_1020[1].JPG IMG_1023[1].JPG
 
Last edited:
I think it will work. I doubt if the spring is strong enough to push the wedge back in case of air loss.

I have a pneumatic brake shoe on my rotary table to lock the table. It pulls the brake shoe parts together when activated. If you mount your plunger between the brake shoes, you can press them apart to release the brake. If the air is lost, the spring will pull the brake shoes together. Because there is no wedge, it will take less force to push the plunger back.
 

Attachments

  • RotaryTableViceModel.jpg
    RotaryTableViceModel.jpg
    99.9 KB · Views: 7
Thanks, I have a stronger spring I plan to install in the event it won't spring back. And I could put another spring on the bottom side if needed.
 
Back
Top