

-
Welcome back Guest! Did you know you can mentor other members here at H-M? If not, please check out our Relaunch of Hobby Machinist Mentoring Program!
You are using an out of date browser. It may not display this or other websites correctly.
You should upgrade or use an alternative browser.
You should upgrade or use an alternative browser.
Shop built CNC Mill Project
- Thread starter RebelJD
- Start date
Finally got all the parts I needed for the air system. Incoming air goes through a ball valve, filter, regulator combo and then feeds four solenoid valves. The first is the Z brake which mounted inside the top of the column. The other three I mounted a small sub-panel I made simply to make it easier to assemble then drilling and tapping holes in the side of the column. The bottom two, which are stacked, feed the mist coolant manifold and an air blast manifold. The fourth one is for the future Power Draw Bar.


Next up will be mounting a vise and doing some test cuts. My goal is to learn both the CAM feature in Fusion 360 and the conversational programming feature in the Centroid software. Any tips on these would be greatly appreciated.
Jim
Next up will be mounting a vise and doing some test cuts. My goal is to learn both the CAM feature in Fusion 360 and the conversational programming feature in the Centroid software. Any tips on these would be greatly appreciated.
Jim
- Joined
- Jan 2, 2019
- Messages
- 6,526
All I can say is just wow!!!!
I’ve put my CNC project mill up for sale now but seeing some of the things you did makes me aware of how I could/should change it if I end up keeping it. Maybe I’ll just take it apart to make room in my little shop.
One thing I realized late in my process is I should have built in a lifting hook so I could use my engine hoist to move it. Have you included this feature?
Beautiful work, looking forward to first cuts.
John
Thanks John, I've had fun building this. The front and rear sections of the base, which are 3" square tube, are hollow. My plan is to use lifting straps through the tubes and use my engine hoist to lift it. I'll probably lower the head all the way down to do so.
Jim
Jim
I started last week using the CAM feature in FreeCad for the router. I watched a few video's on Youtube and start testing using a tooth picker as router bit and some thin plastic (wood gives to much dust) for testing. After that, I placed the plastic besided the table (my router can move beyond the table to mill the side of plates) to reduce the risc running in to the table. Always had my hand on the power switch and feeding slowly (60 mm/min). Now I have some confidence and tomorrow I will mill the first plastic parts (covers for the router) placed on the table.My goal is to learn both the CAM feature in Fusion 360 and the conversational programming feature in the Centroid software. Any tips on these would be greatly appreciated.
I think it will take a long time before I trust the router (me) as much as I trust the lathe.
First Chips
I designed a small part in Fusion 360 as a first test of the mill. I used Centroid's INTERCON conversational programming language to program the part. The 11 lines of code actually generated 285 lines of G Code. I did struggle a little bit with cutter comp function and the sub-program function but I eventually got it to work.
It took 3 tries to get the part correct. The first time I entered .100 instead of .200 for the edge finder I was using to set part zero, so the part was off center. I guess I was too used to using .100 on the manual mill. The second attempt was when I realized cutter comp was not working as I thought. I need to do some more homework on that. I deleted the cutter comp function and programmed it differently, and it worked fine. I checked the dimensions of the diameters and they off about .004. So I measured the 3/8" end mill I was using and it was .373 instead of .375, so I think that explains it. I need to remember to update the tool library.
I took my time and kept the feed rates low. Lots of room for improvement on the programming, but I learned a lot. Best of all I did not crash the machine or break any tooling. I can definitely see the benefit of preset tool holders, tool changes can be cumbersome.
My plan is to use CAM in Fusion 360 on the same part and compare the effort of each. I'll probably wait to do that until I get the way covers on, cutting aluminum at 3000 rpm makes a big mess. All in all I'm happy with where I'm at on this, it's been well over a year in the making.
Jim
Last edited:
Well, I'm back to work on the CNC Mill. I was struggling to find some bellows that would fit the Z-Axis until I looked on Ebay. I stumbled across one that looked like just the ticket. It is cut to fit into the outer bearing races of the linear rails which will help keep it in place. The distance between the tangs on the drawing was 104.60mm which converts to 4.118". I went to my model in Fusion 360 and measured the distance between the linear rails and would you believe it came to 4.119". Holy cow. And the length was perfect. So I ordered it but it was shipping from China so it took a while.
I was able to mount the top to the bottom of the linear bearings and made a small bracket for the bottom. I then used some old treadmill rubber to cover the Y axis and the drag chain. I'm happy with the results.


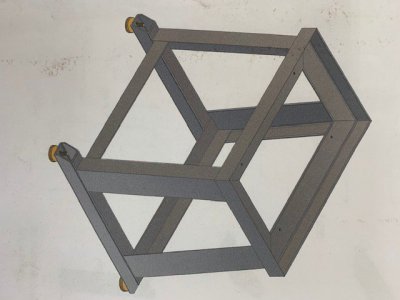
And while I was waiting for the bellows to arrive, I designed (in Fusion 360 of course) and built the base. I had a bunch of 5" x 3" x 1/4" angle iron left over from another project so that is what I used. I made the top a coolant/chip tray and installed some drawers to store the tooling and other items. It is very heavy and sturdy. It is painted with black epoxy primer, because that is what I had. I made it so my pallet jack will fit under it which makes it easy to move.


I still need to re-mount the one-shot oiler and clean up a few loose ends and I'll be ready to use it. As I mentioned previously my first project is going to be a power draw bar. It takes two hands to change tool, one to hold the spindle and the other to loosen/tighten the draw bar. That means if you are not careful the tool will fall out. I'm probably not the first person to chip the end of an end mill doing this. Stay tuned.
Jim
I was able to mount the top to the bottom of the linear bearings and made a small bracket for the bottom. I then used some old treadmill rubber to cover the Y axis and the drag chain. I'm happy with the results.
And while I was waiting for the bellows to arrive, I designed (in Fusion 360 of course) and built the base. I had a bunch of 5" x 3" x 1/4" angle iron left over from another project so that is what I used. I made the top a coolant/chip tray and installed some drawers to store the tooling and other items. It is very heavy and sturdy. It is painted with black epoxy primer, because that is what I had. I made it so my pallet jack will fit under it which makes it easy to move.
I still need to re-mount the one-shot oiler and clean up a few loose ends and I'll be ready to use it. As I mentioned previously my first project is going to be a power draw bar. It takes two hands to change tool, one to hold the spindle and the other to loosen/tighten the draw bar. That means if you are not careful the tool will fall out. I'm probably not the first person to chip the end of an end mill doing this. Stay tuned.
Jim
Attachments
Last edited:
- Joined
- Jan 7, 2016
- Messages
- 3,270
Errrmmmm. No, you are not the first. Sorry, I beat you to it.I'm probably not the first person to chip the end of an end mill doing this.
")
I got most of the small final items done on the mill this week, and here is why.....

It's been too darn hot to do anything outside or go anywhere, so the cool basement is the place to be. We've had heat advisories and air quality warnings all week. Today (Thursday) should be the last of the heat wave and I'm glad.
So, among other things, I got the oiler re-mounted and now gravity is working in my favor and the oil is not siphoning out. You can also see the drain for the coolant tray. I then 3D printed a cover for the upper spindle bearing. This was one of the few times a part fit without having to reprint it.


I'm in the process of designing the power draw bar so I'll be ordering the material soon and start to work on it. That should be a fun first project for the new mill.
Jim
It's been too darn hot to do anything outside or go anywhere, so the cool basement is the place to be. We've had heat advisories and air quality warnings all week. Today (Thursday) should be the last of the heat wave and I'm glad.
So, among other things, I got the oiler re-mounted and now gravity is working in my favor and the oil is not siphoning out. You can also see the drain for the coolant tray. I then 3D printed a cover for the upper spindle bearing. This was one of the few times a part fit without having to reprint it.
I'm in the process of designing the power draw bar so I'll be ordering the material soon and start to work on it. That should be a fun first project for the new mill.
Jim