Single Point Threading Issue - might be gearing?

Tried a piece of 12L14 with the handwheel setup. Boy, that handwheel really helped! Made it a lot easier. Was able to make some decent threads. They are better than the originals. They ought to be, since I'm using 12L14. (I bought some more of these pins - got to keep the economy going.) Looking carefully at the originals, it is obvious they were single point threaded. And there is no groove, the threads just start. (Original on top, 12L14 on bottom)
View attachment 320105
I then tried turning the original 12L14 threads (hex stock - from early in this thread) down and recut them under power. This is with the threading tool I ground. The threads are better quality than with the LMS threading bit, but there are some burrs. Looking carefully at my tool, I see the tip is cracked off. Now, I put in a flat on this tool along the edge. The flat can't be too wide, or I can't do 32 TPI threads.
View attachment 320106
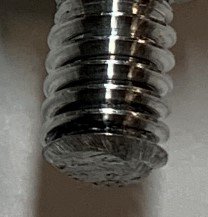
I seem to be breaking off the tip. What could cause this?

I'd like to make a relief for the thread. What kind of tool is used for this? Could one grind a parting tool thinner? (Have a spare blade) The relief that is there was just keeping the threading tool in the same place, but that doesn't create the square shoulder that it should have.
SO you are threading towards the chuck? Does your lathe have a break or are you disengaging the half nut? I was told by many not to disengage, just stop, pull the compound out and reverse then restart moving the compound back in....The slowest my lathe turns (currently) is 150 rpm unless I'm doing 100 tpi (joking) its just moving too quick to thread 1/4" like you did AND no relief.
 
I was threading towards the chuck. The half nut was disengaged at the end. For the 8-32 threads shown, I was using a hand crank that I just made.

For the 1/2-32 threads that I was doing under power, I did cut a thread relief. For that I waited until the dial came to 1 and engaged the half nuts. At the thread relief I disengaged. There was 1/2" length of threads so it was easier to time.

I haven't tried threading away from the chuck yet. For that I need to grind a left hand threader bit. I'd like to try that and mount it upside down. Maybe I'll try that tomorrow.
 
I can get clean threads (this was straight off the lathe-didn't even clean it up), perfect fit...but even this small of a relief, I had some abrupt stops up against the work piece. Guess I gotta work on that. I was trying to follow DarkZero's technique with the DI...couldn't really get the jist. Is that what you're doing? I will say, my DRO I don't have the ability to track so many things going on, I really don't have the ability to multi task like that.
 

Attachments

  • thread.jpeg
    thread.jpeg
    37.2 KB · Views: 9
I was threading towards the chuck. The half nut was disengaged at the end. For the 8-32 threads shown, I was using a hand crank that I just made.

For the 1/2-32 threads that I was doing under power, I did cut a thread relief. For that I waited until the dial came to 1 and engaged the half nuts. At the thread relief I disengaged. There was 1/2" length of threads so it was easier to time.

I haven't tried threading away from the chuck yet. For that I need to grind a left hand threader bit. I'd like to try that and mount it upside down. Maybe I'll try that tomorrow.
Yeah, I wonder if the fracturing tool and the rough threads can both be attributed with the very slow, even stop and go technique of the hand crank?
 
Nope no DI. I'm just a beginner, I don't have all the tooling built up. I don't have a DI holder that I can attach to the ways or the carriage.
 
Yeah, I wonder if the fracturing tool and the rough threads can both be attributed with the very slow, even stop and go technique of the hand crank?
I can say it's slow, but, not really stop and go. It's pretty easy to crank smoothly. Whether this slow speed causes tool fracture and rough threads, I leave that up to those who are more knowledgeable than myself.
 
Actually, that last set of threads was threading going straight in, not modified flank. Maybe that's why they weren't that clean. I forgot what the angle was and was too lazy to go online to look it up. I'll have to print out a picture and hang it up next to the lathe.

Still don't know why the tip of the tool is breaking off. It's discouraging since it take me all afternoon to hone a single tool. @mikey What could cause the tip to break off? I am putting a flat along the whole edge. I was spt'ing 12L14 when it broke.
 
Not sure. The only time I've ever cracked off the tip of a threading tool is when I didn't put a flat at the tip. The flat should follow the front V of the tool, from top to bottom, and it only needs to be about 1/64" wide.

Might help to see a pic of your tool.
 
Not sure. The only time I've ever cracked off the tip of a threading tool is when I didn't put a flat at the tip. The flat should follow the front V of the tool, from top to bottom, and it only needs to be about 1/64" wide.

Might help to see a pic of your tool.
Post #100 of this thread. If you need a better photo, I can try to take another one.
Looking at the tool flat, it seems the width is less than a 1/64" , maybe half of that? It's less than a 1/100", at least if I rest the scale on top of the flat. Looks like more flattening is necessary. Had to look at it under an 8X magnifier, eyes may have deceived me earlier.
 
Last edited:
Sorry I missed that photo.

Okay, the flat has to be across the width of the tip. These are my threading tools. The flat is across the width of the tip and is most visible on the larger tool on the left. The flat you see is about 1/64" across on the tool on the left. It is half that on the tool on the right.

Threading.JPG

Let me know if this is at all unclear.
 
Back
Top