Single Point Threading Issue - might be gearing?

Helix angles will vary depending on diameter and threads per inch. When single point cutting threads it is important to be conscious of the helix angle if only to realize its a factor. If the relief angle on the tool is routinely generous then chances are you do not need to 'worry' about helix angles. But if your thread cutting tool does not have enough relief then it will rub or cut poorly. The reason to increase relief from 7-8 degrees to 15ish for cutting threads as mentioned above is largely to accommodate the helix angle and still have some relief at the cut.

I totally agree, Mike. The issue with helix angles is the rubbing that occurs when you run out of relief angle with a standard or inserted carbide tool. We had a brief discussion about it here. The thing about grinding tools for helix angle is that the helix angle changes for each and every thread and if we ground a tool for every thread we cut in a hobby shop we would have a lot of tools on the shelf. I ran my own tests and for me, a standard 60 degree tool with 15 degree relief angles works fine for all the standard 60 degree threads I am likely to cut in my shop. I have had no rubbing in threads from 4-40 to 3/4-16; well, at least my thread form is good, burrs are minimal and fits are good.

I suppose I could go back to our model tools thread and go into all of this helix angle business. I didn't do it because excessive detail tends to confuse new guys who have enough on their plate just learning to grind a basic tool. A 15 degree relief angle works without having to go into why it works.
 
I went back and read my own thread that I linked to above and wanted to mention the suggestion by @carlquib that we can use a ROUND threading tool and angle it in the tool holder to suit the helix angle. I think this is a novel and enlightened idea that I must try one day, especially if I have to do a multi-start thread (which I haven't had to do yet).

The hardest thing about machining is to keep things simple. I like simple ... but sometimes it isn't about what I like.
 
@mikey, if you do go further into helix stuff, put it in the model tools thread. I'd want everyone to be able to find it. And, yeah, when I first read the that model tools thread, it was confusing the first time through. But, with a combination of reading and doing (grinding and threading) things have become much clearer. Speaking for myself, experiencing a non-optimal tool grind motivates me to do it better. The grind I was using made burr filled and almost muddy threads in 3 different materials, aluminum, pvc and 12L14. There's quite a difference in angle between the LMS grind and yours. I measure about an 80 degree angle with the LMS and about 62.3 degrees with yours. So the tip falls away from the thread a lot faster with your grind.

Got a little sidetracked designing an adapter plate for leveling casters for my lathe stand. Basement floor isn't level. Design is done. Template made. Got to cut some metal, after the tool grinding. For the peanut gallery: My wife was listening to me for a while, stopped me and said, "If I had a dollar for everytime you said this would be easy with a milling machine, I'd be a millionaire."

Back to tool grinding... Final location for my belt sander isn't finished, so I'll make a temporary setup. (No power or lights there!) I'll grind a proper threading tool somehow tonight.

Wives have a way of coming up with really inspired snide one-liners ... must be an X-linked thing.

Yeah, tool grinding can be really confusing. I tried to make it as simple as I could because believe me, there is a lot more to tool geometry than I put in those discussions. Keep trying and it will eventually become easier to visualize and do. When you feel comfortable with it, try altering your tool angles to better suit your needs.

As for taking up Helix angles in our model tools thread, I'll think about it. I won't say much beyond the thread I linked to above so I'm not sure it would make a difference.
 
Tool grinding is almost as difficult to understand as women are....but both are totally worth the suffering.
As Tim the 'tool man' once said, 'women can make you oh so happy but can also make you oh so sad.'
Same as tool grinding.
 
For the peanut gallery: My wife was listening to me for a while, stopped me and said, "If I had a dollar for everytime you said this would be easy with a milling machine, I'd be a millionaire."

If she had a dollar for every time you said this would be easy with a milling machine, she could buy you one.
 
Sounds to me like she wants you to stop talking about it and do it.
 
I'd like to offer a second opinion on the problems with the part in question.
While helix angle is important, on a part with a diameter this small and pitch this fine, I think the major problem lies elsewhere.

First, O-1 has pretty low machinability making it difficult to get a decent finish under less than optimum conditions. Depending on the application, I would recommend using Stressproof or ETD150, both of which are available on eBay. ETD150 is equivalent in hardness and strength to heat treated 4140 with much better machinability.

Second, I would suggest that the ragged finish and chipped tool are both related to the low speed and stop and go nature of turning the spindle by hand. While I can't adequately explain the physics, higher speeds cause the material to shear more cleanly and consistently, producing a better finish. In addition, at higher speeds, the metal actually shears ahead of the cutting edge reducing the stress on the cutting edge. We all know that one of the best ways to chip carbide is to stall it in the cut. While HSS is more forgiving, the same conditions exist. Also, a slight reverse movement is almost certain to chip a sharp tool nose that is buried in the cut.

JOMO
 
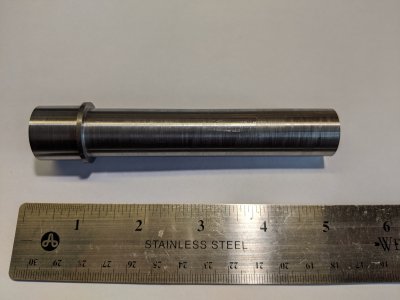
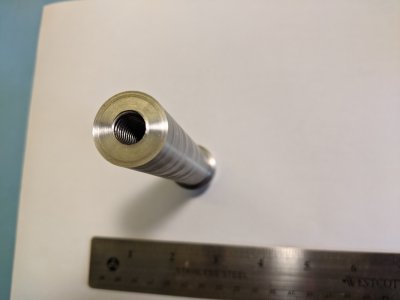
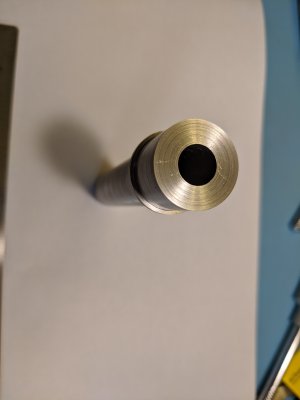
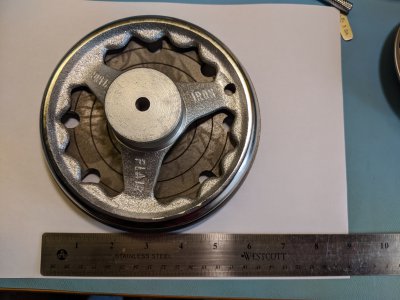
Sorry to keep you all in suspense :) . Things have taken quite a bit longer than expected. So I bought the hand wheel from Grizzley. Then made the spindle section out of 12L14. I made a small shoulder so that the key wouldn't fall out. I haven't made the keyway, but it is threaded at the right side, and ready to cut.
IMG_20200402_145747.jpgIMG_20200402_145817.jpgIMG_20200402_145832.jpg

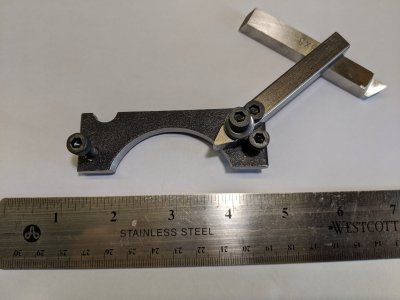
I had no way to hold the lathe locked (to make the keyway) so I just built a lathe lock. I was so proud of myself, but screwed it up at the last moment, since I forgot to account for the diameter of the screw heads holding down the key. I'll turn the screw heads down until it fits. It does hold the spindle stationary. The two lower screws M5 on the right hand and left hand side screw into the lathe headstock. The large semi-circle was cut out by with a die grinder using a carbide. The upper bite mark on the left hand side also was done with a slightly smaller carbide burr. The chisel point is just some stock that I ground down using the belt sander. I need to trim the key to length still.
IMG_20200402_145942.jpg
I used some transfer screws to get the holes to line up to the lathe and the keystock. These are pretty cool. Still waiting on some 1/8" cut off blades. The parting blades will be used to cut the keyways on the spindle and wheel.

The only thing I don't have a handle on (literally) is how to clamp the handwheel down to bore it. I will have to improvise something. I think I have to clamp from the inside of the wheel, as there isn't much clearance on the outside before hitting the ways. A mini-lathe is limiting for something like this. I don't have the luxury of clamping it like @darkzero did. Clamping on the inside seems to have some challenges as the features seem to get in the way of the slots. Can't fit a full 3/8" bolt through both holes because the balance is thrown off.
IMG_20200402_152747.jpg
Slowly getting there.
 
Back
Top