-
Welcome back Guest! Did you know you can mentor other members here at H-M? If not, please check out our Relaunch of Hobby Machinist Mentoring Program!
You are using an out of date browser. It may not display this or other websites correctly.
You should upgrade or use an alternative browser.
You should upgrade or use an alternative browser.
Some work on a TX650.
- Thread starter th62
- Start date
 or arthritis repair?
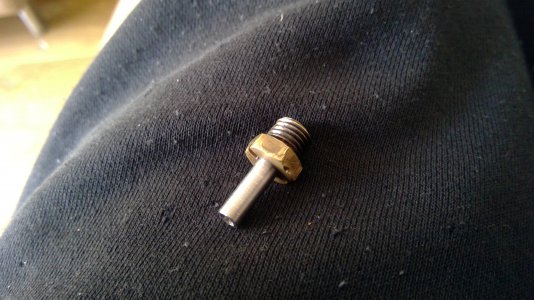
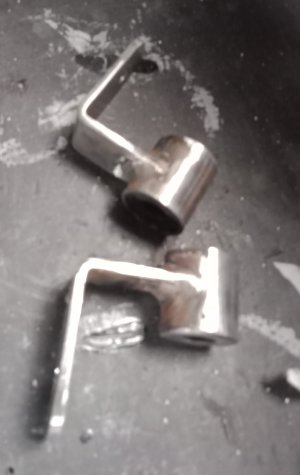
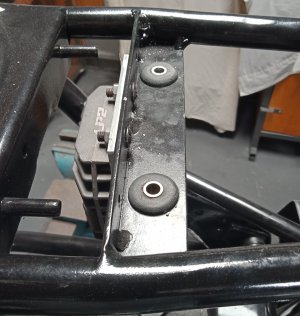
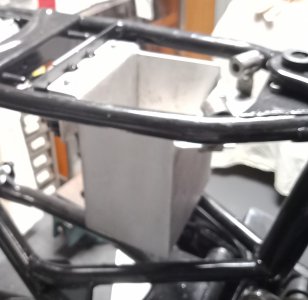
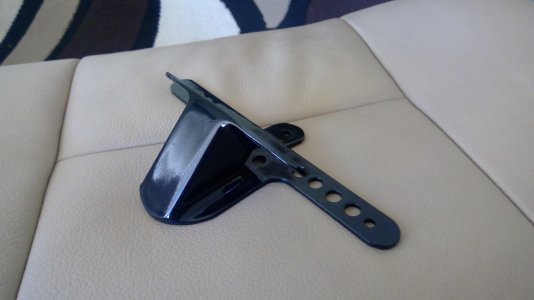
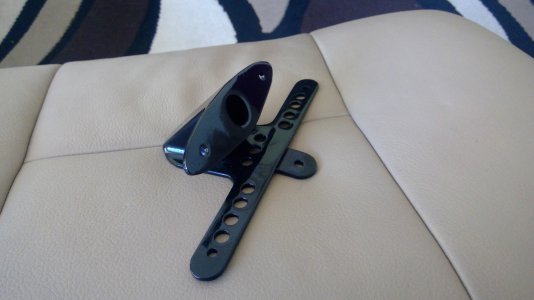
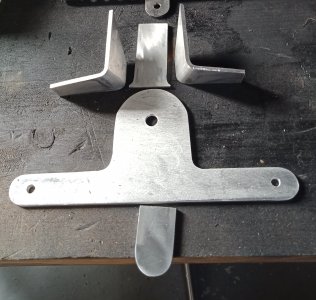
The batter carrier on the TX was just a lump of rusted metal when I removed it. Tabs everywhere with numerous electrical items attached, that went in the bin real quick. Removing it was a real chore: The rear wheel has to be removed along with the plastic guard and the box pulled out the rear. So, I decided to make one from ally. To mount it I welded a bracket across the frame and sunk two Rubber grommets into it along with a couple of positive stop T nuts I spun up. The box was made of three pieces, one each side pieces and a bent section for the remainder. I then welded the box together, drilled some holes for mounting the starter solenoid underneath and four more on the top returns for mounting. For the front mounts I decided to use the little spigots on the frame and welded up a couple of steel brackets to fit over then. Simple brackets made of 20mm strapping bent at a right angle and welded to a short section of 22mm tube, into which a rubber bushing fits. I also welded some ally strips on the side for mounting the side panels and fabricated a top clamp to secure the battery.
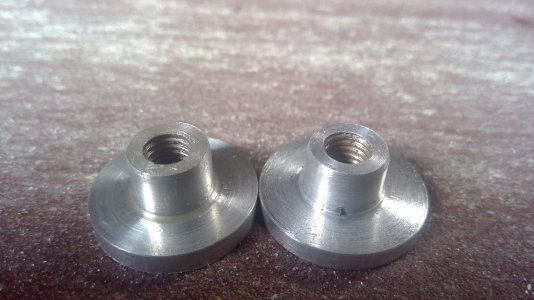
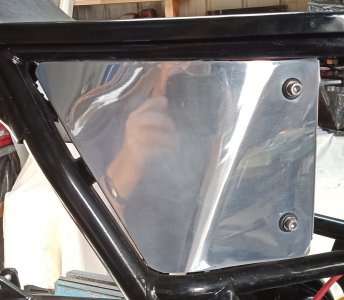
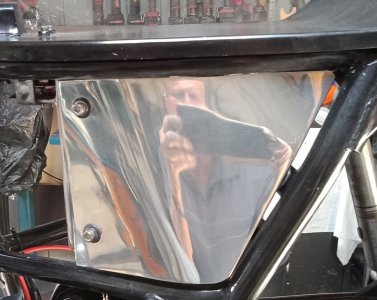
The side panels finish at the front of the battery carrier to allow pods to fit on the carbs. Side panels, being short, didn't require a rolled edge for strength, so they are just flat 1.6 mm thin sheet panels bent at a right angle at the rear to allow fitment of a grommet. At the front two holes were drilled to match up with the battery box brackets, grommets fitted and positive stop T nuts spun up to fit in the grommets. To fit, simply slide the rear grommet over the ally bullet on the rear downtube and two stainless allen heads, with washers, secure the front to the battery box.
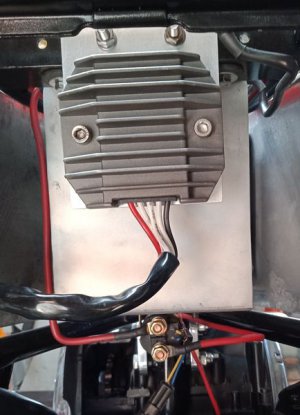
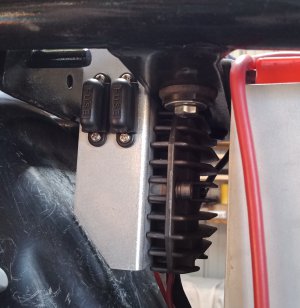
The starter solenoid hangs off the bottom of the battery box and the reg/rect is bolted to an aluminium bracket mount to the frame behind the battery box. To join the battery cable, reg/rect positive cable and a cable feeding the two fuses fitted to the reg/rect bracket I spun up a delrin insulator/terminal block. I've since run a fused wire from battery to the terminal block.
The side panels finish at the front of the battery carrier to allow pods to fit on the carbs. Side panels, being short, didn't require a rolled edge for strength, so they are just flat 1.6 mm thin sheet panels bent at a right angle at the rear to allow fitment of a grommet. At the front two holes were drilled to match up with the battery box brackets, grommets fitted and positive stop T nuts spun up to fit in the grommets. To fit, simply slide the rear grommet over the ally bullet on the rear downtube and two stainless allen heads, with washers, secure the front to the battery box.
The starter solenoid hangs off the bottom of the battery box and the reg/rect is bolted to an aluminium bracket mount to the frame behind the battery box. To join the battery cable, reg/rect positive cable and a cable feeding the two fuses fitted to the reg/rect bracket I spun up a delrin insulator/terminal block. I've since run a fused wire from battery to the terminal block.
Attachments
-
 battery box front mount brackets.jpg594.1 KB · Views: 3
 -
 battery box mounting rubbers at rear.jpg1.1 MB · Views: 1
 -
 fuses mount on plate on mount.jpg319 KB · Views: 1
 -
 battery box mounted right.jpg561 KB · Views: 2
 -
 regrec mounted on bike.jpg44.1 KB · Views: 2
 -
 fuses mount on plate on mount.jpg319 KB · Views: 2
 -
 positive stop nuts.jpg297.7 KB · Views: 1
 -
 positive stop nuts.jpg297.7 KB · Views: 1
 -
 positive stop side mount innstalled.jpg649.7 KB · Views: 2
 -
 side panel1.jpg303.2 KB · Views: 3
 -
 side panel2.jpg254.7 KB · Views: 4
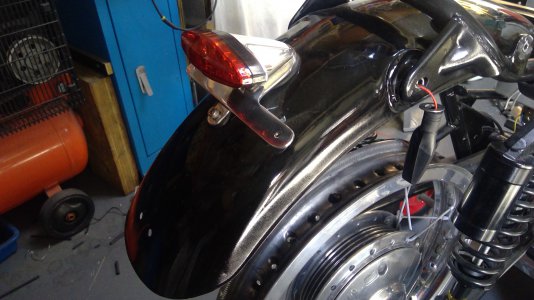
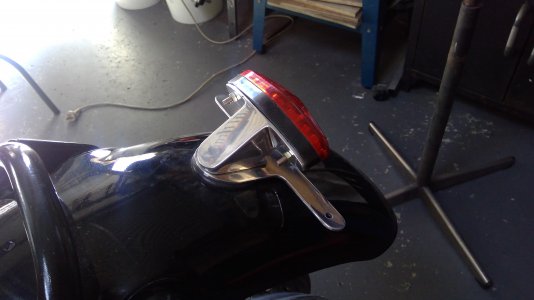
These are a couple of tail lights I built. First one was made of steel which I didn't really like that much, so, I welded up an ally one. I had to make it in two parts so I could get in to polish it. Both came up pretty good, so I can pick and choose.
Attachments
Pushed the starter button this afternoon and the TX roared into life, very loudly with those pipes. So, the single points cam works beautifully. PMA conversion works well as does the dual output coil, cable splitter, remote filter, cooler and ignition wiring. It's running a little lean at the moment due to the pods and exhaust, so I'll have to rejet before syncing. Very happy chappy.
I used bicycle cable for the outers and the original inner cable, shortened of course with new nipples. I bought the TX about 12months ago, it was in terrible condition, been busy ever since polishing bits and machining bits for it. Unfortunately, living in the workshop while I make bits for it and try them on the paintwork is scratched and chipped in a lot of places and the ally has dulled considerably due to workshop dust.
Last edited:
If you've set the float level in your carbs and want to check the actual fuel level , you'll need to access the float bowl. Most bike carbs have a plug on the bottom for emptying the fuel. If you have a spare plug, mount it in your lathe chuck and drill a suitable size hole through it. Don't have a lathe? Too easy mount the plug in the bench drill chuck and a drill underneath in a drill vice, or something similar and drill a hole through the plug. Don't have a bench drill? Too easy, mount the plug in your hand drill and the drill in a vice and drill through. Do not place a drill bit in the drill and drill through the plug, the hole will not go through centrally. If you want an accurate size hole, always use a pilot close to the finish size hole first, yes, even with very small holes. You'll need to either use a centre drill or centre pop the plug first. Then find a barb to plug in the hole, drill the through hole using the same method. For a leak proof join you'll need a barb10mm bigger than the hole. For example a 4.5 mm drill is actually somewhere around 4.34mm and drills a hole around 4.5mm or slightly smaller using pilot first, so you'll need a barb around .10mm bigger. You can turn it down on a lathe, or, turn to size using a drill and file.