-
Welcome back Guest! Did you know you can mentor other members here at H-M? If not, please check out our Relaunch of Hobby Machinist Mentoring Program!
You are using an out of date browser. It may not display this or other websites correctly.
You should upgrade or use an alternative browser.
You should upgrade or use an alternative browser.
[How do I?] Square Hole ?
- Thread starter ELHEAD
- Start date
- Joined
- Aug 3, 2017
- Messages
- 2,437
Yeah, I agree. The broach is going to be error prone and expensive to make. A piece of O1 the right side is about $150 it looks... then getting it machined right on the lathe(even annealed O1 is hard on tools), THEN getting the hardening done, which will require some sort of heat treat oven (accurately heating a piece that large with a torch will be... interesting).I’m surprised it isn’t better to find a (local) laser-cutting shop that can make the holes. This broach plan is going to eat a ton of your time.
After all that is done, you have to get the alignment right(which is typucally a pain with broaches) and hope you don't crush one side and don't break your broach. It just seems costlier and worse than the other suggestions.
As for the steel, I'd do O1 for a broach, oil quenching seems less error prone than air.
- Joined
- Aug 3, 2017
- Messages
- 2,437
I figured I'd spend a few minutes going through why I think the broach is a bad idea, particularly for you. If you still want to do it,of course feel free, and post progress as you can, I'm interested to see how it goes!Although the round pass-through sleeves are a great idea, we don't have an extra $500 in the budget. I don't mean to sound like a jerk, but the folks we're building the A/V rack for are repeat customers and, believe it or not, they want us to do the work from beginning to end. We've built several pieces of custom furniture for them over they years...and there's no other way to put it, they like the products we produce for them.
I appreciate all your help, Erich, but I think that we're going to fabricate a broach for the job. I understand that we'll have to support the inside of the vertical 2 x 2 steel tubing to accomplish this -- without deforming the work -- but it looks like that's the best way to go under the circumstances.
I've found a source just across the border who can supply several different types of blanks, including A2 or O1. In fact, they can supply several different types of square blanks to us, so I'd like to ask you, if you had any type of steel to work with, which one would be your top pick for such a steel broach? I'm assuming that it would either be A2 or O1, but I'd appreciate it if you would kindly suggest a single type of tool steel.
Thanks again ~ Red
1- You first have to buy annealed O1 tool steel in the right size, square, since you don't have a mill to make it the size you want. You cannot do 1", since you'd be putting a 1"+/- peg in a 1" hole: it wouldn't fit (see your above concerns about the 1.010" hole above). That leaves your choice as 1-1/8" (since noone seems to carry it in 1-1/16" for a tighter fit). Looks like it is about $90/foot, and you'll likely need a pretty long piece (I'd guess 15-18", but I did no math). Remember as the size goes up, the tool pressure goes up, and thus the amount of cut per-tooth/meanslonger tool. Additionally, you'll want your leader-cylinder itself to be long enough to go through both sides of the material (so 2+"), otherwise it'll not go in straight.
2- You now have to turn this down for teeth. Your initial post says you don't have a steel lathe, so I don't know how you're going to do this? Even if you DID have one, I suspect your shop cannot support a 'big' one, so this is going to take a LOOONG time of thin cuts. Tool steels are hard. It is a square interrupted cut, so Carbide tooling will likely break in no time. SO, you'll want to hand-grind your HSS tool bits, which takes time + the skill to do so.
3- Now you have to heat treat the broach. Heat treating something small is doable with a torch. Except now you have a 1"+ square more than a foot long. This is NOT a small project at that point. You either need to be REALLY careful with some oxy-acetylene torch with the part on fire bricks (which are inexpensive, but very specialized and another thing you need to order), or you need to use a large heat-treat oven (assuming you have one). I imagine you DON'T have a heat-treat oven capable of that heat, so while using the torch, make sure you don't heat it unevenly (which causes stress cracks), you don't heat it too quickly(as that causes the outside to heat up quicker than the inside, causing stress cracks), or too slowly (since it will be shedding heat non-stop). THEN you quench in oil and hope it doesn't warp. Then a bit of time in your home-oven (hoping your wife doesn't kill you for putting oily steel in her oven) to temper.
4- So now you have a broach! You go to your largest arbor-press, which I HOPE is large, because it needs about a 18" throat to do this job. Note a hydraulic press can snap your broach, they don't apply pressure evenly enough to not break them. You have your starter-holes pre-drilled with your mag drill. Now you have to start the broach at the right alignment so that your bars aren't in at a funny angle. This is going to be somewhat challenging, since the bottom of the broach is round! You have to find a good way to line this up with the material... but perhaps you have a jig you can make up to get these straight rotationally.
5- Now you can make these cuts on your press! You've presumably found a way to put some sort of machinist jack inside your stock to support both sides of the cut (they need to be quite tight on both sides to give it support remember!), then pull the handle on your arbor press. Assuming it goes in straight in all 3 axes (simplified with the longer leading cylinder), you'll have your cut. If you've allowed it to rotate at all during the cut, you've probably scrapped your piece. If it has 'tipped' in either direction during this, you've likely broken your broach and get to start over. Now repeat this step your 22 times!
It sounded like a lot more than 22 holes (10 posts, each with lateral and longitudinal connections). Given what I’ve read about the shop doing it, welding in a sleeve seems most likely to succeed. Laser cut posts would give a better result. You could hand cut with plasma and a template but it would require a bunch of cleanup with a finger sander.
- Joined
- Oct 14, 2013
- Messages
- 984
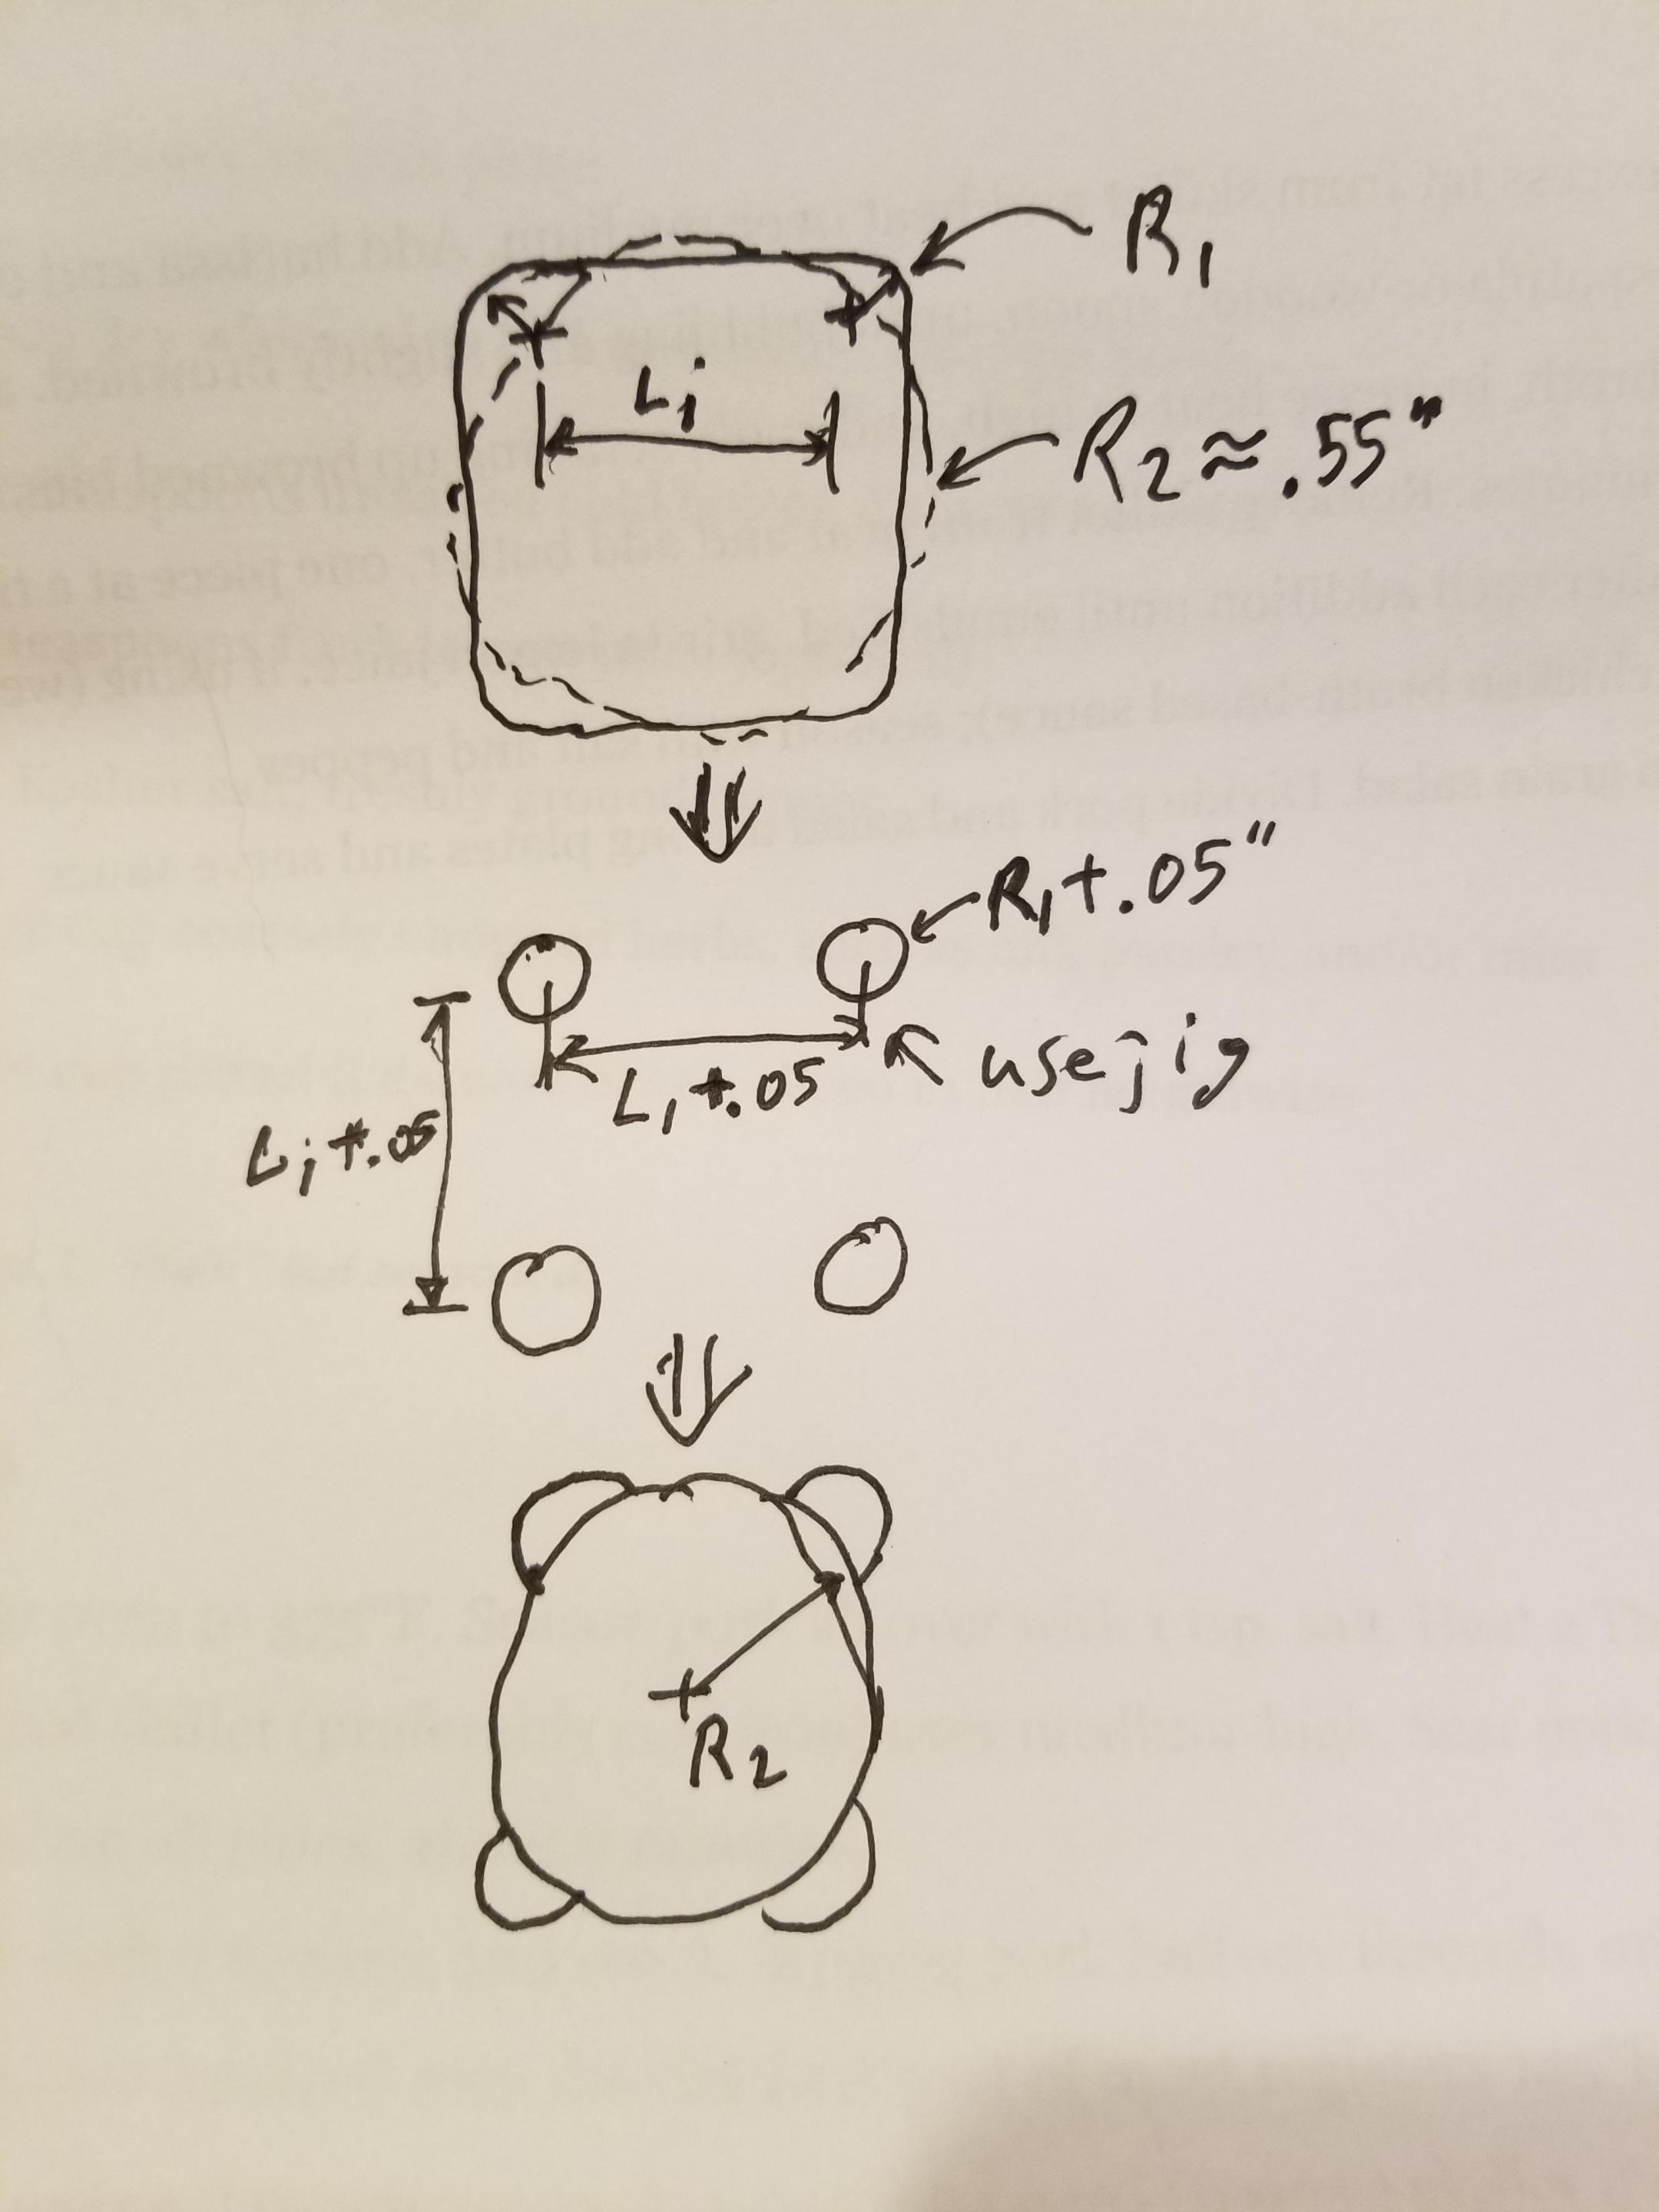
Sketching...
#1: you are welding. That means you DON'T need machinist tolerance. You want clearance. A standard square broach wont give you this.
#2: your mating part has found corners!
Measure the corner radius of the 1x1. Make a jig with 4 drill bushings to drill four holes that -clear- the 1x1 corners.
Rotabroach in a hole that is BIGGER than 1". Maybe 1-1/8 or 1-1/16, depending on your welding.
At this point you may just be able to smack the tubes in. If not, a bit of filing would do it, or make a tapered square punch that is a bit over 1x1 and drive that through to clean those little bumps.

Sent from my SM-G892A using Tapatalk
#1: you are welding. That means you DON'T need machinist tolerance. You want clearance. A standard square broach wont give you this.
#2: your mating part has found corners!
Measure the corner radius of the 1x1. Make a jig with 4 drill bushings to drill four holes that -clear- the 1x1 corners.
Rotabroach in a hole that is BIGGER than 1". Maybe 1-1/8 or 1-1/16, depending on your welding.
At this point you may just be able to smack the tubes in. If not, a bit of filing would do it, or make a tapered square punch that is a bit over 1x1 and drive that through to clean those little bumps.

Sent from my SM-G892A using Tapatalk
My wood shop was a job shop, I. E. anything for a buck. So we would take on a lot of rejected projects. Lots of curved work in store fixtures. Our minimal metal capability didn't make multiples cost effective. So almost all metal was subbed out to shops well equipped to do it cheaper, faster & better.
These days, we're not far from being the Job Shop you mentioned, Larry.My wood shop was a job shop, I. E. anything for a buck. So we would take on a lot of rejected projects. Lots of curved work in store fixtures. Our minimal metal capability didn't make multiples cost effective. So almost all metal was subbed out to shops well equipped to do it cheaper, faster & better.
The fancy A/V/D rack that we've been tasked to build wasn't designed by me; it was designed by the engineer/customer who's paying the freight.
Although I can weld fairly well, that doesn't make me a machinist. By all accounts, this forum is for beginners, which is why I'm here. Considering that the owner/designer will be using the rack to support his very heavy, and extremely expensive, audio/video/digital (A/V/D) gear, he's designed the pass throughs as a shouldering method to better handle the loads. The amplifiers in this system weigh well over 200 lbs per unit and there are three of those to consider. The center speaker in this system is very large, which is what has caused the customer to come to us for "custom" work. As I mentioned before, we would ordinarily design and build something like this out of high-quality hardwoods, but the customer wants a hybrid steel/wood unit, so that's what we've agreed to build for him.
I'm an old-school active duty vet, but I believe that one is never too old to learn. If this project teaches me more about using steel, I welcome the opportunity. As we're still in the design phase of the project, it hasn't actually been started yet. Once it's been started, though, I'd like to work efficiently and deliver a high-quality product by a certain date. I really appreciate all of the inputs.
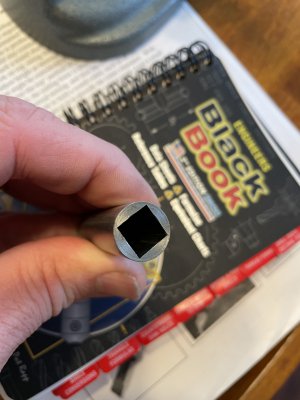
Hi Alaska Jeff ~If the part you're making will allow it, it doesn't get much easier than getting a piece of tool sleeve from MSC, M-C, etc and just press fit it in a reamed hole.
View attachment 377305
Do you think that the "tool sleeves" that you so kindly photographed is available with an inner dimension that's conducive to passing 1" x 1" mild steel tubing through it? Erich had a similar idea, but the materials proved to be too expensive. Regardless, I haven't checked the sources you cited, so one never knows.


