Straddle knurler build, no mill required (we hope!)

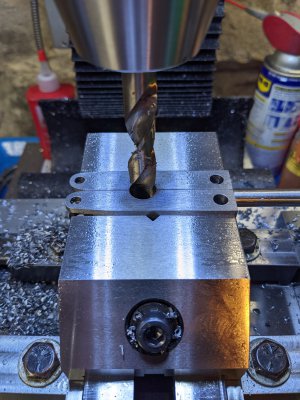
This next step I was kind of dreading, drilling through the crack at the center of the two arms. I was expecting disaster. But nothing of the sort happened. In an unusual moment of clarity, I thought to myself, hey, I have a DRO, I can easily place the hole in the right place. Then I distrusted that thought, and said, how about I measure what actually is there too. Turns out things were within 0.001 of expected. So that helped build some confidence that maybe I was starting to get the hang of some this...

Spotted the drill in the right location, then mounted the big stubby 12mm drill. Since this twist drill bit was an eBay special of the finest the Far East offered, I measured the drill tips to make sure it actually was 12mm. Came out to 11.97mm, so I thought I'd chance it. Was sort of pecking at the arms, drilling maybe 0.1" at a time, less in the beginning. Was expecting all sorts of carnage and it didn't happen. I had really cranked down the vise.
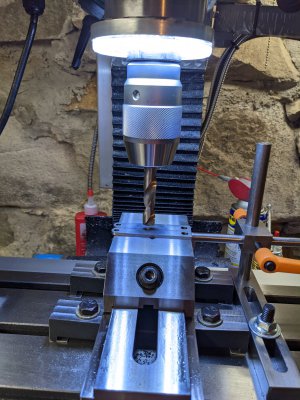
PXL_20210603_155309419.jpgPXL_20210603_160434342.jpg
Finally got it to break through. Finish on the hole was decent, I was surprised. I think I had bought 5 12mm drills for $20, maybe it was less. The second hole using a McMaster sourced 31/64" drill was perfectly uneventful and quick. Didn't take any time, as the cutting is just on the very outer edge.
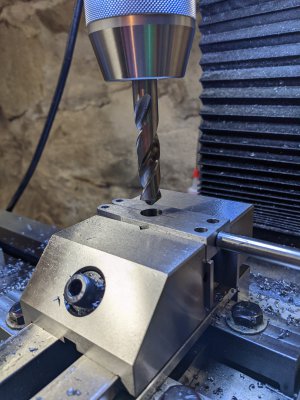
PXL_20210603_160743348.jpg
The hole finish was good for the second drill. Then it was time for the reamer. I hadn't used this reamer before. When I took it out, I realized there might be a problem. It was loooooooooooooooooooooonnnnnnngggggg for my mill. Yeah, it used up all of my Z-travel. Took me three tries to figure out how to insert the reamer. I didn't want to move the table as it was dead on. Reamer kept interfering with the vise.
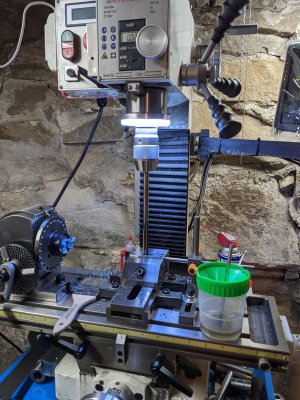
PXL_20210603_161932627.jpgPXL_20210603_162005895.jpg
Yeah, shouldn't be operating this way. I'm going to cut the shank down some as the reamer is just too long for my mill. I still used it though. After I'm done with this project I think I will cut it down 2". Anyways, here's a picture of the two arms so far. I think they came out pretty good. I didn't take a picture of this, but I did drop a 1/2 rod into the reamed hole. The rod measured 0.49875" and slid in without much friction. Too lazy to find a rod closer in size as I couldn't find my O-1 0.500" stock. I think I still have some, just can't seem to find it.
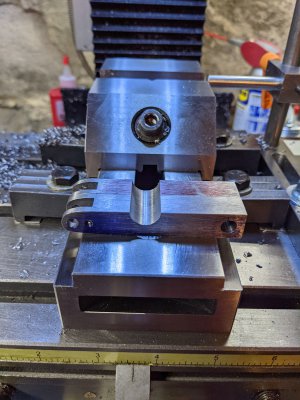
PXL_20210603_162952751.jpg
Now to drill the slot through the half moons... Gee, worked hard on them and I'm drilling through them! Sir, I'm just following the instructions.
 
You are doing a fantastic job.
This has been fun. I need one!!
I have it on my long list of tooling to make.
Looking forward to seeing the finished product.
Thanks for the compliment. It's a bit of a boost for me. I find this work rewarding, but hard to execute. It's not natural yet for me. There's a lot of hidden detail that's assumed by experienced people, and I find some of the details aren't always obvious (to me). So it takes a while for me to figure them out.

I see some of your projects and at the moment, I can only hope that some time in the future I could tackle something that complex. This project has been so well documented by @mikey even a beginner like myself can attempt it. That being said, when I started last year on this, I was not capable of completing it. With a little more experience under my belt, it's becoming a bit easier. Just didn't have sufficient confidence to do it earlier. I'm going to plow through this, bit by bit. It might not be the prettiest knurler on the block, but it will be mine.
 
Minor set back. Slowly milling away. Then I run out of end mill. It's not long enough. Should have thought of this before starting. The only 1/4" end mill I have is 3/4" LOC. It's a nice Niagara carbide. But the LOC I need is >1". You know, when you stack two 1/2" pieces of stock on top of each other, the height is going to be 1", not 3/4". Oops.

Seems to be a lot of 1-1/8" LOC end mills on eBay. Guess I'll leave the mill set up. I need a couple of angle blocks as well. I missed that in the instructions the first time though. Shopping is fun, so it's not too bad. Well this leaves me with a tied up mill. What lathe project can I work on?

Oh, I need to make the pins for the knurler. I have some M2 pins I need to cut and notch. That will keep me busy a bit. Have to figure out a way to hold a dremel in some sort of stand to make a clean cut (or at least a controlled cut!).
 
Don't have a good way yet to hold the dremel, besides my hands. Maybe I can make a crude clamp with the lathe, bore out a square chunk of aluminum and use a hacksaw to make a slit. Then drill and tap a screw to hold the clamp shut. That solves part of the problem. Then maybe I could use my junk xy table to clamp the dremel clamp. Would be nice if all of that could be cozied up to my bench vise. Although the xy table has a ton of backlash, and is worthless in general, it would be fine for this use. This feels like a MacGyver moment. I'll try to make something work. Will be fun trying...

It's easy to cut off a piece of M2, I can always grind off the end flat, it's more having control when making the little slots for the washers. I'd like the slots to be somewhat straight.
 
Lots of operations for a "simple" project, eh? Been there too
-Mark
 
Don't have a good way yet to hold the dremel, besides my hands. Maybe I can make a crude clamp with the lathe, bore out a square chunk of aluminum and use a hacksaw to make a slit.

Why not chuck the Dremel mandrel holding the cutting disc in a drill chuck on your mill and clamp the pins in your milling vise? Then you can use the movements of the table to feed the pin into the spinning disc with great control.
 
That could work, although the cutting disk speed would be low compared to a dremel. I've heard some people say abrasive things should be kept away from machine tools. Not happy to break down the existing set up, mostly because I'm not confident in being able to get back exactly to where I was.

At the moment everything is dialed in and all I have to do is put in the longer end mill when I get it. I haven't finished the machining of the slot. (It is not deep enough.) Is it "easy" to re-indicate to get back to where you were? If so, then there's all kinds of stuff I could do. I think I could reinsert pins in the holes to get the piece to align again. I had also used a vise stop to locate the ends of the arms.

I was thinking of using my lathe to make the dremel holder. That was posted as a separate thread in the Beginners area.
 
Easy, peasy. Use your edge finder. Just measure the OD of the end mill, then measure the thickness of the wall of the part. Use the edge finder to put the center of the spindle over the edge of the part and then use your handwheels to move the end mill into position. So, half the diameter of the end mill plus the thickness of the wall of the part being cut = back to where you need to be.

As for abrasives for this process, just cover things up as best you can and go for it. Once the slits are cut, tear down and clean everything up carefully. When I do this kind of thing on my mill, it looks like the entire mill is covered in paper towels but it takes just a few minutes to clean up. After decades of doing it this way, no wear issues that I can detect.
 
Thanks for the reassurance. It won't be that easy for me, sure there will be a wrinkle, but I'll give it a try. Using the abrasive disk in the mill would be controllable. Might make a dremel holder anyways, but I don't have to make it now. Would be kind of fun to make it on the mill with a boring head, haven't tried that yet.
 
Back
Top