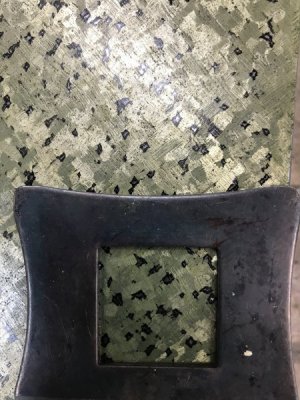
[How do I?] Thoughts on simply scraping a part flat (efficiently)

And the Biax on ebay is sold (not to me)...
 
I can't find the, "SUBSCRIBE" edit in the points :)
 
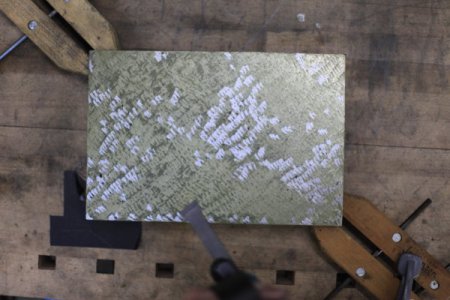
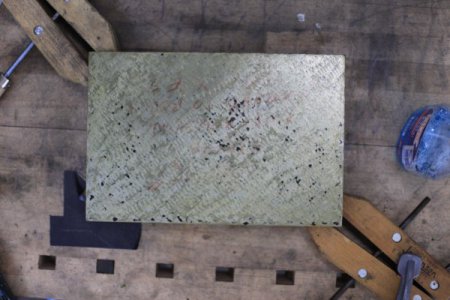
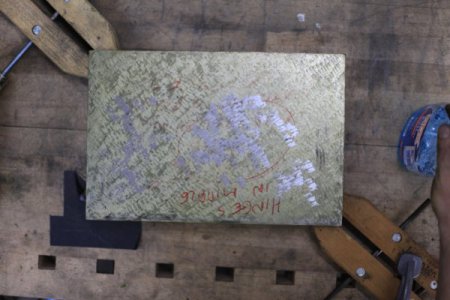
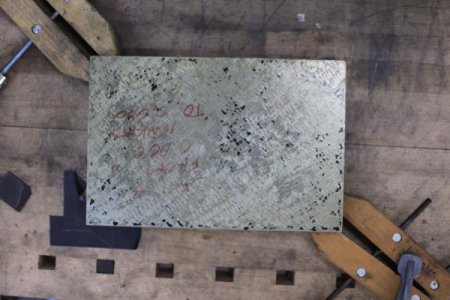
Here's a wide shot from yesterday's session (just a couple hours or so):


This is missing the first few scraping passes because some idiot forgot to take the lens cap off of his camera (I noticed when I decided to swap camera positions).

One thing to point out: it's very helpful to learn to hold the scraper ambidextrously, sometimes on your left side with right hand forward, sometimes on the right with your left hand forward. You'll constantly have to reposition your part if you don't learn to do this.

Here's the iphone close-up time lapse of me going after that shallow hole in the middle:


Its hard to tell from the time lapse (especially when that stranger with the bald spot keeps getting in the way) but notice how I'm scraping "areas" of blue and not paying much attention to the individual blue spots. For example, early on at 4s into the video you only see a few spots of blue, but I know these are just the peaks of higher areas so I scrape heavily all around those spots, not just the individual spots themselves.

I like to think of the blue spots as mountain peaks peeking up through the fog. You have to imagine that there are some valleys down there in the unmarked areas (covered in fog). The goal is to grind all of the mountains down to the same level as the valleys. Its conceptually possible that a blue spot might indicate a very tall narrow spindly tower/spire surrounded entirely by a valley, but in practice this never happens. The blue spots invariably indicate just the very peaks of much broader hills and mountain ranges.

For example, here's a blue up from later in the process:

293856

This is the first markup where I no longer have a "hole" in the middle. In fact the "hole" is now showing hi spots (yay!) so I know the unmarked areas can't be too much lower (they were showing higher than the hole after the previous markup, so I only scraped somewhat past the "valley"). Since my scrapes are only a few tenths, and the "hole" is now showing proud, I know I'm getting close.

I'm still roughing though, so I scrape entire areas, not just individual blue marks:

293859

Because I was getting closer, I only scraped in one direction rather than crosses. I've also still got my long half inch stroke and the marks are pretty close together (still roughing).

Here's the very next blue up:

293860

The "hole" in the middle is still proud but I'm getting more coverage across the plate (some peaks are starting to appear through the fog). I noticed that it was hinging right in the middle, though, indicating false blue around the edges though (hinge every time you take it to the plate for markup). So I wiped off the very outside marks and mostly attacked the (now proud) hole in the middle:

293861

One more blue up (with the part hingeing just fine):

293862

Then just rinse and repeat. Here's the time lapse of the above sequence:


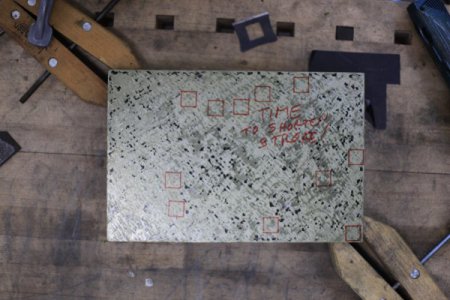
And again, here's where I left off. Ready to shorten my stroke and increase the coverage:

293863

The 1"x1" red squares indicate locations with no blue marks whatsoever. When I get to where there are no areas anywhere on the surface with fewer than about 5 points, I'll be done roughing.
 
Last edited:
Nice work, Rex.

I have just slightly more than zero percent experience with scraping so I can't comment on your method, but I did want to applaud your approach and diligence in presenting this the way you are. It can easily become a really mind-numbing thing to watch, but you seem able to bring just the right amount of detail and perspective into the posts and keep them interesting. And I believe that's a huge part of teaching -- allow people to become interested without boring them to tears in the process!

Keep up the great work, I think a lot of people are and will be able to benefit from your effort.

-frank
 
Hey Rex, did you know you have a bald spot on the top/back of your head? I discovered I have one after watching one of my videos.

Your 'thoughts' are a good primer for anybody who does or wants to do some scraping. I may print this out and post it next to my surface plate. I can already see some of your comments that would be helpful to me as a sophmore scraper. Keep it up, great stuff.
 
Gosh. Thanks for the kind words, guys.

I've always enjoyed explaining things for some reason. There's also no better way to learn something yourself than to try explaining it to others.

I really need to get a lighter scraper, though. I want to head into the shop again today, but my body really wants a day or two off.

And that's just a trick of the light, Jon. I have no bald spot.
 
Wow. That ended up being a longer break than I anticipated. I took a few days away from the shop to give my back a rest, and then ended up getting a little busy with work and travel. Anyway, I got a little more time in today.

I did spend an hour or two on 5/2 getting a couple more roughing passes, but managed to mess up the exposure of my photos/video (apologies for the poor quality).

I was still roughing, because I still had some 1" square areas with no bearing at all:
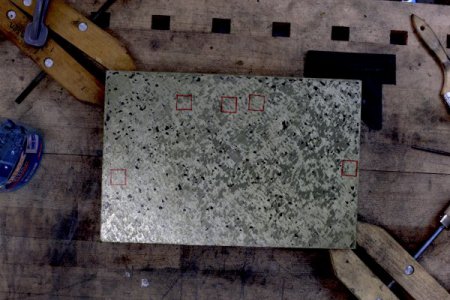
294929

It's easy to get into a mode where you keep seeing spots you "missed." So you go back and touch up an area, and before you know it, you've over scraped an area, with scrape marks too close together and overlapping.

One simple trick to keep yourself from doing this is to mark out areas on the part, and scrape within each area completely before moving on to the next area. You're less tempted to back up and hit spots you missed:
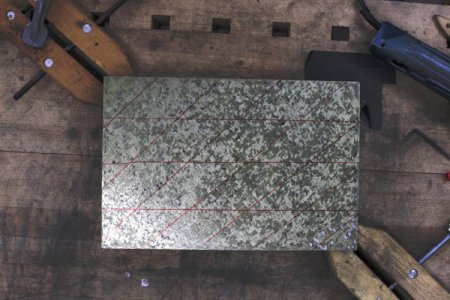
294930

Anyway, here's how it ended up after about 90 minutes of scraping on 5/2 (maybe three or four blue ups?):
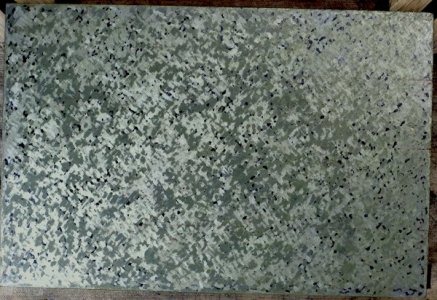
294933

(I tried to play with the levels a it to make the markup easier to see, but clearly I'm going to need to drag out my filters to photograph this better.)

It's probably hard to tell due to the crappy photo, but there is a pretty big area along the bottom that no longer appears to be marking up. It seemed like the last blue up was worse than the previous.

When this happens, it's smart to take a break. A couple weeks break might be excessive, but it's probably good to at least break for lunch or a cup of coffee.

The other thing to keep in mind is that if an area was printing just a pass or two ago and isn't currently, then you can't be more than a few tenths away. This is where calm consistency is the most important thing. Whatever you do don't start trying to scrape lighter or harder in certain areas. Keep your scrape depth the same no matter what.

Anyway, I gave it another pass this morning and ended up with this:
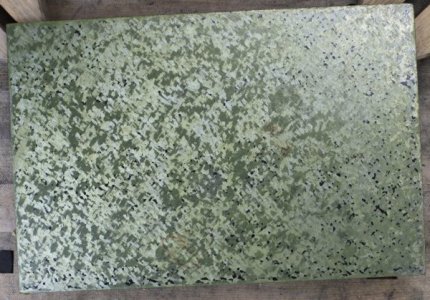
294934

Yeah, I can't see the pattern, either (crappy photography notwithstanding, it was hard to see even standing there).

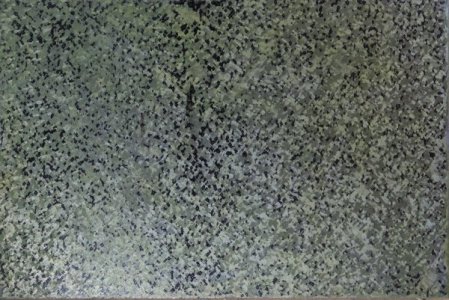
I'd cleaned the plate thoroughly this morning before starting, but I'd put too light a coat of ink for the stage I'm at. Adding a little more ink gave me a much more satisfying mark up (no scraping was done between these two photos, I just added more ink to the granite and rubbed the part up again):
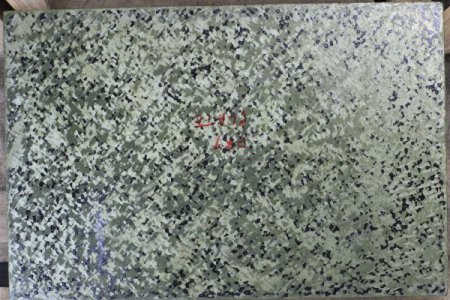
294935

Since it's finally marking up pretty well over the entire surface, I'm finally to the finishing stage and ready to go after individual points. It's much, much more time consuming scraping individual points, so resist the temptation to start doing so before you get it marking up to this point.

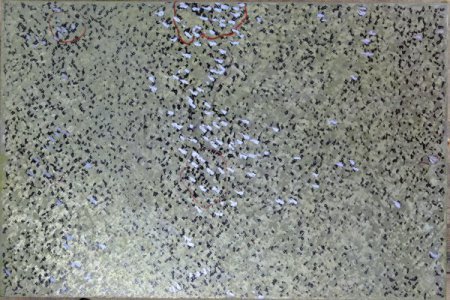
In addition to adding more/wetter ink to the granite plate, I also moved the part onto a dry part of the granite after marking it up and rubbed it around dry. This causes the very highest points to reveal themselves. Notice in the upper center of the photo how some of the spots are dark circles around a silvery center spot? Those silver spot are the highest peaks.

So I took a pass just "dive bombing" those individual shiny spots, ignoring the smaller black marks without a shiny spot in the center. It may seem surprising and counter-intuitive to skip any points that are clearly touching the granite (showing blue/black) but keep in mind we are dealing with tiny deviations in height (around 50 millionths to a couple ten thousandths of an inch). If any of those tiny points you leave are higher than anywhere else after this scraping pass, moderate stoning will bring them back to the same level as the other points. The pressure per square inch from the stone on those tiny points is enormous — the stone will shear them right off.

After another pass or two I was averaging around 15 to 20 PPI (with the lightest areas only seeing 5~8 PPI):
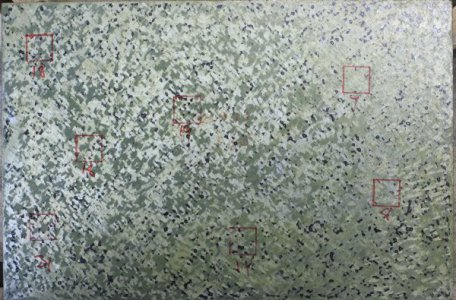
294937

One more pass brought me to about 27 PPI:
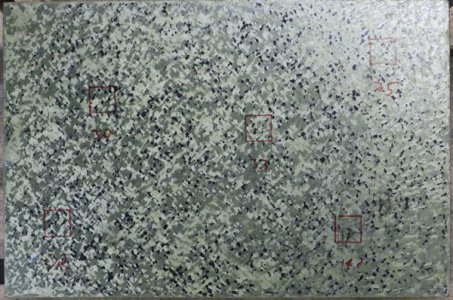
294940

It takes a long time to complete a scraping pass when you've shortened up your stroke and are going after individual points. It probably took me a solid 30 minutes to just to scrape this last pass (not counting time for stoning/highlighting/blueing). My all-steel scraper is so dang heavy I can't manage more than a few minutes at a time, so the 30 minutes was broken up into 5 or 6 short stints.

A word about counting points:

It's not rocket science, but you only count individual points within a 1"x1" square. If you see any blue at all within the boundary of the square, count it as a point. If you see a bunch of connected shapes, you count it as one point, but if you see individual silver points in an "island" of bluing, it's fair to count the individual shiny spots. Take a reading in several random locations (trying to get at least one of the densest and one of the lightest areas). Average the results. It helps to tic off each point as you count it with a sharpie.

For example:
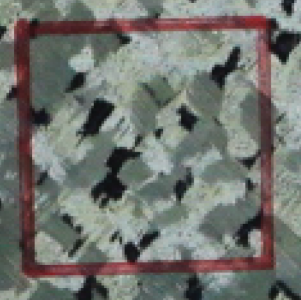
294942

I counted this as 33 PPI above (I was probably optimistic counting a few of the points). A 1" by 1" square is actually outside the the red sharpie mark (the point angled in a bit as I scribed the square). I doubt that I'd come up with the same count twice, but this is probably similar to what I counted (my eyes are terrible, FWIW):
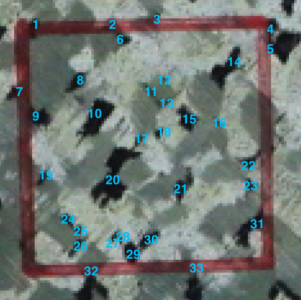
294945

I really want to get back to working on my lathe, which requires first scraping in a lighter 36" straightedge than the one I have, but I foolishly appear to have promised to scrape this surface plate in to 40 PPI.

Seriously, this plate is already scraped in well enough for almost anything I'm likely to do. Because it's intended to be a reference gage for other things, though, it is worth the time to go the extra mile and get it to ~40 PPI throughout.

I will dig out a polarizing filter for my camera before my next few passes, though, and see if I can get better quality photos. I'll try to document the final finishing passes as well as I can.
 

Attachments

  • PPI-counted.png
    PPI-counted.png
    238 KB · Views: 2
Last edited:
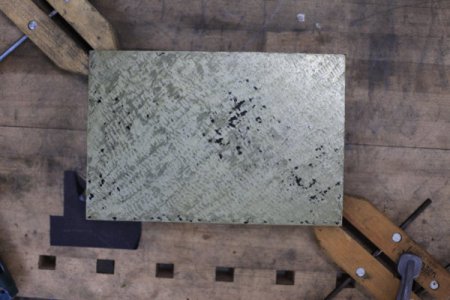
I got about an hour in the shop yesterday, and put in another hour or two on the plate this morning. I've got it to around 30~35 PPI (at a guess) everywhere which is good enough for me now since I don't need it immediately (unlike the straightedge I just started scraping in).

There were a couple more interesting tidbits worth pointing out (I learn more with every single thing I scrape). I'll post about them later, but for the moment, here's the "finished" product:


I took some photos with the 1"x1" gauge in random locations. I'll count the points later (turns out that photographs make it easier to see and count the points!).

More soon.

[By the way, while the PPI is good enough for a casual use plate, I'd definitely like to get a higher percentage of bearing — bigger points — as well as a few more PPI if I was going to use this as my primary reference surface.]
 
Here is the markup immediately prior to the final round of scraping:

295055

It's really hard to photograph what's easy to see by eye, but the markup was very uneven. Ignore the smears, but the center and a few other areas were markup up quite dark while other areas had only relatively faint bluing. Even though there were bearing points everywhere along the surface, some areas were slightly higher, causing a mottled appearance in the markup.

To correct this, I just scraped a few of the absolute highest points (with the big silver centers) in the darker areas, leaving the lighter areas completely untouched. The idea is to break up some of the larger points as well as lower the darkest areas. By just hitting a few of the very highest points in the darker areas (without removing all the blue spots) you lower the area only slightly.

295056

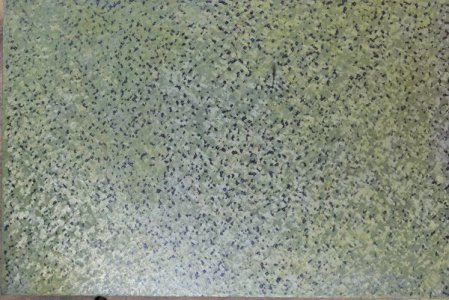
This was enough to greatly improve the overall "color" of the whole plate. It's easier to see in the video in the previous comment, but here's the final result:

295057
 
Here's some close-ups to measure PPI:

295058

I'd say that's conservatively around 25 points (in one of the lightest areas).

295059

Maybe 28 or 29?

295060

At least 35, close to 40.

295061

About 30.

295063

Around 30?

I'd say the plate is averaging around 30 PPI.

Basically, I think it's just rinse and repeat to go beyond this point. If you look closely at that last photo, you can see that the black marks are only a little smaller than the individual scrape marks. To get beyond this point I'd likely have to shorten my stroke a little bit more (the are already down to about an eighth of an inch).

I'm not entirely sure how to get a higher bearing percentage, but I think the approach would be to have flatter/shallower scrapes. There are two ways to accomplish this: grind the blades with a larger radius, or lower the back end of the scraper to create a larger effective radius at the surface. Either way, I'd need to take a lot of care to keep the scrape depth consistent and not tip the blade (causing scratches).

A heavy stoning (with precision ground flat stones) would also increase the bearing percentage slightly.

Anyway, I'm done with this plate for the moment. It's good enough for my purposes, and I need to get back to scraping in my lathe! :)
 

Attachments

  • IMG_0516.jpg
    IMG_0516.jpg
    60.4 KB · Views: 4
Back
Top