What is Needed for Making a Gear?

@wachuko they look like this
View attachment 402325
Used between centers. The other kind of mandrel, with simple slits
View attachment 402326
seems to slip when you need it the most. I made one, and it was ok, but it did slip on occasion. Making a gear, you can't have the gear slip or rotate on the shaft. You could also use a nut mandrel, where the gear blank is clamped by a nut against a flange on the shaft.

Thanks. I thought I just needed to make one with a key so it would not slip... similar to what Keith did in this video:


Was not aware of those mandrels you shared. I will see what a set goes for... And you answered another question I had... how to hold them. I could not figure out how these were held in place...

And found one more kind of mandrel in this video...

A key works fine if it is a good fit on the arbor and the gear blank.

A couple of years ago, I didn't know much about mandrels. Been learning a lot since I have taken up this hobby. There are a lot of techniques and methods of workholding that I have yet to learn. Learning new things and being able to up my game making things is part of why I find this hobby so rewarding.
 
FWIW, the mandrels I use are just a piece of aluminum turned down to size with a shoulder ~10 thou short of the gear thickness, and a bolt in the end. So far cranking down the bolt on a washer on the gear has never let me down.
 
What I learned about gears and mandrels is that the single expanding end mandrel has to be long enough that a larger gear cutter can complete the cut full depth and also clear the dividing or indexing head. That means some significant stick-out, and I had rigidity issues like that. The less expensive set of expanding mandrels I bought are not really that long...they work well for lathe work, but gear cutting, not so much. So I got a set of the two piece expanding mandrels...now those are great. No need for keys, since there is not much rotating force on the gear blank, and the mandrels can be pressed together (or hammered, I suppose) to as tight as you need, yet easy to get apart later. I set up the dividing head tailstock with these mandrels, and life was good. I made a 62 tooth gear, module 1.5 for the Takisawa out of Delrin, and it works perfectly.
 
FWIW, the mandrels I use are just a piece of aluminum turned down to size with a shoulder ~10 thou short of the gear thickness, and a bolt in the end. So far cranking down the bolt on a washer on the gear has never let me down.
Most of the gears I make are small. Subfractional modulus (mod 0.25 et al) out of plastic. The largest I have ever done is the 16DP for my Craftsman lathe. The larger ones are aluminium, the smaller ones from plastic. Binding with friction has always been sufficient. When I cut a 16DP 127 tooth from plastic (acrylic) for my lathe, I did key the original 127t from a Taiwanese machine. Mostly because the gear had a keyway and my rotary device was a cobbled up contraption at best.

For cutting a gear, the force is "fore and aft", with little to no rotational force involved. While rigidity is important, a shoulder and a nut or a clamp screw should suffice for a one off or experimental job. A tapered mandrel is nice to have for production work, but for a hobbyist learning it is a bit much to start. And the expanding mandrels are an even more desirable but unneccesary tool. Face it, you're going to botch a large number of parts as you learn. That's just part of the learning curve. Rigidity is the least of your problems.

.
 
Late to the party so not adding too much. As has already been said, you'll need some sort of indexing device like a dividing head or rotary table. I haven't read every post above so sorry for the repeat(s). Cutters are sold in sets of 8 with each size covering a range of gear teeth. The USA numbering system and Import system are flipped relative to each other: A USA #8 cutter is for 12-13 teeth. The equivalent Import cutter is a #1. No idea why the difference, but be careful if you're buying individual cutters off eBay.

Another thing I would suggest is to shut off your phone, turn off your shop radio and tell your significant other to leave you alone while you are cutting the gear. I've found when cutting a gear I get into a repetitive routine: Make a pass, unlock the dividing head, index to the next tooth, rotate the sector arms (or whatever the adjustable arms are called), lock the dividing head and make the next pass. If you get interrupted, it'll increase your chance of screwing up.

I haven't posted one of my biggest fails while cutting a gear, so here goes. I had a Rockwell 10" lathe with a taper attachment. The Rockwell's have a QCGB with 27 threads per inch standard. I'd never cut a 27 tpi pipe thread on the Rockwell, but being really anal I hated taking a tool from my arsenal when I sold the lathe. I have a Clausing 5418 which will cut 27, but it doesn't have a taper attachment. I also have a Grizzly G0709 with a taper attachment, but the QCGB goes from 26 to 28.

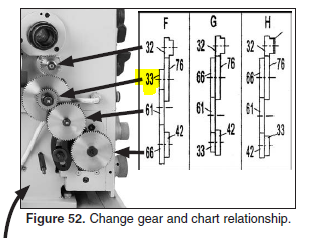
The Grizzly has a 33-tooth gear in the gear train, and the QCGB can do 18 tpi. My thought was to make a 22-tooth gear and swap it in for the 33-tooth which would slow the QCBG by 50%. That'd give me 27 tpi on the 18 tpi setting. I bought an import gear cutter of the correct modulus off eBay for under $15. By the way, it worked fine on CRS for the one gear I cut. I made an arbor for the cutter which had something like an 18 mm hole. Did the math on the OD of the blank, cut the gear on the Bridgeport using my L&W dividing head. Made a metric bushing for a metric broach to cut a keyway, cut the keyway. Then went to put my new fangled gear on the lathe and FAIL! I'd failed to look at the center to center distance in the gear train; my new gear wouldn't mesh with the appropriate gear because the 76-tooth gear that it's ganged with hit the shaft of the gear below. Oh well, it was good practice!

If you want to get really fancy, I attached a CNC routine for cutting spur gears on a Tormach (probably work on others too) with a 4th axis. I'll end up going this route when I get back to getting my G0709 27-tpi capable. I'm thinking of making a 99-tooth gear to replace the 66-tooth one at the bottom of the quadrant.

Another aside, plain dividing heads won't cut every number of gear teeth. The formula for indexing turns between teeth is typically "40 / x" where 'X" is the number of teeth (typical 40 to 1 ratio on the crank vs. the spindle on a dividing head). For a 20-tooth gear, it's 40/20 or 2 turns. If it's a 22-tooth gear as in my case, it's 40/22 or one complete rotation, 20/22 of an additional rotation. I put a 33-hole plate on DH and went 30 holes (30/33 is the same ratio as 20/22). That's where the sector arms come into play. Those were set for 30 holes apart. Spin the indexing crank one full revolution, then a second one until the pin is at the hole at the sector arm. Rotate the sector arms in prep for the next tooth. And "Yes", I'm making it more complicated that it actually is.

Have fun! The formulas for sizes are pretty simple. There is something very satisfying about cutting your own gears!

Bruce


Metric arbor for an import gear cutter
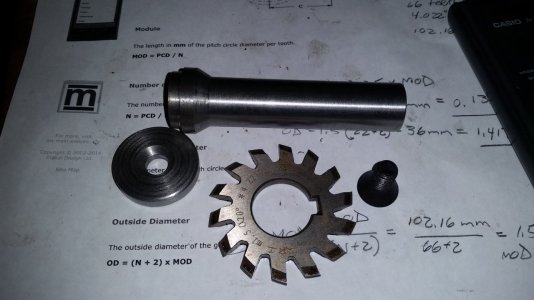
20171001_184117.jpg

Last pass on the BP
20171006_095901.jpg

Broaching a keyway
20171006_102215.jpg

Grizzly G0709 change gears. Plan was to replace the 33-tooth gear with a 22-tooth to slow the gear box by 50% (18 tpi becomes 27)
1648754110093.png

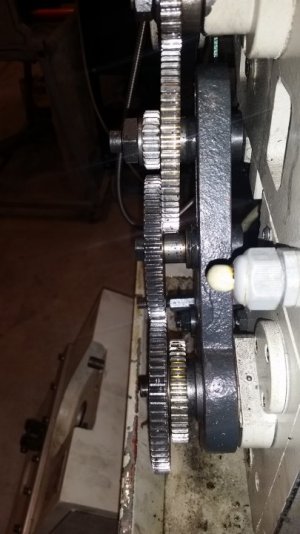
And . . . FAIL! The large gear at the top is ganged with the 22-tooth gear I made. Problem is the 76-tooth gear bottoms out on the shaft for the 61-tooth gear below before the 22-tooth gear meshes.
20171006_103334.jpg

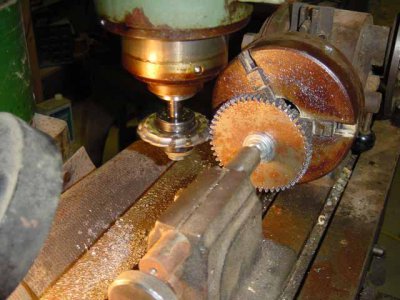
I think these were 50 tooth gears.
cutting P50s.jpg
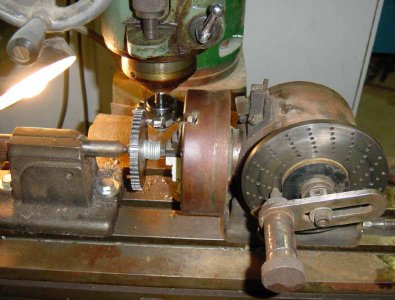
dividing head set up.JPG

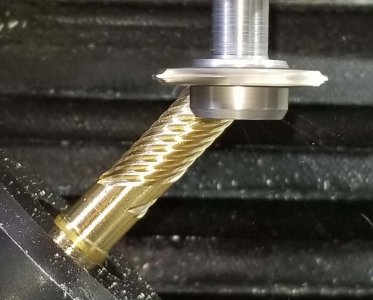
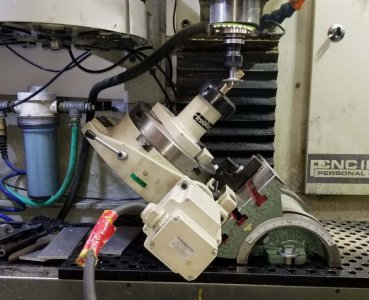
Or get really fancy and cut some helical gears!
20200613_123322.jpg

20200613_123623.jpg
 

Attachments

  • gear cutter routine.txt
    2.4 KB · Views: 0
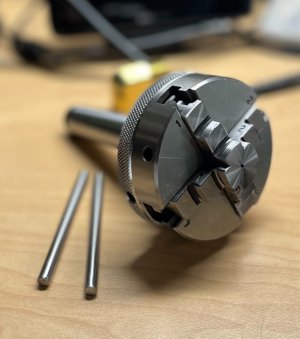
A few things are starting to arrive... this arrived today and wow, it just look soooo cool.

IMG_5139.jpeg

Daughter walks by and sees it and just shouts - "Oh what a cutie!" :D

Can't wait for the rest to arrive to take it for a test run... but that will have to wait a couple of weeks since I am out starting tomorrow...

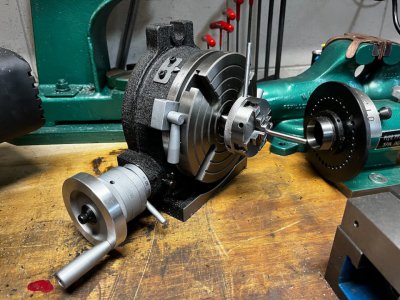
EDIT: Could not resist installing on the rotary table...

IMG_5146.jpeg
 
Last edited:
For the rotary device, the indexing head, the most accurate solution is going to be a center and dog arrangement. A 3 jaw chuck is doable, but any runout in the chuck will show up in the finished product. A 4 jaw chuck is the worst for this application, requiring several rotations to get the chuck on a true center. There are situations where a four jaw on a rotary table will save untold hours of setup. But for gear cutting it isn't the optimal solution. Just my $0.25 worth, inflation ya know.

.
This one is a self-centering 4-jaw chuck... if that makes any difference... I will measure runout after April 18, when I get back...

But I do have a center for this... and a dog that I could use as well... I will just need to make the tailstock for it...
 
Last edited:
Mine is the same one I think? It keeps surprisingly good concentricity, definitely good enough for the small gears I was doing.
 
Back
Top