-
Welcome back Guest! Did you know you can mentor other members here at H-M? If not, please check out our Relaunch of Hobby Machinist Mentoring Program!
- Forums
- THE PROJECTS AREA
- PROJECT OF THE DAY --- WHAT DID YOU DO IN YOUR SHOP TODAY?
- Project of the Day Mega-Thread Archives
You are using an out of date browser. It may not display this or other websites correctly.
You should upgrade or use an alternative browser.
You should upgrade or use an alternative browser.
2014 POTD Thread Archive
- Thread starter Smudgemo
- Start date
- Joined
- Feb 7, 2012
- Messages
- 539
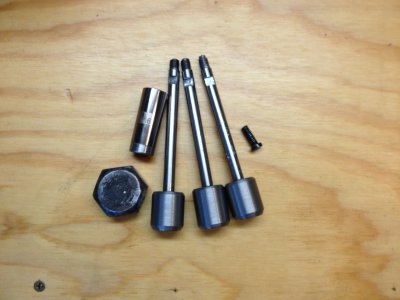
I finally got around to building an adapter for my HF 20-ton press to push out pins and rivets...
I decided to go with a removable 3/4" slug to hold the final sized pins. But as you might notice, with 20ton vs. a .120 drill rod pin vs a Suomi rivet - the drill rod loses...
Next step will be to try hardening the pin first...
View attachment 72903
That's a very similar set up to what I did with my press. I never had an issue pressing pins in any AK's, PSL's, or FAL's - is it possible you weren't exactly in line [perpendicular] to the pin? Drill rod is pretty hard IIRC. Or........ could be Suomi pins are really tight. :thinking:
- - - Updated - - -
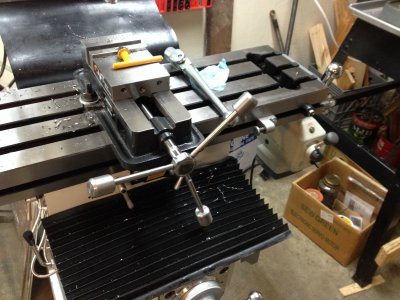
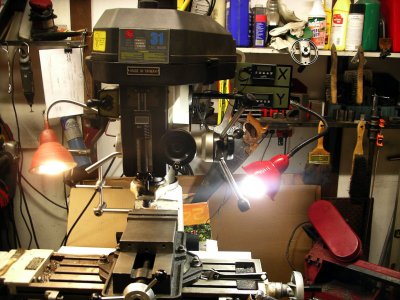
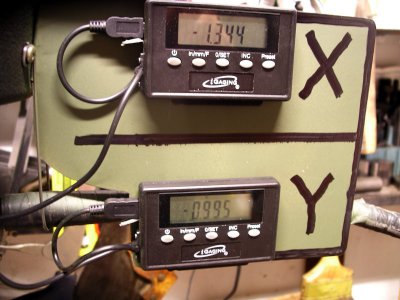
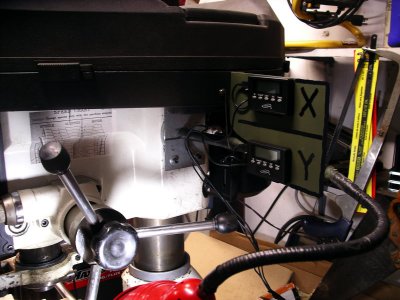
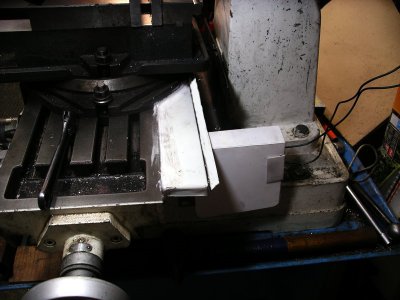
Finished up putting a bracket on to hold the readout modules for the Igaging DRO I put on a small RF31. I have noticed the accuracy is not the greatest, but if I go slow it's not too bad for my hobby work.....I won't bore you with details as this has been covered a few times already. Just the finished look for my set-up.


- Joined
- Nov 2, 2012
- Messages
- 415
- Joined
- Dec 17, 2012
- Messages
- 745
A neighbor had to fix a curtain support, making a sort of mortise into a piece of pipe.
The support was basically a pipe made with some mystery metal looking like heavily compressed aluminum dust.
At the first attempt to make a hole with a self-proclaimed HSS Chinese bit, 500 RPM and very light feeding, I got as a result just a notch and a bit 1 cm shorter.
A brand new Bosch HSS bit completed the hole, with the help of some cooking oil (all I had in that moment!), and even the Bosch bit became almost dull. Around the hole instead of chips there was a sort of crust, like slag, pretty hard to be filed.
Then I had to make two cuts with an HSS slitting saw 0.6 mm thick.
After a test I decided there was the need of something constantly dripping oil on the blade to get a decent result, so I filled an empty tube of cold pills with oil, attached to it an IV line (some time ago the drugstore had to dump a full box of them because they were expired, and I kept them to water the plant pots) running just near the chuck and I named it "coolant hose". Of course I removed the needle…
Here is the "IV drill press":
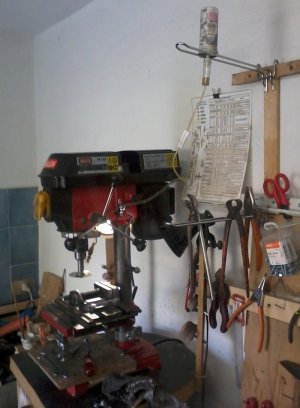
I used an M6 thread bar to push the vise under the saw, turning it at 1 RPM: an astounding advance speed of 1 mm/minute.
The mortise anyway is perfect, the saw blade is not yet dull and the neighbor is happy.

The support was basically a pipe made with some mystery metal looking like heavily compressed aluminum dust.
At the first attempt to make a hole with a self-proclaimed HSS Chinese bit, 500 RPM and very light feeding, I got as a result just a notch and a bit 1 cm shorter.
A brand new Bosch HSS bit completed the hole, with the help of some cooking oil (all I had in that moment!), and even the Bosch bit became almost dull. Around the hole instead of chips there was a sort of crust, like slag, pretty hard to be filed.
Then I had to make two cuts with an HSS slitting saw 0.6 mm thick.
After a test I decided there was the need of something constantly dripping oil on the blade to get a decent result, so I filled an empty tube of cold pills with oil, attached to it an IV line (some time ago the drugstore had to dump a full box of them because they were expired, and I kept them to water the plant pots) running just near the chuck and I named it "coolant hose". Of course I removed the needle…
Here is the "IV drill press":

I used an M6 thread bar to push the vise under the saw, turning it at 1 RPM: an astounding advance speed of 1 mm/minute.
The mortise anyway is perfect, the saw blade is not yet dull and the neighbor is happy.

- Joined
- Feb 8, 2014
- Messages
- 11,144
The continuing saga of the Z-axis conversion gearbox. I had to pull off of this project last week to fix a CNC router, and get the brass thingies done.
I finally have the gearbox completed.
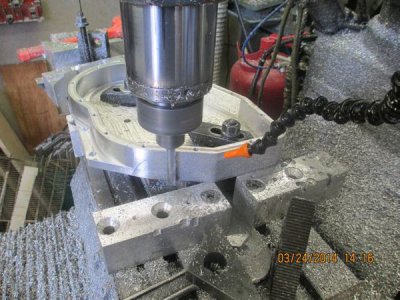
Roughing out the outside profile
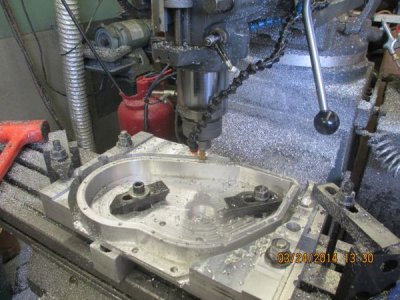
The final finishing pass
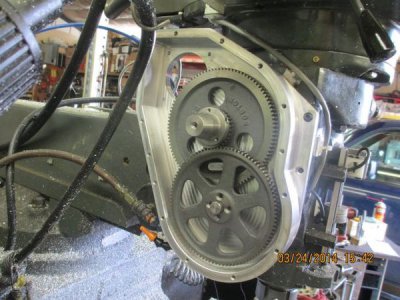
It fits !!!! :allgood: Looks like the gears mesh correctly and will disengage when the cam is rotated. Next is making sure everything does fit up correctly, and a little deburing on the case. I should be able to test run it on the bench in the next day or so. I have a little bit more work to do on the machine before I can go live, like getting the travel limits installed!!
A nice narrow profile
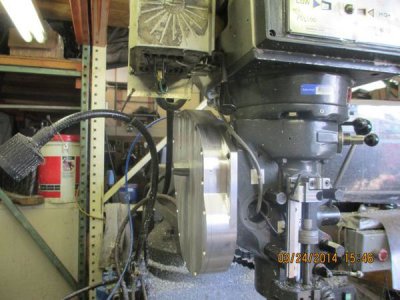
I think the Engage/Disengage cam shaft sticks out a bit too far, looks like I can shorten it up by about 1/2 inch or so.
Now it's time to clean house a bit, there is about 5 gallons of aluminum chips all over the place.
I finally have the gearbox completed.
Roughing out the outside profile

The final finishing pass

It fits !!!! :allgood: Looks like the gears mesh correctly and will disengage when the cam is rotated. Next is making sure everything does fit up correctly, and a little deburing on the case. I should be able to test run it on the bench in the next day or so. I have a little bit more work to do on the machine before I can go live, like getting the travel limits installed!!

A nice narrow profile

I think the Engage/Disengage cam shaft sticks out a bit too far, looks like I can shorten it up by about 1/2 inch or so.
Now it's time to clean house a bit, there is about 5 gallons of aluminum chips all over the place.
Last edited:
- Joined
- Oct 27, 2013
- Messages
- 124
Nice I.V. bottle support! I need something similar next to my evening chair, only it should use a bottle of Maker's Mark...
- Joined
- Apr 12, 2011
- Messages
- 3,472
I'm sorry I don't have any pictures......but.......today I spent $20 worth of time making a 10 cent part for a 3 dollar lamp. I had a good time though. It's good it's just a hobby. I wouldn't be in business long.
You are so right, not everyone understands the concept of "hobby".
Took a couple of pieces I got from some members earlier this year and finally rebuilt a compound rest for my logan. Probley the best couple of days this year so far! Made a handle,resized a hole and counterbore, made some tee nuts out of grade 8 bolts, welded some threads onto the short lead screw, the slotted if for a 1/8 key. Just could not figure out the picture thing. Not done yet though, need a new tool post because none of the ones I have fit the new to me compound rest. So tomarrow I run for more steel at the recycle yard.


