-
Welcome back Guest! Did you know you can mentor other members here at H-M? If not, please check out our Relaunch of Hobby Machinist Mentoring Program!
- Forums
- THE PROJECTS AREA
- PROJECT OF THE DAY --- WHAT DID YOU DO IN YOUR SHOP TODAY?
- Project of the Day Mega-Thread Archives
You are using an out of date browser. It may not display this or other websites correctly.
You should upgrade or use an alternative browser.
You should upgrade or use an alternative browser.
2014 POTD Thread Archive
- Thread starter Smudgemo
- Start date
- Joined
- Oct 4, 2012
- Messages
- 198
- Joined
- Oct 17, 2013
- Messages
- 363
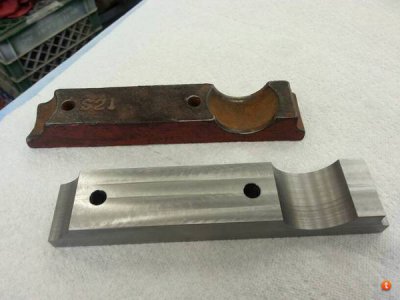
nice is that just a radi or is it a ball socket?
He made a few design changes so the cupped portion is no longer necessary.
sent from my hand held hickymajig
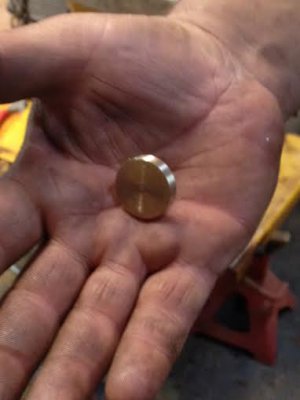
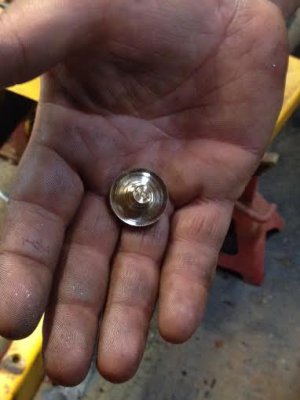
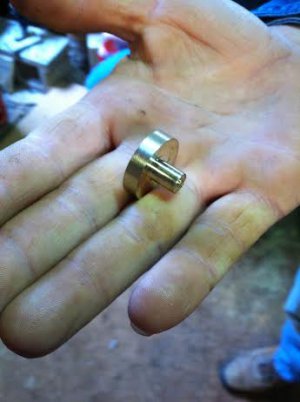
Had a friend come over and needed his PTO rebuilt on his garden tractor. The bushing that presses it out of operation was worn out. Its sposta be made out of a fiber and wear on the steel bushing in the center of the PTO. For years people have been making them out of brass, a forum member here dose it, so I tried my hand at it today. This is the second thing Ive made on my new to me 9A.


- Joined
- Dec 19, 2012
- Messages
- 41
I finally finished the plumb bob which spent most of the winter in my cold shop.
View attachment 73829View attachment 73830View attachment 73831View attachment 73832View attachment 73833View attachment 73834
that plumb bob is to nice to use !
- Joined
- Dec 17, 2012
- Messages
- 745
Here is my POTD.
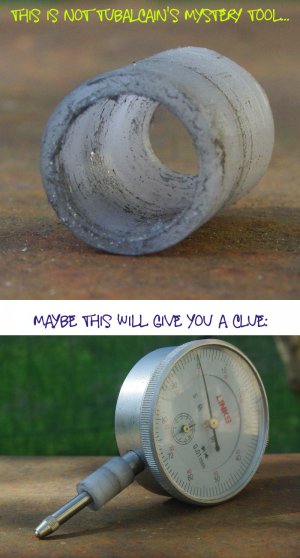
I made an indicator holder for my drill press: the small plastic piece is a morsel of Delrin, ⌀ 10 mm, with an 8 mm hole reduced to 5 mm in the bottom.
This was made with a drill press, since I've nothing else; the outside of the bushing has a dark ring because I cut it with a pipe cutter.
I'm sure many beginners will find pretty difficult to make a concentric hole like this one, so I gathered some basic instructions into a single image: click on it to see the larger version.

For who is browsing with a phone, here is a more readable text description.
1) Get a second chuck. A threaded one is better, because you have to bolt it to the drill table.
2) Insert the bit you have to use in the drill chuck, keeping it very low (grab just the tail of the bit).
3) "Hang" the second chuck to the drill bit. Don't close too much the second chuck, just to
avoid it falling down, or you'll damage the bit.
4) Move the table until you can bolt the second chuck into the table hole and lock both the table and the second chuck.
5) Remove the drill bit and place the piece you have to drill into the lower chuck. If the piece is short add a shim below it, inside the lower chuck.
6) Put the drill bit back into the drill chuck, pushing it at the top. Hint: open the drill chuck at its widest, so you have more clearance to insert the bit.
7) Drill as usual and don't push too much!
I made this many times, always with successful results (here is why I can't persuade wifey I need a lathe!!!).
Anyway, here is the prosecution of the POTD.
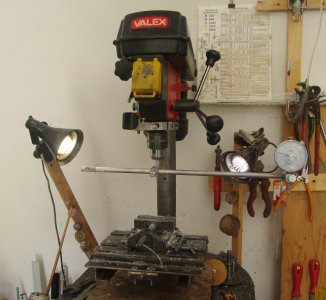
I'm sure someone will ask how can I tram that small vise with such a monster… but this long setup is for the table I use for woodworking:
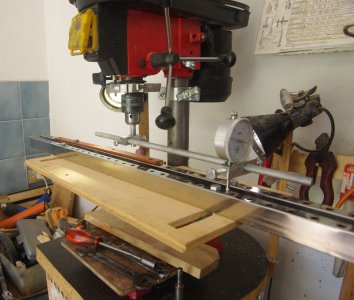
The chrome bars come from one of my preferred hardware shops (don't remember if Trash Depot or Dumpster Freight) and they are pretty useful. They move on a slotted plywood table bolted to the drill table and behave like a sort of very wide vise. I can even use the holes to clamp down the pieces like on a table with T slots.
I know the aluminum pipe is not the best thing for the indicator holder, but this was just a beta version: I must ask a photocopier shop some more robust steel bars (and use two or three of them).


I made an indicator holder for my drill press: the small plastic piece is a morsel of Delrin, ⌀ 10 mm, with an 8 mm hole reduced to 5 mm in the bottom.
This was made with a drill press, since I've nothing else; the outside of the bushing has a dark ring because I cut it with a pipe cutter.
I'm sure many beginners will find pretty difficult to make a concentric hole like this one, so I gathered some basic instructions into a single image: click on it to see the larger version.

For who is browsing with a phone, here is a more readable text description.
1) Get a second chuck. A threaded one is better, because you have to bolt it to the drill table.
2) Insert the bit you have to use in the drill chuck, keeping it very low (grab just the tail of the bit).
3) "Hang" the second chuck to the drill bit. Don't close too much the second chuck, just to
avoid it falling down, or you'll damage the bit.
4) Move the table until you can bolt the second chuck into the table hole and lock both the table and the second chuck.
5) Remove the drill bit and place the piece you have to drill into the lower chuck. If the piece is short add a shim below it, inside the lower chuck.
6) Put the drill bit back into the drill chuck, pushing it at the top. Hint: open the drill chuck at its widest, so you have more clearance to insert the bit.
7) Drill as usual and don't push too much!
I made this many times, always with successful results (here is why I can't persuade wifey I need a lathe!!!).
Anyway, here is the prosecution of the POTD.

I'm sure someone will ask how can I tram that small vise with such a monster… but this long setup is for the table I use for woodworking:

The chrome bars come from one of my preferred hardware shops (don't remember if Trash Depot or Dumpster Freight) and they are pretty useful. They move on a slotted plywood table bolted to the drill table and behave like a sort of very wide vise. I can even use the holes to clamp down the pieces like on a table with T slots.
I know the aluminum pipe is not the best thing for the indicator holder, but this was just a beta version: I must ask a photocopier shop some more robust steel bars (and use two or three of them).


- Joined
- Feb 17, 2013
- Messages
- 4,407
I recently bought an Enco reversible 3-jaw chuck for my Griz G4000 9x20 lathe. Spent some odd hours over the last few days and completely disassembled it, cleaned out the grit, lubed it, re-assembled, machined the backplate, etc. etc. This is my first reversible 3-jaw chuck, and while playing with it, I realized that I'd have to keep TWO tools with it, not just one. The jaws are held on with 10mm socket head screws that require an 8mm hex key.
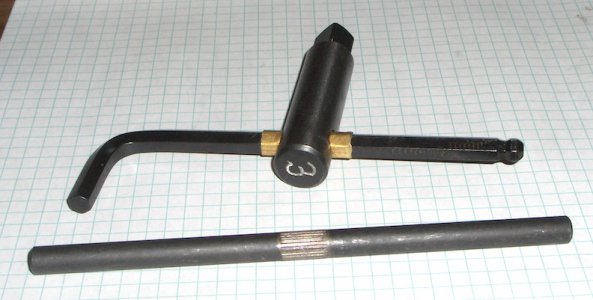
Then I noticed that my ball-ended 8mm hex key was about the same length as the crossbar originally pressed into the chuck key. I also noticed that the crossbar was slightly under 3/8" in diameter (knurled to a bit larger where it pressed into the body of the key), and that the hex key was .354 across the peaks (just slightly over 11/32") :thinking:
Today's project: Visited my favorite hobby shop and bought a length of K&S 3/8" OD (.014" wall) brass tubing. Cut off a 1 1/4" length and pushed it into the chuck key body. Then with my vise set to just let the 8mm key slip through, I carefully hammered on the key until it was nicely centered.
For now, I've goobered on some cherry flavored Loctite to hold things together. If that doesn't work, I'll probably have to try brazing (though I'm a bit concerned about what the heat will do to the hex key).
Anyway, I now have a single tool that will loosen/tighten both the scroll and the jaw retaining screws.


- Joined
- Apr 6, 2011
- Messages
- 2,082
Nice thinking on the "combo tool". :thumbzup: If you have issues with it coming loose I'd give Loctite "green" a try before brazing it. - http://www.loctiteproducts.com/p/t_lkr_green/overview/Loctite-Threadlocker-Green-290.htm
-Ron
-Ron
- Joined
- Mar 26, 2013
- Messages
- 78
I recently bought an Enco reversible 3-jaw chuck for my Griz G4000 9x20 lathe. Spent some odd hours over the last few days and completely disassembled it, cleaned out the grit, lubed it, re-assembled, machined the backplate, etc. etc. This is my first reversible 3-jaw chuck, and while playing with it, I realized that I'd have to keep TWO tools with it, not just one. The jaws are held on with 10mm socket head screws that require an 8mm hex key.
Then I noticed that my ball-ended 8mm hex key was about the same length as the crossbar originally pressed into the chuck key. I also noticed that the crossbar was slightly under 3/8" in diameter (knurled to a bit larger where it pressed into the body of the key), and that the hex key was .354 across the peaks (just slightly over 11/32") :thinking:
Today's project: Visited my favorite hobby shop and bought a length of K&S 3/8" OD (.014" wall) brass tubing. Cut off a 1 1/4" length and pushed it into the chuck key body. Then with my vise set to just let the 8mm key slip through, I carefully hammered on the key until it was nicely centered.
For now, I've goobered on some cherry flavored Loctite to hold things together. If that doesn't work, I'll probably have to try brazing (though I'm a bit concerned about what the heat will do to the hex key).
Anyway, I now have a single tool that will loosen/tighten both the scroll and the jaw retaining screws.
View attachment 74149
A great idea, one that I will copy.
You could drill and tap it for a set screw on the end, that way if you break, bend or strip the hex key you can change it out for a new one.
Chuck


