2020 POTD Thread Archive

Worked on finishing the mobile base for my Unisaw. Needed to add a place for the extension table legs to rest. Cut the legs to length and then tried to cut a piece of 2x angle for the legs to rest on. That's when the bandsaw blade decided it didn't like being on the wheels and promptly jumped off four or five times. I suspect that it needs more attention than I was prepared to give tonight.
Off went the lights. Tomorrow's problem now...
 
Not a lot today - cleaned the Starrett level and it's case. The case needed some running repair - the LH short side had been bust out during transit. Some gorilla glue and a clamp sorted that out.
IMG_0945.jpegIMG_0946.jpeg

Base cleaned up nicely with just some WD40 and some fine scotchbrite. The body got a going over with so WD and a plastic bristle brush, and the vial holder and rotating cover the same but with a brass brush to get the crude out of the knurling. The case was cleaned with oil soap to get the muck off and then I put some linseed oil on it.

I've lined the bottom of the case with some VCI paper to help prevent any rust, and given the base a light coat of oil.
 
Bottom side painted blue

a296ddf1b2600fa595d17244f502aa7f.jpg


Sent from my iPhone using Tapatalk

And the end result. Finally no more oil everywhere on the desk


f8c3c9f2fde0e09cc66ff11291770b89.jpg


Sent from my iPhone using Tapatalk
 
I bought one of those amazingly cheap misters and a gallon of Koolmist. I mounted it to the mill in what has been a pretty good location, out of the way but convenient to use. A plastic milk carton holds the diluted coolant. I leave it connected to shop air and use the air needle valve to turn it on. Seems like the liquid Venturi does not need much fiddling.

And most surprising, it actually works well. You can blow the chips clear without liquid if you like, and the coolant makes a significant, or at least notable, difference. It is diluted so much that it seems like water might work ok too.

Comments?

View attachment 321019

I found they work good too. You may want to hang your bottle below the valve so you don't come back and find that it has all siphoned out.
Aaron
 
refurbed a couple of Gerber multitools I found so I could give them to my daughters for their birthdays (Friday and today). The newer one turned into quite the project as it was missing the locking pins and clips for the slide out plier, was bent (must have been runover a few times) and had 2 broken blades and a broken saw. The older one was a piece of cake in comparison and needed only a new blade.
IMG_9393.JPG

locking pins and clips, made from stainless of some description. Man they look like ar$e close up!
IMG_9395.JPGIMG_9394.JPGIMG_9401.JPG

all in place
IMG_9402.JPG

made some blades out of 7/64" O1 that was milled down to the necessary thickness, then filed/ angle ground to shape before torch hardening and quench in ATF. Here they are after a nice cook at 400F or so for an hour.
IMG_9403.JPG

sharpened and cleaned up (a bit)
IMG_9404.JPG

old one
IMG_9405.JPG
new one. The saw blade was fixed by carefully grinding a slot down the centerline of the broken piece, then pinning and JB welding in a piece of hacksaw blade.
IMG_9406.JPG

the girls were happy and I had many happy hours distracting myself in the garage. Plus I think I'm actually starting to get a handle on the whole hardening O1 thing..
 
Here’s what I’ve been up to during the server upgrade...

Designed and printed a magnetic mount for my coolant spray.
F9D3E7F0-858C-4C3E-B6D8-88973F062570.jpegC4E0172B-2D1A-4805-BF5B-472A4C81D4D0.jpeg50190199-953A-4F70-9322-D6CBBCB9AD9A.jpegD62BBB3D-4D7A-4F22-9ADA-09E394C4B7EE.jpeg
I’m not sure how successful this will be. The two 20x3mm neyodinium magnets are strong enough to stick it to the side of the mill, but it sides. I’m already redesigning it to use a mag base from an indicator arm.

Designed and printed this little rack for my depth mic rods.
EDE62DA5-81C7-4BAE-9969-FF0E9D52C099.jpeg2F4ED708-311D-4EDF-9A3D-06B37C593842.jpegB39C98E4-A796-4DE1-A6FC-22C5E0B8F9BC.jpeg
The raised text was coloured black with a permanent marker.

And I finished off my CQR chest by fitting the new lock, escutcheon and a small name plate I made, just for the hell of it.
96C626CD-28BD-4213-8091-2D33F2A7D409.jpegF614F293-59E1-46FD-A755-852CE6982765.jpeg5A110952-25C6-47B8-96FC-2EB9B25164B5.jpegA050C1A0-9348-4D30-A722-B5565C66991E.jpeg

Oh, and I fixed my lathe again. It seems there’s a small daughter board on the main PCB that likes to come loose. I’m going to have to come up with some way of keeping it walking it out of it’s slot...
 
Finished the grinding of the work rolls for the hot mill yesterday. Ready to send out for coating. Took 2 hours for the 3 sets. Have to fix the hydraulic traverse as I had to hand crank back and forth the whole time.
Pierre
43548885-5938-4F66-BCCA-ADAFEBC6E71A.jpeg
 
Perhaps if the magnets were on the outboard side of the mister magnetic holder it would work better?
 
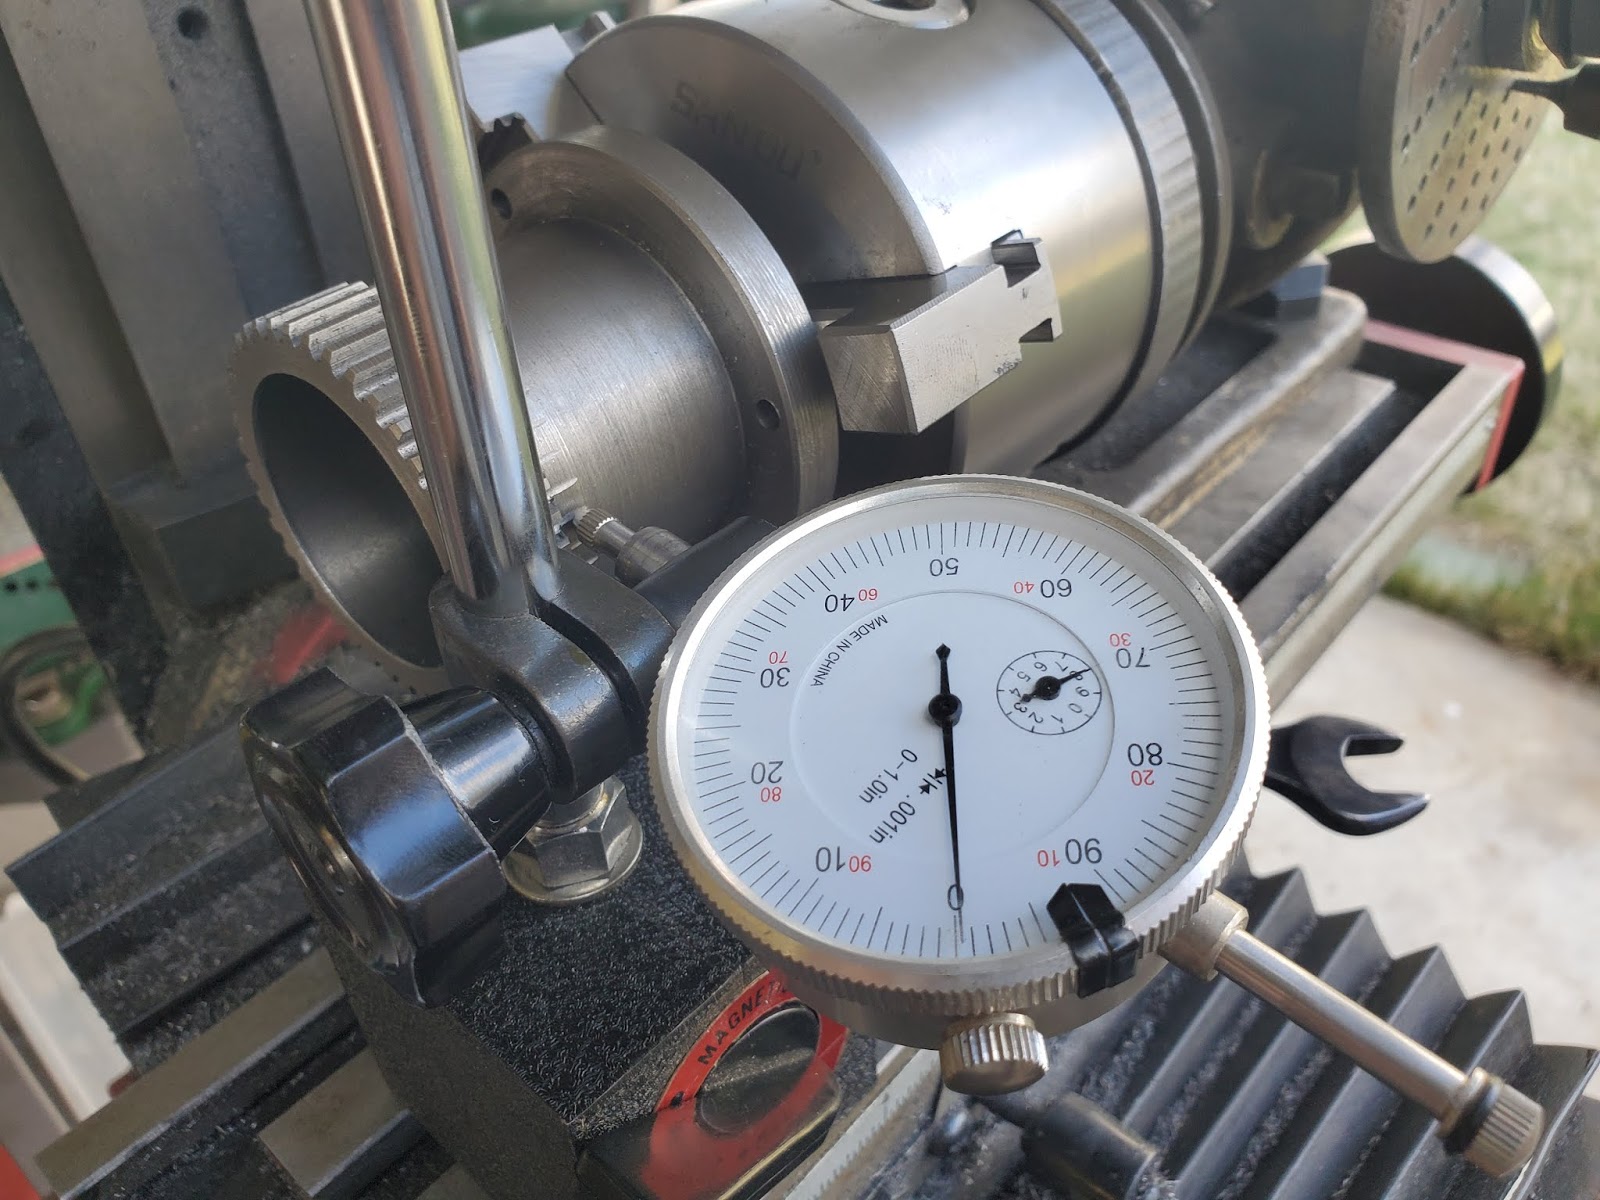
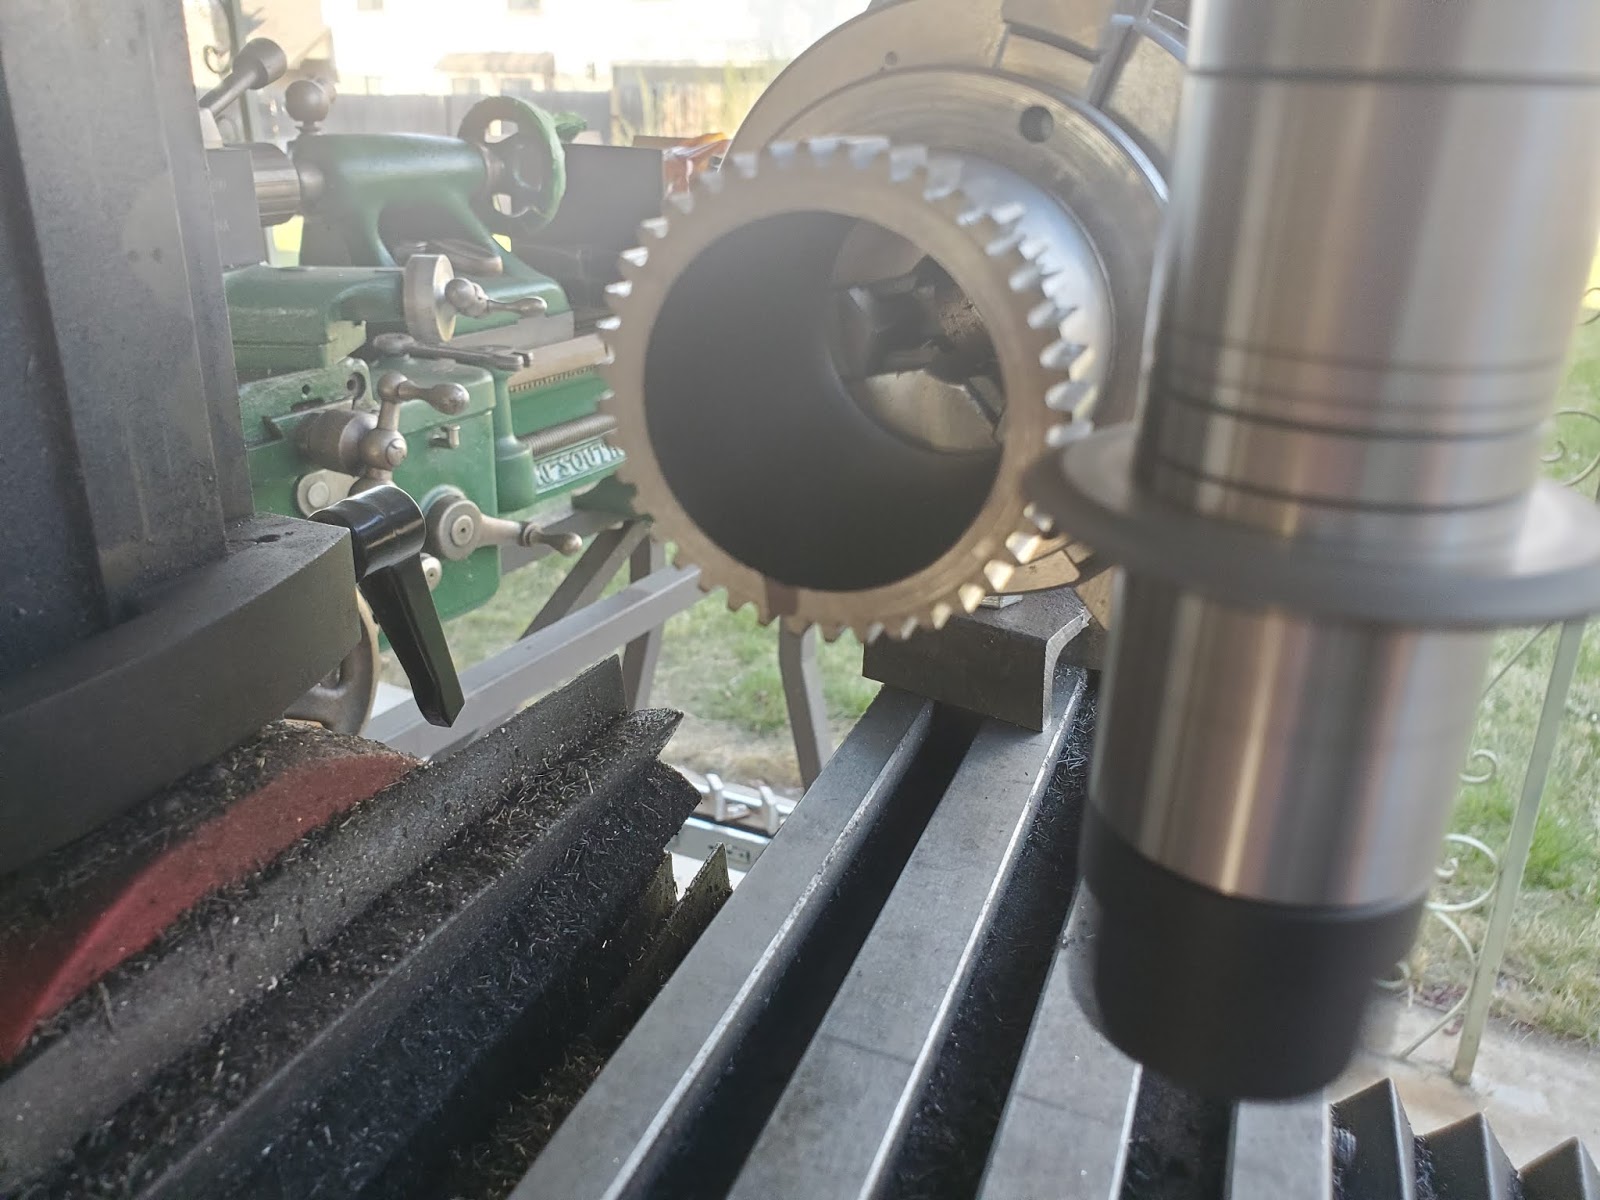
I managed to clock in my gear, cut it slightly deeper (I had it about 0.005" shallow), broach the keyway, and install it to my SB10L. First, get the gear axially centered on the dividing head :

20200420_180920.jpg


Next, use the mill to ensure you have the dividing head clocked in using the gear :

20200420_182504.jpg


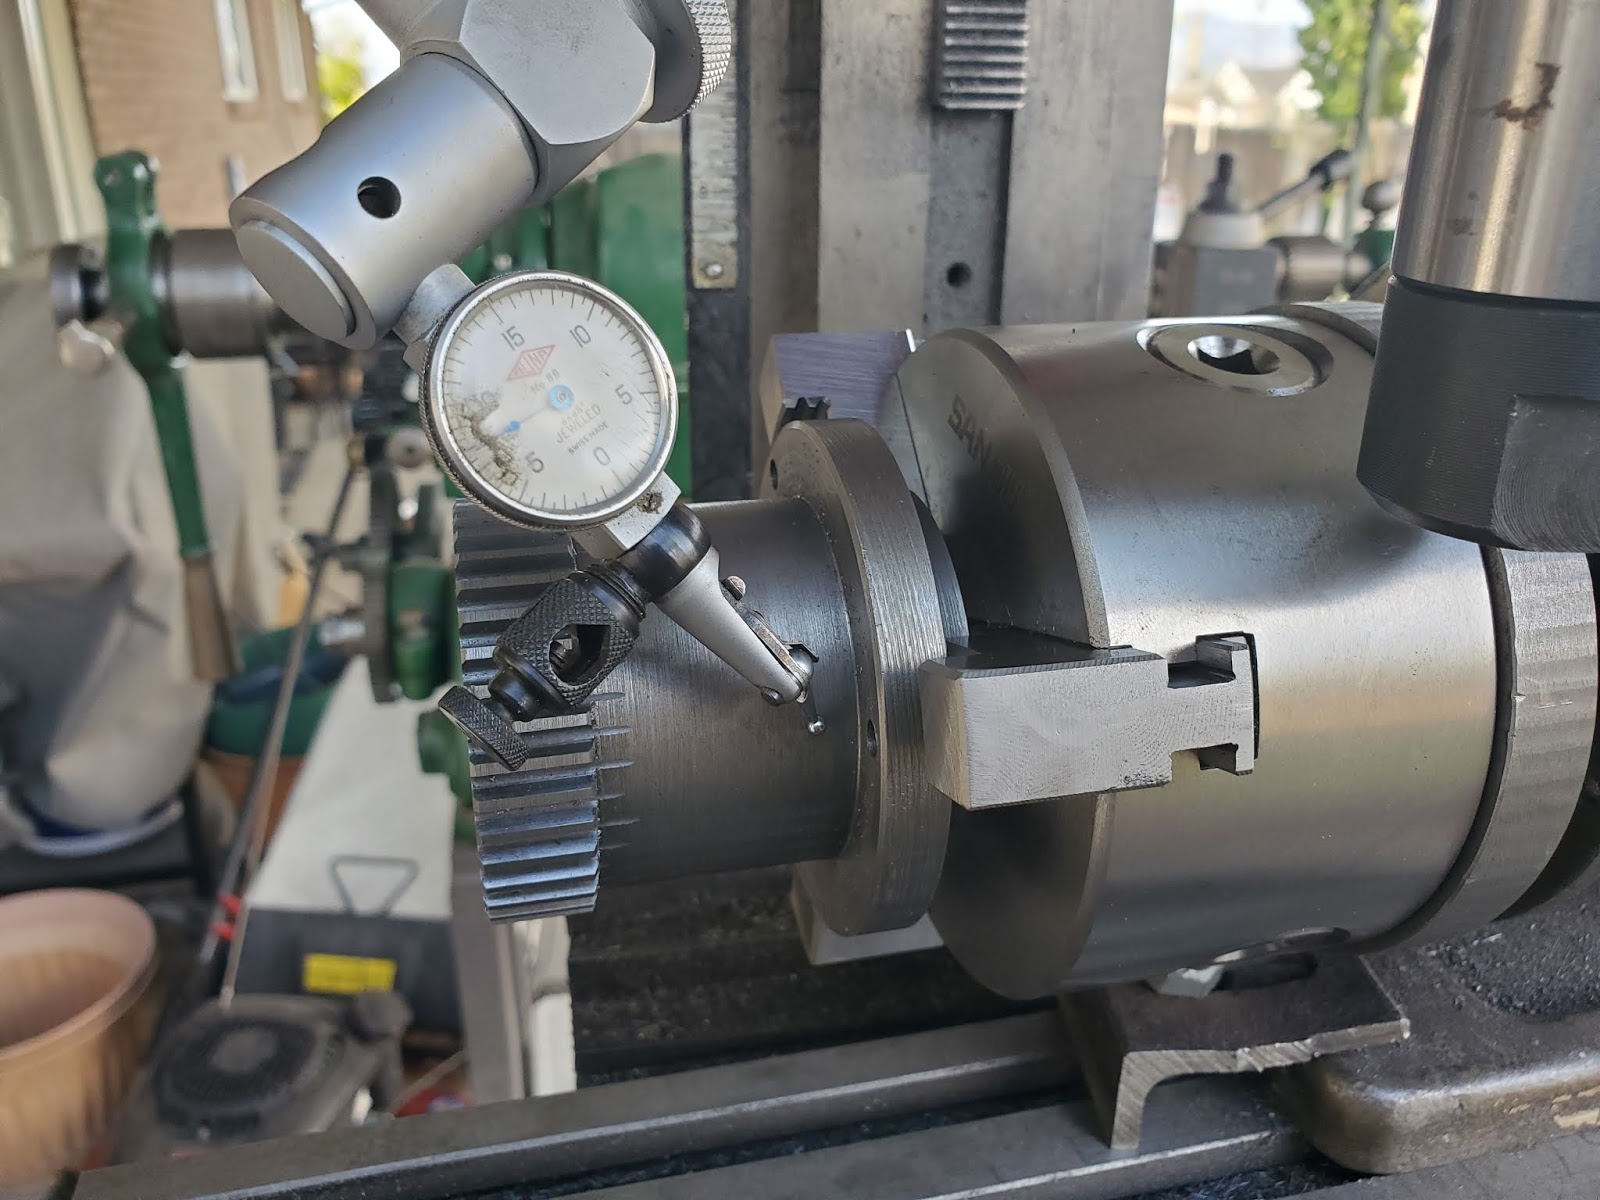
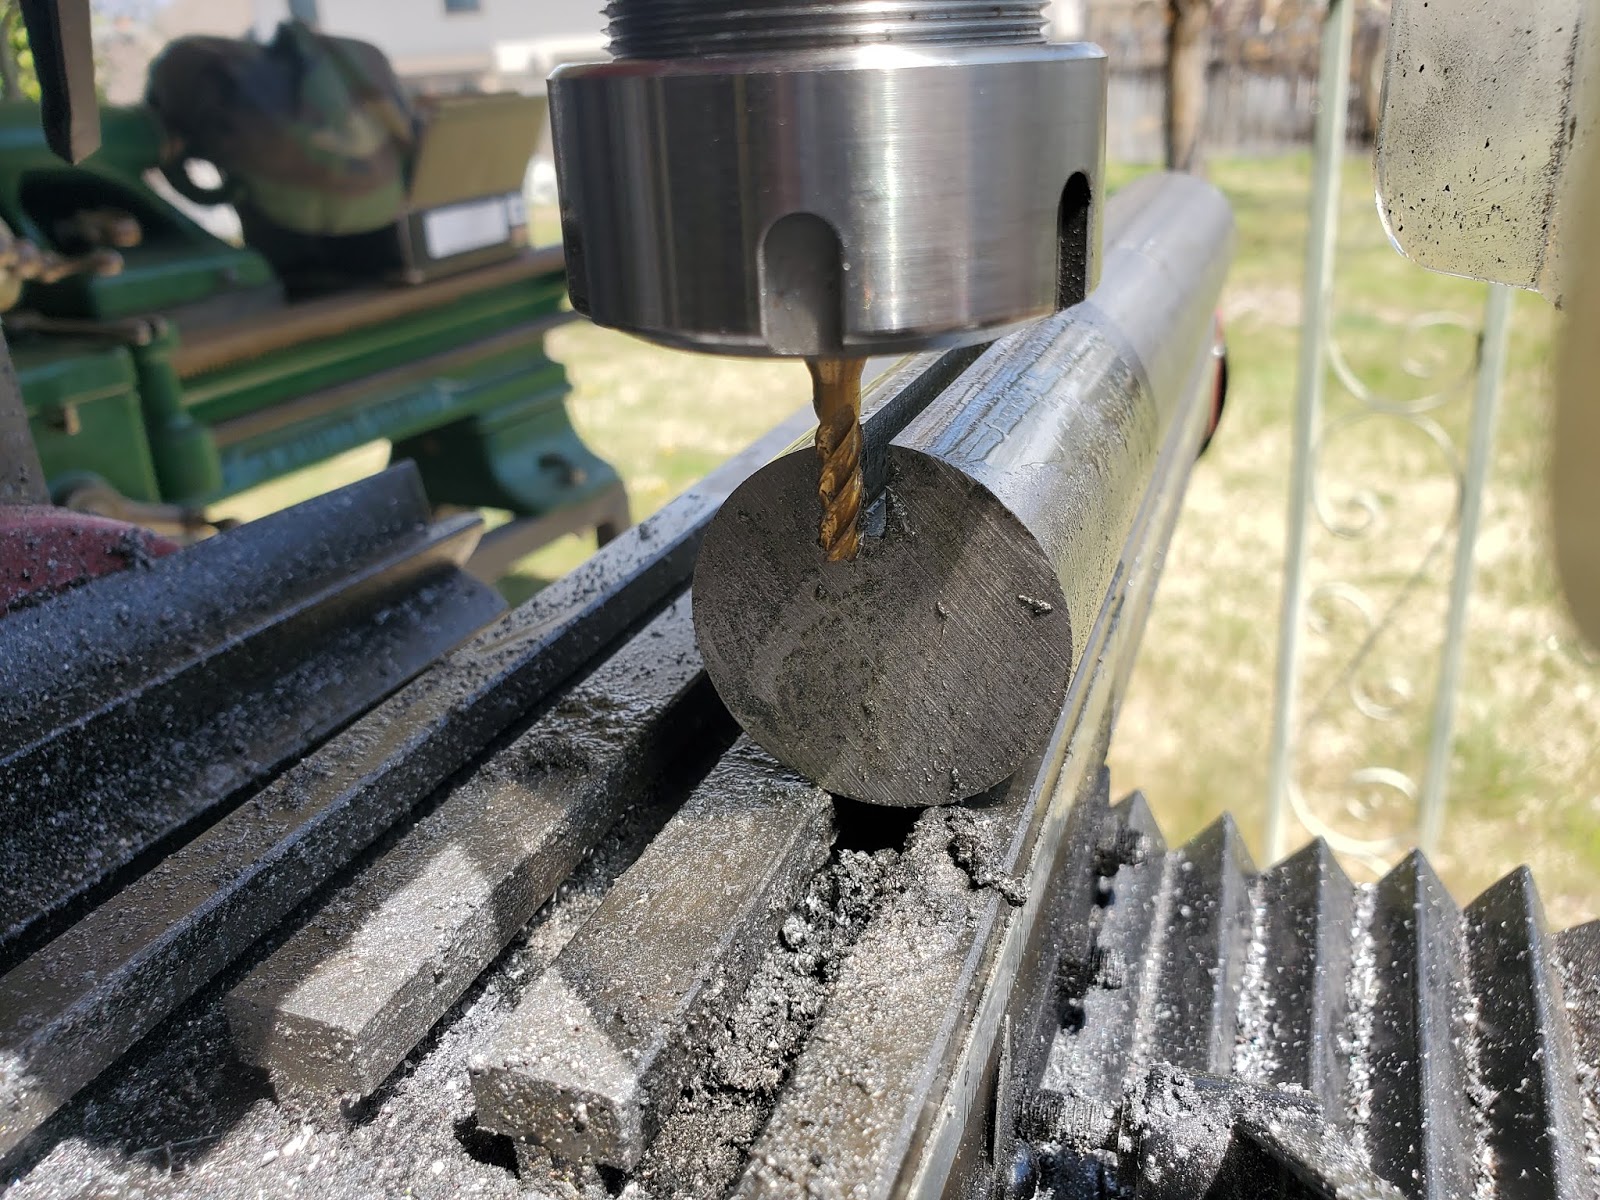
Then center the cutter on the gear body :

20200420_183104.jpg


Then free the gear from the chuck and turn it until you have it timed with a cut along with one of the holes on the dividing plate, and re-center on the dividing head axis (this ensures we are perfectly lined up). Now you can establish the proper depth of cut. I marked the slot with a sharpie on the end as well as the gear teeth grooves so I knew I had it right.

20200420_184408.jpg


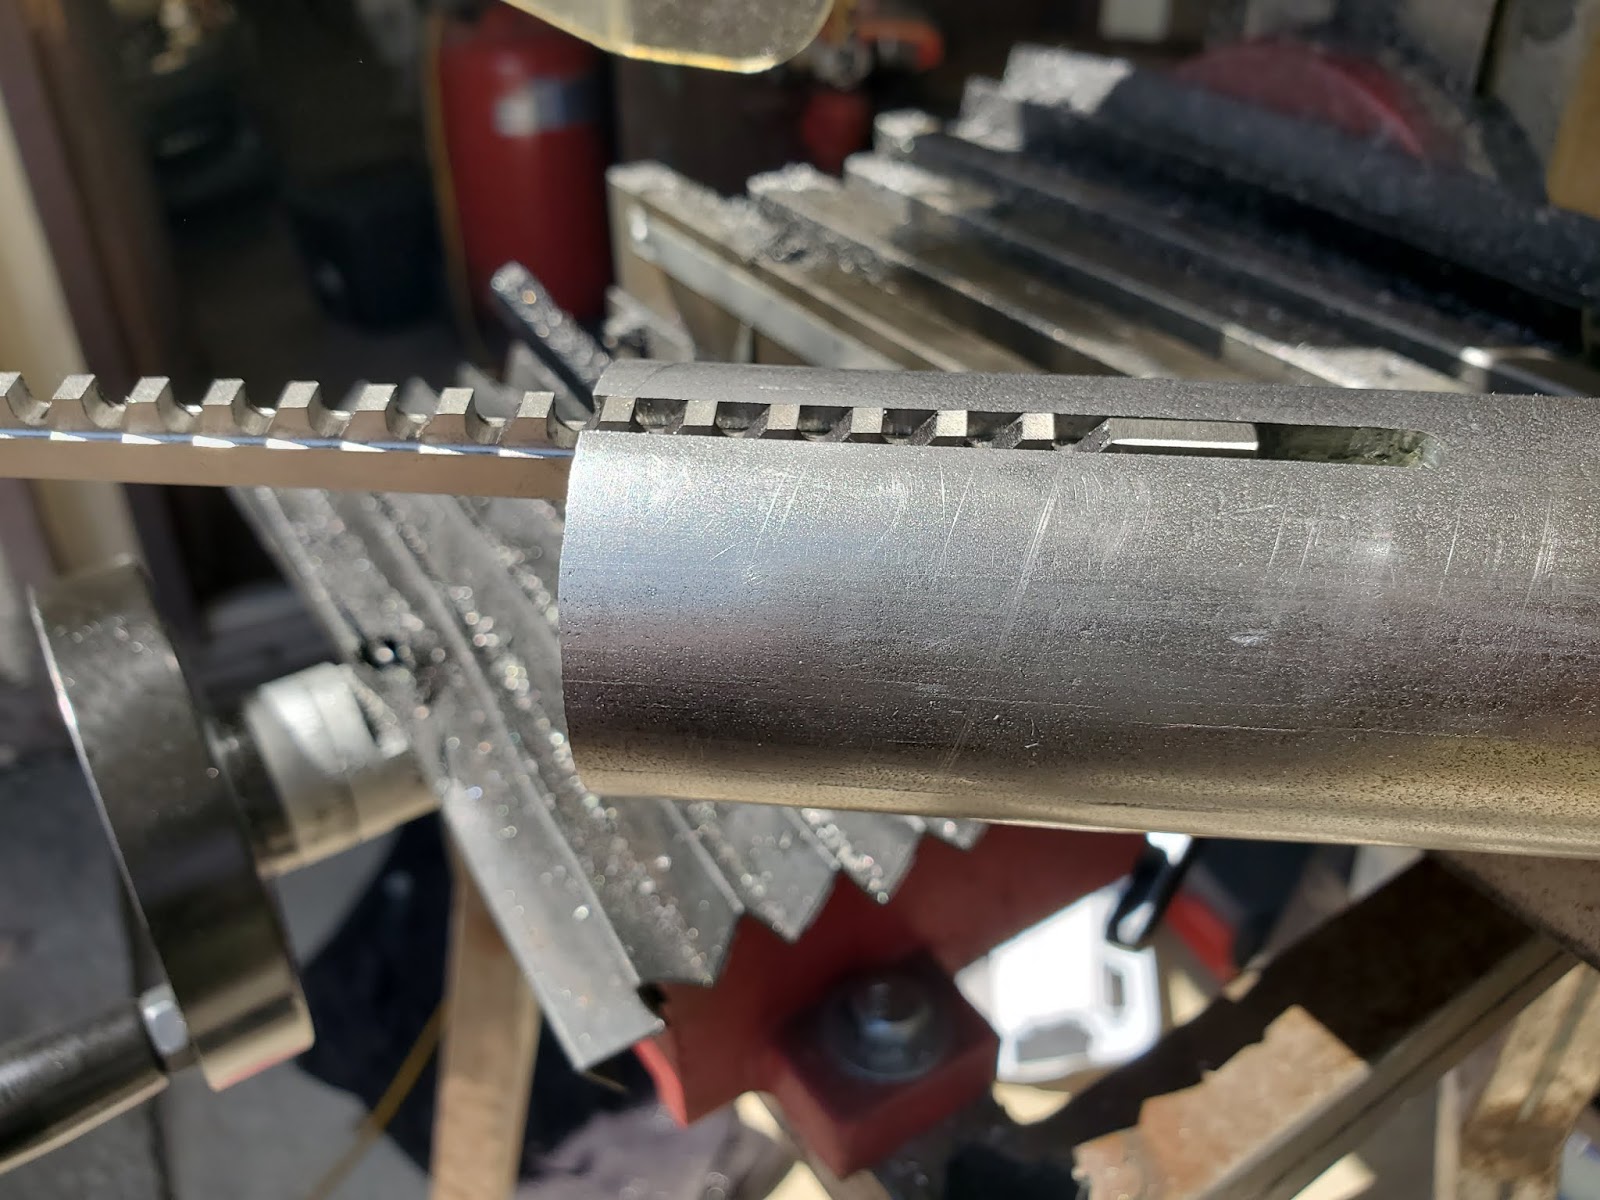
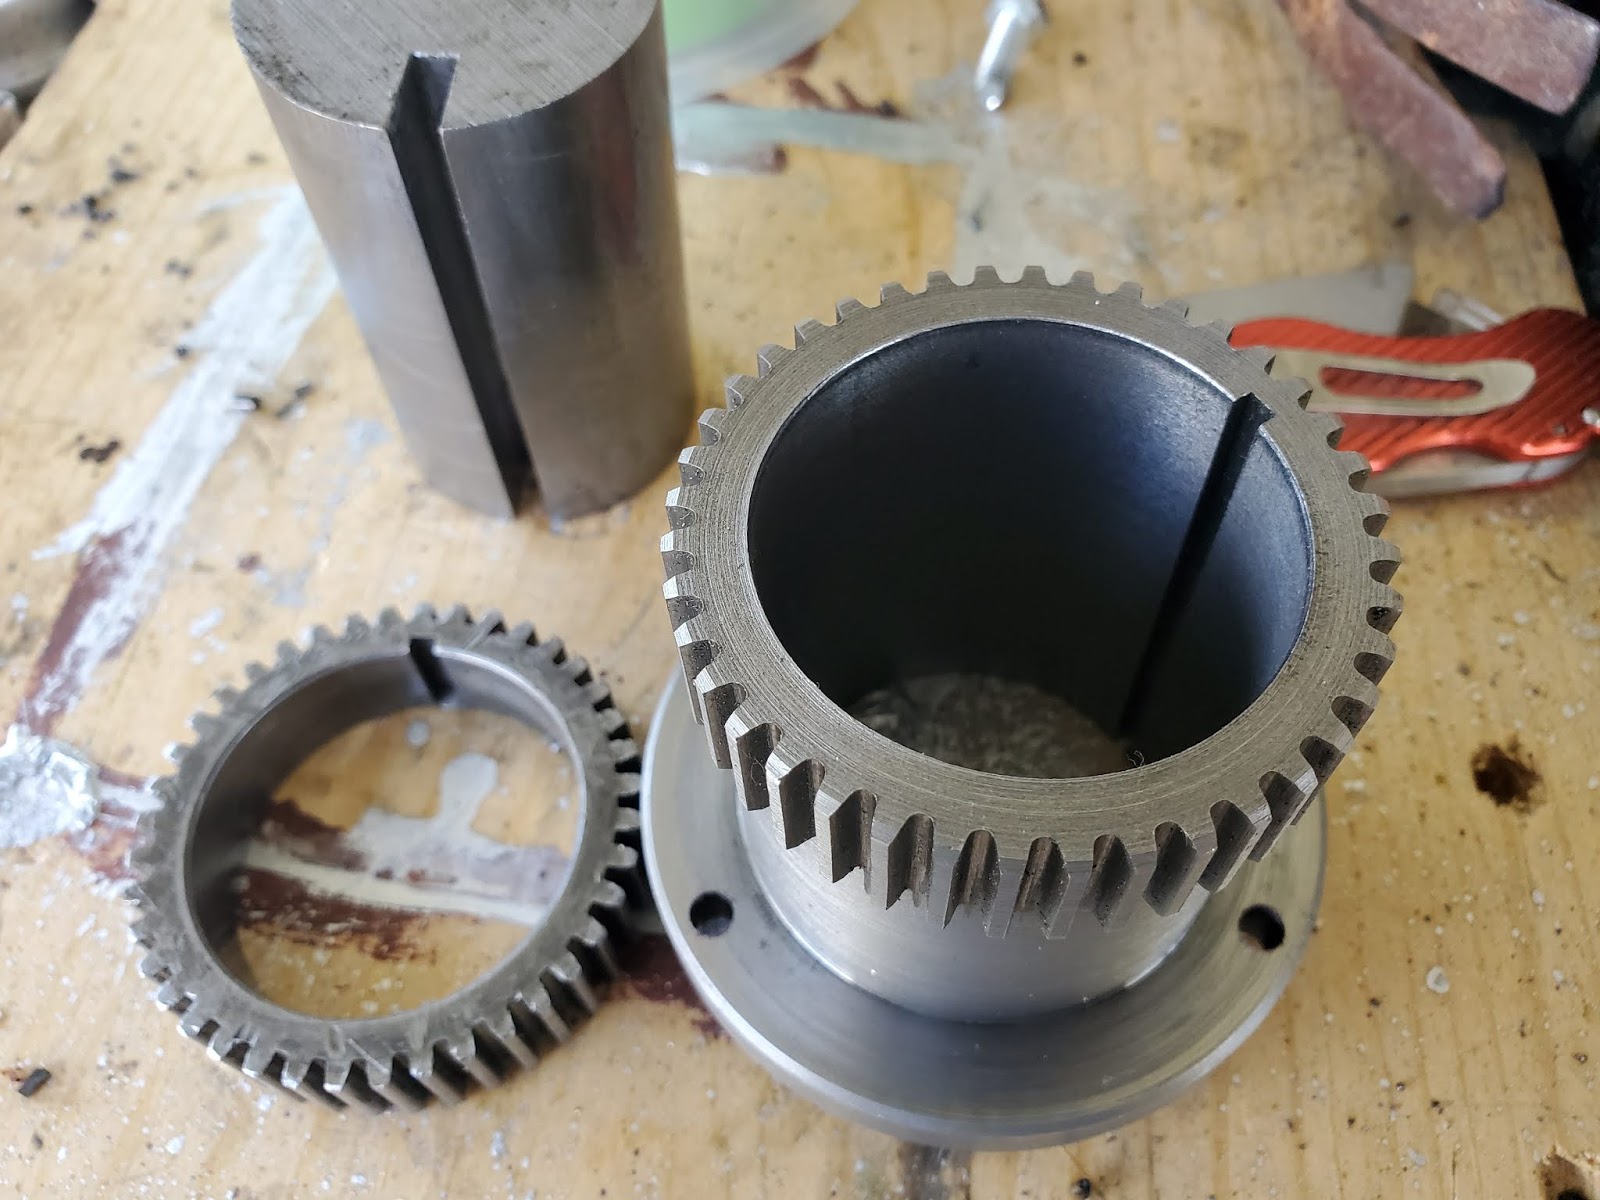
Then, took some 1.75" CRS and milled a 3/16" groove into it so I could use the 1/8" broach to cut the keyway.

20200421_140714.jpg


Check the fit for the broach :

20200421_140811.jpg


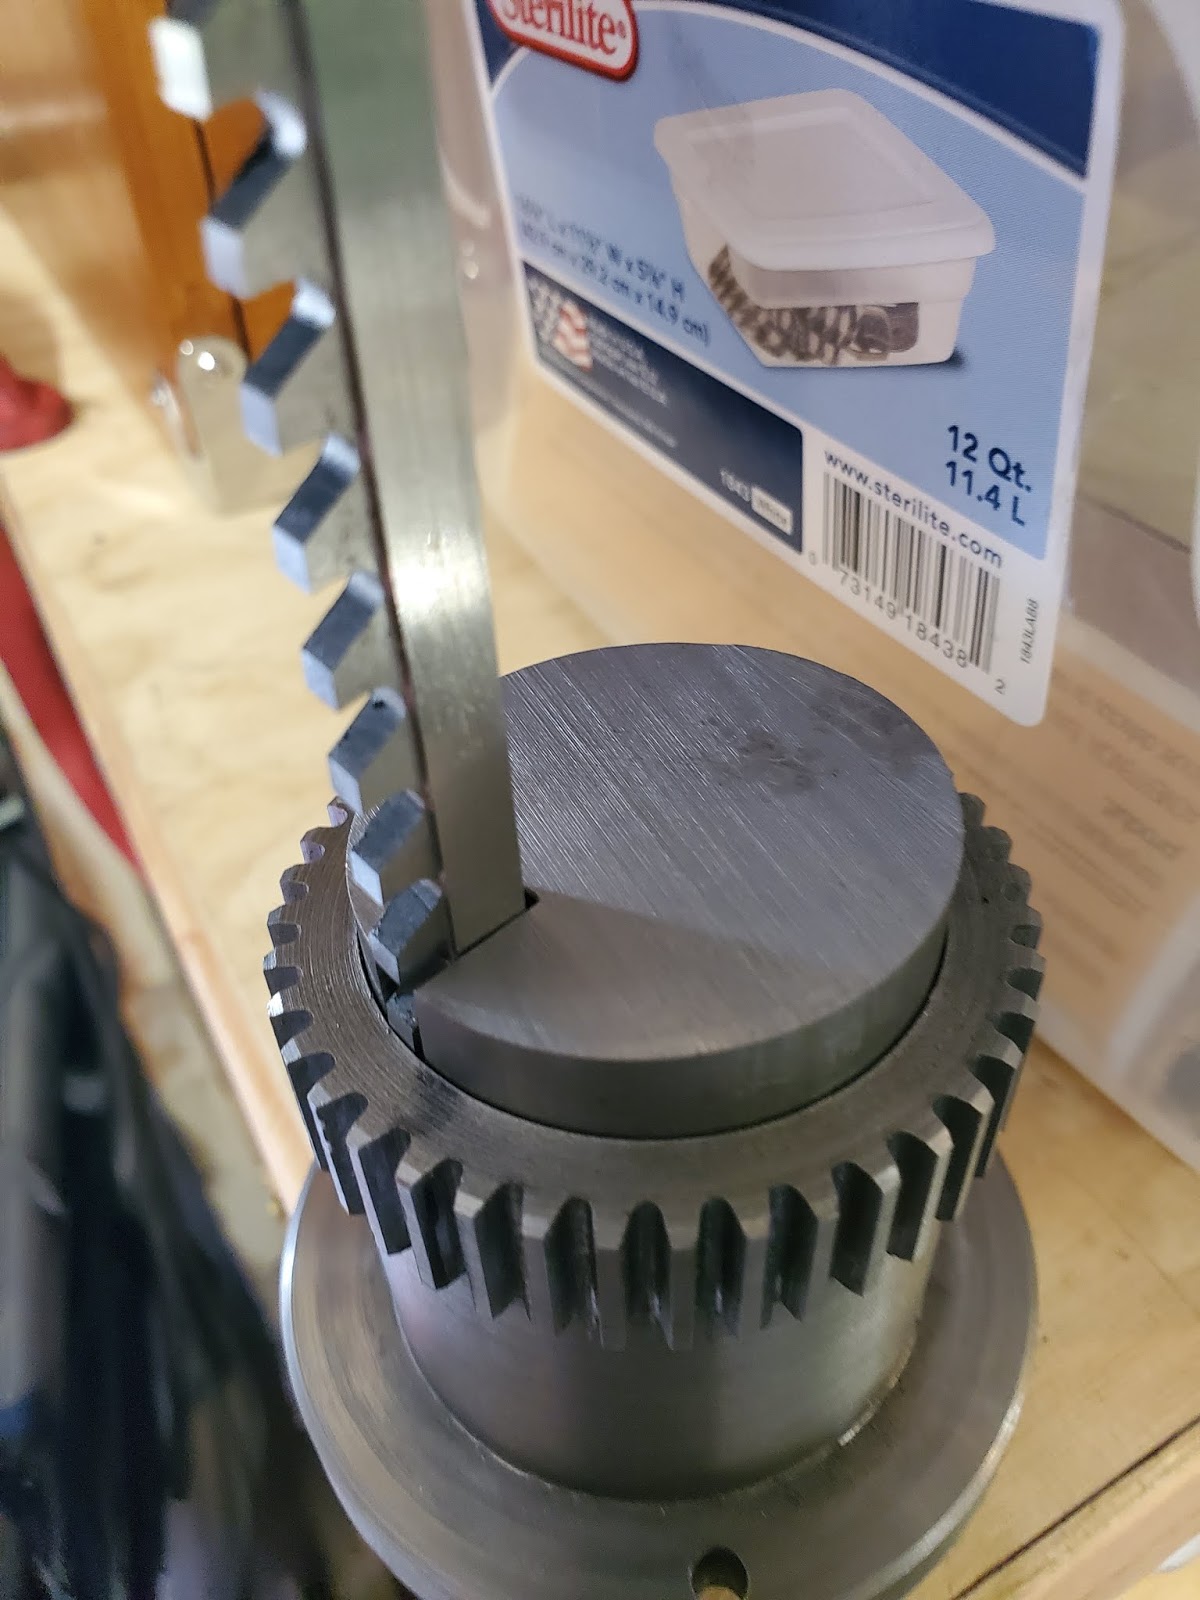
Slice it off in the bandsaw, file all of the edges off for a free sliding fit, and check again :

20200421_142926.jpg


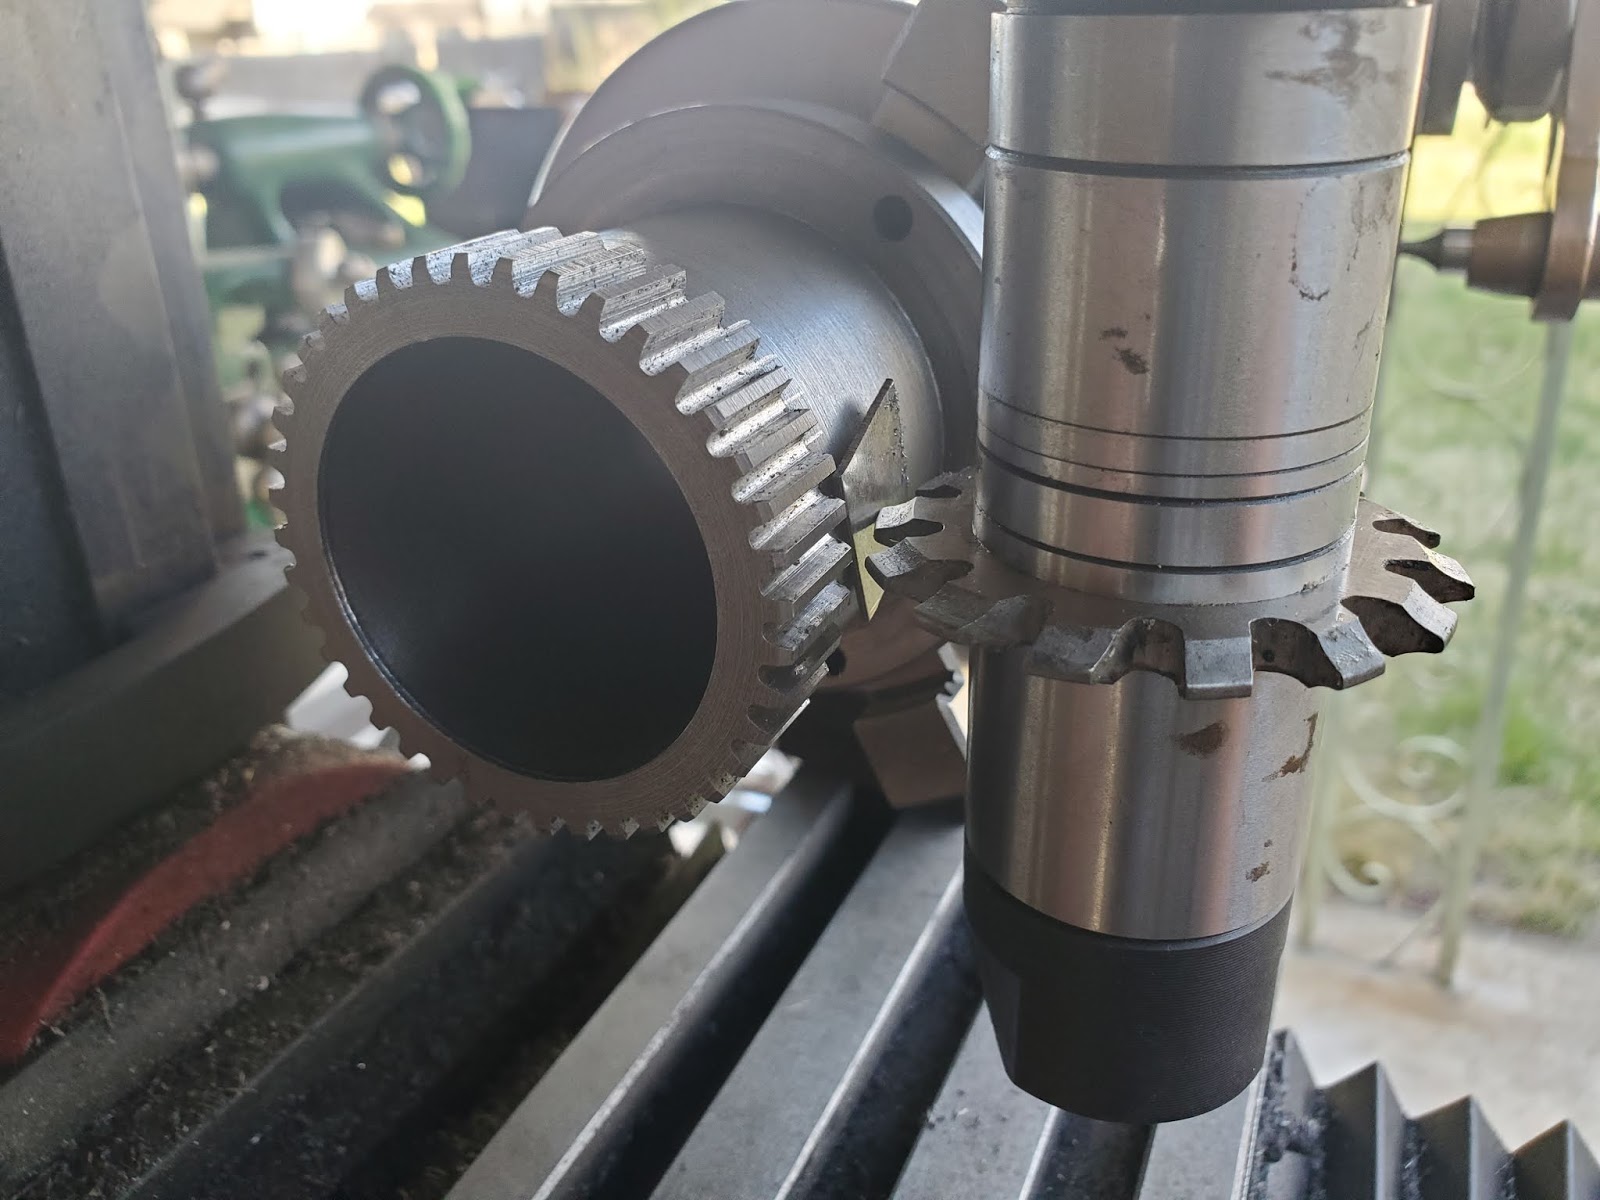
Broach it in the press, and then have what appears to be a successful gear :

20200421_164252.jpg


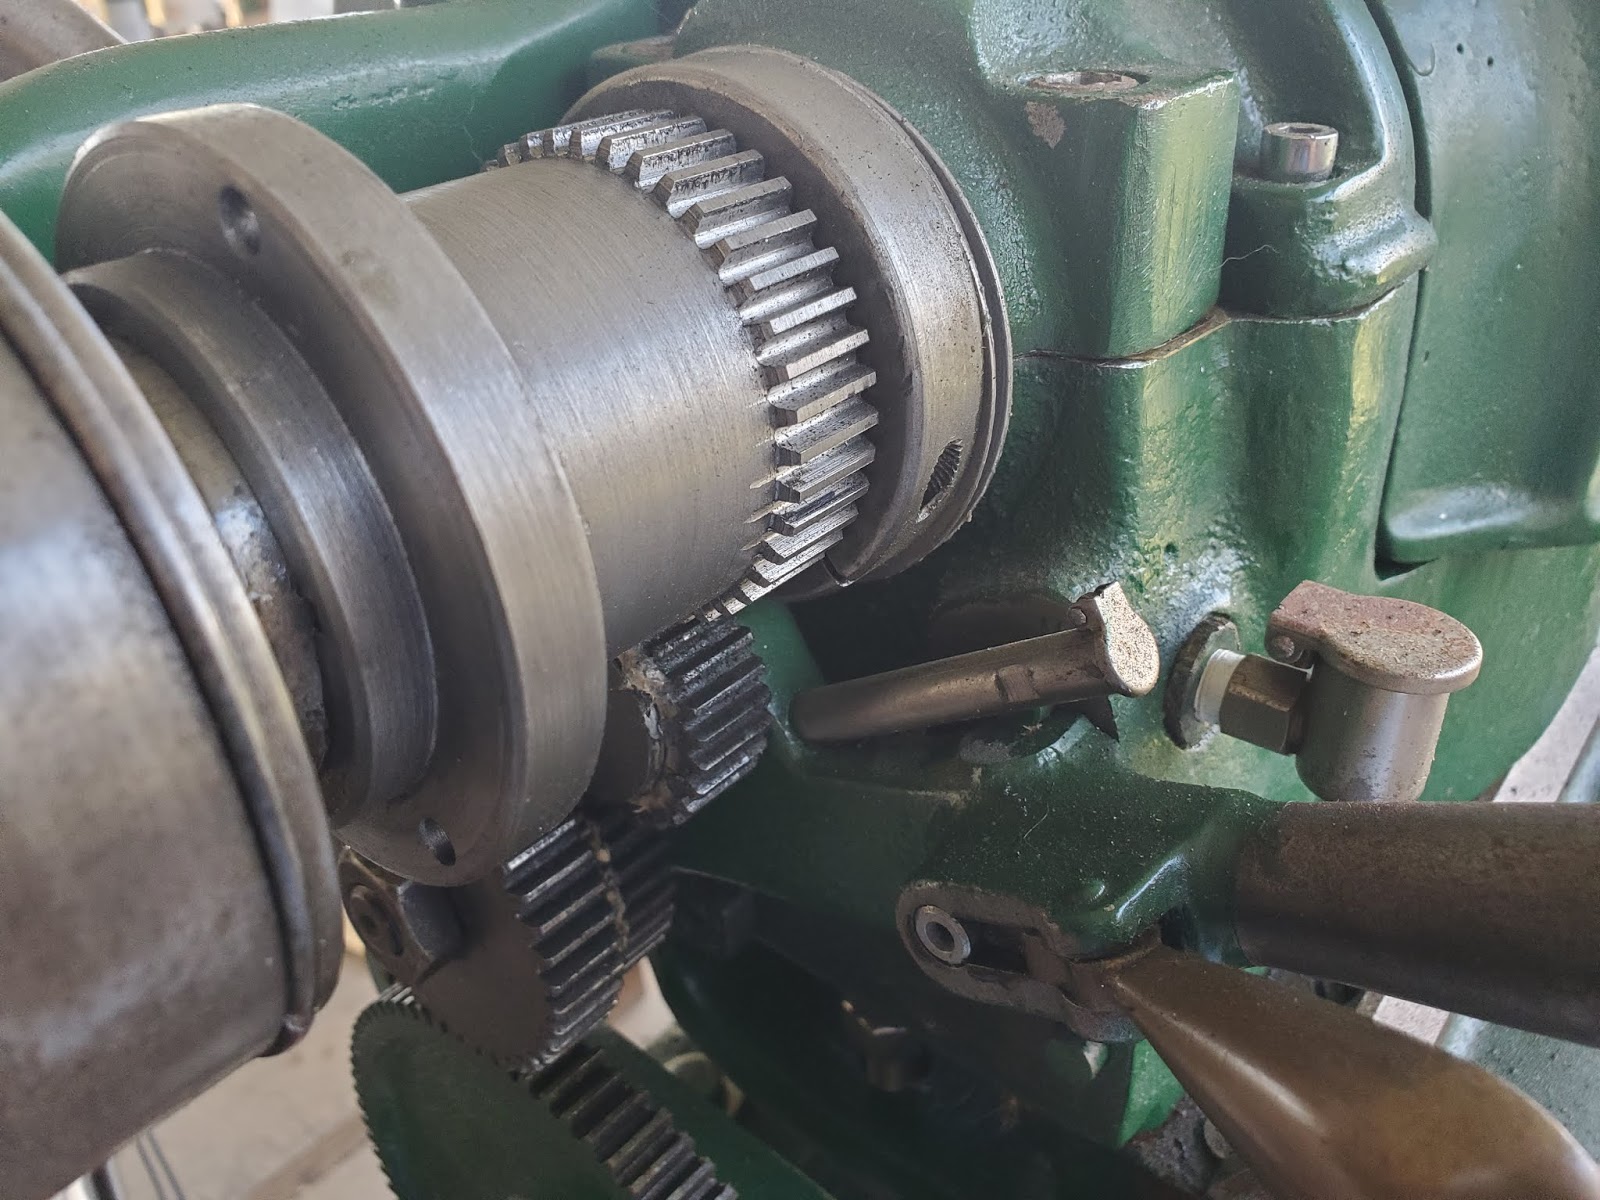
However, the proof is always in the pudding, so it was time to install it and see for real :

20200421_171750.jpg


It works great!
 
Back
Top