2020 POTD Thread Archive

More of a repurposed project than a build. I was given this rolling tool cabinet minus the wheels and one drawer guide was bent 90 degrees half way the length of the guide. I straightened the guide and purchased a set of casters. The top of the box is kind of flimsy so I made a frame from some 2x2x1/4 angle to bolt the bandsaw to and allow room for a chip pan. I also mocked up a stock support for cutting longer stock.
KIMG0101.JPGKIMG0104.JPG
Thanks for looking.
Jay
 
Got the idea from darkzero's 'Quickie Projects' thread to buy a couple of those plastic squeeze bottles with the needle tips. It didn't make sense to buy one or two - the price was fine, but the shipping about doubled it - so I bought a bargain priced set of five with different color caps. I used some more of my scrap 1/4" cast acrylic to make this rack for my most commonly used lubricants. I thought about putting tabs on the sides so that I could mount it on the wall, but it's very stable sitting on the shelf. That gives me the flexibility of carrying the whole thing to whatever piece of machinery I'm using.

Sometimes, you only want a dab, and these are just right for that. I color-coordinated the fluids to something approximating product label colors and made a strip on Excel that I taped to the front of the rack. At a quick glance, I don't need to worry about picking up the wrong lubricant. The strip is completely sealed with Scotch tape, but I suspect over time the oils will eat into it, and I'll need to replace it. Any thoughts on something more permanent?

Regards,
Terry

IMG_0763.jpg IMG_0764.jpg
 
When I bought the 1977 GMC motorhome the radio was shot and I replaced it with a current model 1-DIN in-dash unit.

After connecting it to the existing speakers it became obvious that one of them had been damaged as the sound was 'fuzzy'. So I acquired some JBL 3..5" 2- way units to replace the OEM equipment. Very limited space for the speakers in the first place and the new ones with their larger magnets and protruding tweeter meant the original bezel would not work.

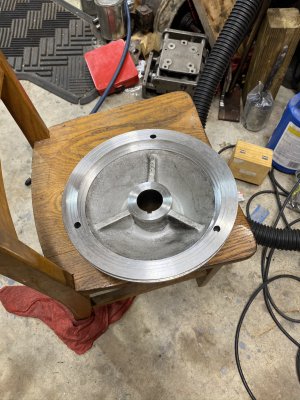
Here's what the OEM looks like: GMC_Spkr_00.jpg

There's the speaker, a light and a switch for the light.

Removing the bezel revealed a very small speaker that was pretty marginal as far as frequency response and power handling was concerned, plus one of the speakers had obviously been subjected to water damage to the cone and probably warped the voice coil.

OEM and replacement speaker shown here.GMC_Spkr_03.jpg

Rear view comparing old and new - note larger magnet:GMC_Spkr_04.jpg

So now off to measure the original bezel and make something to replace it. Got an opportunity to use the Sorenson Center-Mike to locate the 4 mounting holes and started programming the mill to cut some poly-whatever plastic stock to an appropriate shape and size.GMC_Spkr_07.jpg

After a couple of iterations and test-fitting into the motorhome I came up with this:GMC_Spkr_02.jpg

And the finished product looks like this:GMC_Spkr_06.jpg

The thickness of the material (1/4") and putting the speaker on the inboard side allowed the magnet to fit behind quite nicely.

Wider view:
GMC_Spkr_08.jpg

All in all, a mostly satisfactory outcome. Color doesn't match but works as an accent color like the window framing. First one took about 6 hours, #2 about 10 minutes start to finish.. Better sound (not great, what are we expecting from a 3 1/2" speaker?) Onward to the next project!

UPDATE:

After building the bezels for 3 1/2" speakers it was obvious that there was room for a slightly bigger speaker, going from 3.5' to 4" would give slightly better low frequency response. (specs say 75 Hz vs 90 Hz, every little bit helps).

So I ordered 4" speakers (JBL Boss 4020) and re-programmed the CNC for the larger opening and 4 mounting screw locations. The 4" speakers are slightly deeper than the 3.5" ones so a bit of 3/8" high density foam insulation between the new bezel and the coach headliner spaced them out and provided a bit more acoustical isolation for better low end response.

33% larger cone area definitely gives better acoustical performance and significantly less distortion than the waterlogged original speakers!

Photo shows comparison of two units. Almost looks like a 5" speaker might fit but that would significantly thin the web of the bezel and probably not a good thing in an automotive (vibrating / shaking) environment. Also a 5" is too deep to clear without interference with the coach body. Oh well.

GMC_SpeakerComparison3-4.jpg
 
Last edited:
Having a "thwacker" on the drawbar wrench is indeed handy. Here's one I cobbled up for my mini-mill a few years ago. Just a squarish chunk of aluminum held to the drawbar wrench with a hose clamp. Having the "hammer" next to the box end of the wrench means that I don't have to reverse the wrench to use it as a thwacker.
kHPIM2893.jpg
kHPIM2894.jpg
 
When I bought the 1977 GMC motorhome

What a great save for the speaker and enclosure. Looking forward to more pictures on your vintage motorhome refurbishment.
 
Having a "thwacker" on the drawbar wrench is indeed handy. Here's one I cobbled up for my mini-mill a few years ago. Just a squarish chunk of aluminum held to the drawbar wrench with a hose clamp. Having the "hammer" next to the box end of the wrench means that I don't have to reverse the wrench to use it as a thwacker.
View attachment 326910
View attachment 326911
I actually intentionally covered my box end using it for the bolt holding the chunk of brass. That way I’ll never leave the wrench on the mill and forget it’s there.....then hitting the start button. Trust me...it’s ugly and scared the living hell out of me when I did that on my RF-45.

so if all I have is the open end side...all the better for my absent mind.
But...to each there own. Lathes actually don’t bother me. I’m pretty good about not starting it up without first checking everything out. Making sure there won’t be a crash. So I removed those springs from my chuck keys which prevented the key from staying in the chuck. They aggravate the hell out of me when I’m using them. Especially when zeroing in a 4-jaw chuck.
anyway....for some reason mills are different and I tend to forget about the box wrench on the drawbar. I guess because it’s-above eye level.
 
I can certainly relate to your concern about leaving the wrench in place! On my mini-mill, the wrench is very visible, plus the motor is not very powerful, so it's never really worried me.

My RF-30 clone is another matter. I'm TOTALLY paranoid about the possibility of leaving one or both of the spindle/drawbar wrenches in place after tightening the drawbar nut! Luckily, it's not happened yet. And if I continue to be careful enough in the future (knock on wood), and always look at the tool board before hitting "Start," I won't be getting a 1 ½ horsepower surprise - especially since the wrenches are often right near the level of the top of my pointy little head!

kHPIM0062.jpg

kHPIM0065.jpg
 
Hman...I like your spline wrench. My RF45 clone has same sort of setup requiring a spline wrench to hold the arbor spline for drawbar loosening and tightening. I ended up finding one from Grizzly. Anyway.....to drive my point.....I left that box wrench there and started the mill. Oh my God !!
It was loud as hell and scared the crap out of me. I think I spent the next hour checking to see if I damaged my spindle/ quill.
Anyway....that’s where my head was at just doing away with my box end. FWIW....my Millrite has a pulley lock. There’s a pin that slides into the big step pulley. Locks the spindle so I only need one wrench to lock or unlock the drawbar. It’s a very handy design. And even if the pin is left engaged and the motor gets started.....no crash. The belt just slips. I’ll try to show a picture of the locking pin itself... but here’s a picture of the pulley. You can see the three holes where the pin slides up to lock the spindle.
 

Attachments

  • A5FA2352-94AA-4298-BE1B-133F3CDB6895.jpeg
    A5FA2352-94AA-4298-BE1B-133F3CDB6895.jpeg
    872.8 KB · Views: 73
Having worked with power machines literally since before I started school, the concept just sort of "is there". Sort of like spinning the lathe by hand before starting. I won't say I've never left something but I can't remember having done it. It's been 65+ years since I first used a riding lawnmower, but I may miss a wrench this afternoon. There's always a first time. . .

.
 
It one of the big benefits that switching to a collet chuck, once installed, all of the tightening is done on bottom of the spindle, right in front of you.
 
Back
Top