Clausing 5428 rebuild

I looked at the first picture of your bed and yeah... it’s rough. But don’t get discouraged. My first semi-real lathe was a 90 y/o SB model C with a bed twice as bad as the way your bed looks. Th apron crank was trashed. Anyway after tweeking and replacing the apron with an EBay apron....that little 9” SB is a surprisingly good lathe. It’s not perfect, but can make very nice parts.
Your Clausing will be much more ridgid than a South Bend 9”
I’d Concentrate on the cross-slide and compound. Make sure the lathe is leveled. Ignore the cosmetics of the bed for now. Unless of course you’re building stuff for NASA.
PS.... I’d use mineral spirits or diesel fuel. In my opinion...Coleman fuel is too volatile....too dangerous to use around a shop. I had a friend who used gasoline to clean a wood floor in his utility room. Long story short is that the water heater ignited everything and he was burned and scarred from head to toe. Stuff happens. No need to tempt fate.

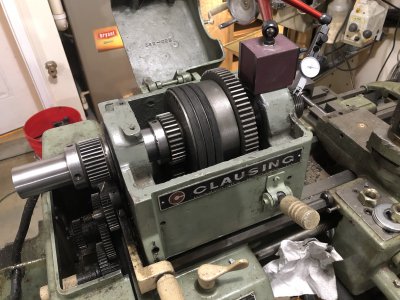
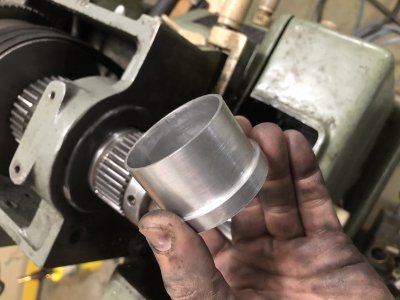
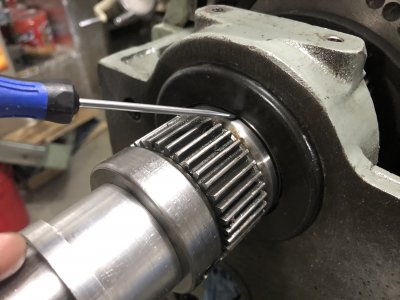
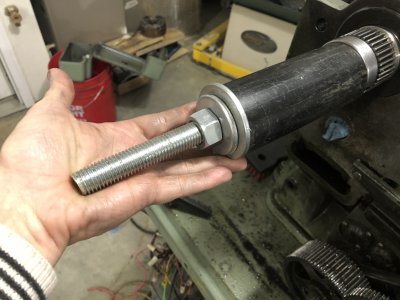
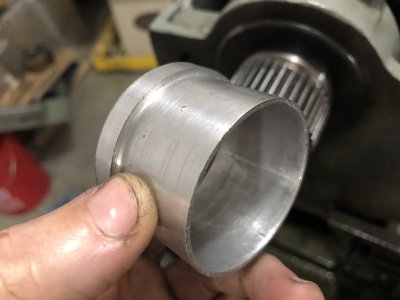
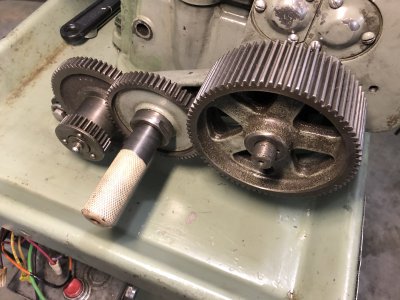
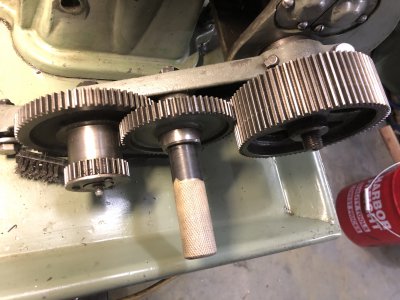
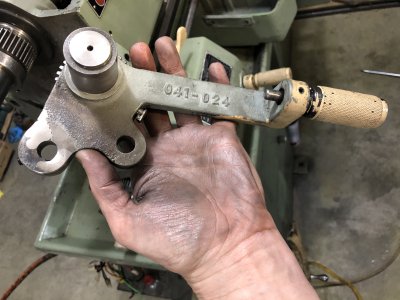
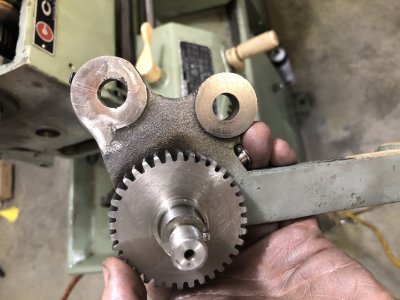
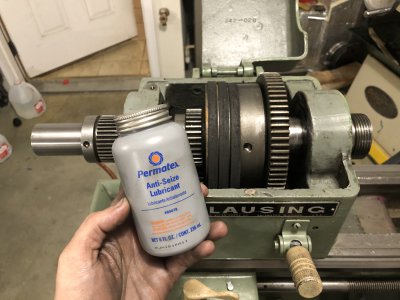
Thanks, I’m now working on getting the headstock back together to get a good evaluation of the spindle. Then I’m going to level the bed and see how it cuts. First things I need to make are new bushings for the back gear, and a new cross slide nut.

Yeah, I’d never use Coleman fuel, it’s just WAY too volatile. I’m using a mix of spray on engine degreaser to dislodge the grease, and heated water based HF degreaser to scrub it away. When I get a parts washer, I might switch to the petroleum based parts cleaner at Tractor supply, I hear it works well, and has a very high flash point so it’s designed to be safe as possible for a hydrocarbon.

If everything else checks out OK, I might take the bed up to Milwaukee to get it ground and then scrape the cross slide, head and tail stocks to the ground bed.
 
Made an alignment bushing on the mill rotary table to align the dust cover inside the outer bearing cover. This dust cover ring hangs down and slides on the spindle. Problem was that that when I was pulling the spindle back in, this cover would catch on a ledge on the spindle and you couldn’t pull the spindle in any more. So I made this bushing that’s the exact height of that ledge on the spindle to prevent the cover from catching on it.

I pilled the spindle in with a piece of 3/4 all-thread as a puller. I don’t want to use the rear bearing collar as this would put a lot of wear on those threads.

First you have to pull the main drive gear on, used some wood to block the gear and pulled the spindle in with the all-thread. Used a chunk of pipe to press on the rear gear which presses on the rear bearing. Then once the main gear is seated, took out the wood and pulled the rear bearing on, continued with the all-thread. Here is where the bushing comes into play to lift up the dust cover in the rear bearing to keep it from hanging up on the spindle ledge.

Then when the spindle was in all the way, removed the bushing and installed the outer gear and collar.

I used Anti-Seize to help the gears slide on the spindle, as I have to pull the spindle back out anyway to fit the new bushings I’m making and fit new drive belts.
 

Attachments

  • 2A71B659-0707-4709-875D-035EBD0BC222.jpeg
    2A71B659-0707-4709-875D-035EBD0BC222.jpeg
    3.1 MB · Views: 18
  • DF4ECD47-4B52-4C7A-8F10-35335BD174C3.jpeg
    DF4ECD47-4B52-4C7A-8F10-35335BD174C3.jpeg
    2.5 MB · Views: 17
  • 33E831D6-79C6-4301-8445-C31289DA5B7E.jpeg
    33E831D6-79C6-4301-8445-C31289DA5B7E.jpeg
    3.3 MB · Views: 16
  • B3CD5456-3735-43C3-915F-AE3ADD334021.jpeg
    B3CD5456-3735-43C3-915F-AE3ADD334021.jpeg
    2.7 MB · Views: 16
  • A04CB1BE-4E2A-4335-AD03-6AC34600C415.jpeg
    A04CB1BE-4E2A-4335-AD03-6AC34600C415.jpeg
    2.9 MB · Views: 16
  • 3B0BA3DB-E35D-45B5-BDEE-08D4FE1880B5.jpeg
    3B0BA3DB-E35D-45B5-BDEE-08D4FE1880B5.jpeg
    2.3 MB · Views: 20
Did some more clean up on the gear train. I can’t stand working on greasy nasty machines, so I just had to get this mess cleaned up. Sprayed it all down with engine degreaser, then used water and water based degreaser in our steam cleaner to clean off the gear train and head stock. Cleaned off all the removable bits in a heated bucket of water based degreaser.

Had another nasty surprise. Some idiot busted the feed reversing gear lever. Seriously, HTF does one break something like this, how, how??? It’s was broken and welded together at some point.

Anyway, at least it’s cleaned up and can see what you’re working on instead of digging though grease.
 

Attachments

  • B1A906F2-BB7F-48F7-A1F3-FFCD65D3ECDF.jpeg
    B1A906F2-BB7F-48F7-A1F3-FFCD65D3ECDF.jpeg
    3.3 MB · Views: 20
  • 23F18F3E-592F-489C-B7CF-A65DFE3E52CE.jpeg
    23F18F3E-592F-489C-B7CF-A65DFE3E52CE.jpeg
    2.8 MB · Views: 20
  • 71D37A2B-AD02-44D6-8085-9CF023206469.jpeg
    71D37A2B-AD02-44D6-8085-9CF023206469.jpeg
    2.9 MB · Views: 20
  • BBB44DDC-F49A-4D56-BB9F-B75F87A4FDD6.jpeg
    BBB44DDC-F49A-4D56-BB9F-B75F87A4FDD6.jpeg
    2.7 MB · Views: 22
  • B6214720-9389-4502-B078-1B99525B118C.jpeg
    B6214720-9389-4502-B078-1B99525B118C.jpeg
    2.9 MB · Views: 21
  • B7584DFD-6368-4A94-BFEC-F133C426F948.jpeg
    B7584DFD-6368-4A94-BFEC-F133C426F948.jpeg
    3 MB · Views: 22
  • 7A99B132-5712-4B92-B2D3-91099D617CF6.jpeg
    7A99B132-5712-4B92-B2D3-91099D617CF6.jpeg
    2.8 MB · Views: 26
Did some electrical today. Tried to figure out this wonky dual winding single and phase motor and this drum switch.

Factory wiring diagram isn’t much help because someone replaced the drum switch.

Made this pretty cool mounting plate out of 1/4 plate, tapped a few holes to mount the switch.

Before the switch was literally just hanging there.
 

Attachments

  • D4DD30DA-7F11-4F78-A444-C8418DD4DA8B.jpeg
    D4DD30DA-7F11-4F78-A444-C8418DD4DA8B.jpeg
    2.7 MB · Views: 14
  • 862C6BCB-ACD7-4AFC-825F-894721E9BC1F.jpeg
    862C6BCB-ACD7-4AFC-825F-894721E9BC1F.jpeg
    3.1 MB · Views: 11
  • 63856032-7371-4AE2-8556-C43D1B9ABA07.jpeg
    63856032-7371-4AE2-8556-C43D1B9ABA07.jpeg
    2.6 MB · Views: 10
  • 410163F3-0432-4035-B809-C11FB92FFA63.jpeg
    410163F3-0432-4035-B809-C11FB92FFA63.jpeg
    3.3 MB · Views: 10
  • 7765C244-E8A7-4BB1-BE1E-3B73C793F975.jpeg
    7765C244-E8A7-4BB1-BE1E-3B73C793F975.jpeg
    2.2 MB · Views: 11
  • 0C236665-B8F4-45BD-8A49-D688D9C775B0.jpeg
    0C236665-B8F4-45BD-8A49-D688D9C775B0.jpeg
    3 MB · Views: 18
I have a 1-1/2 hp single phase on my Clausing. I replaced the bearings and painted it. I took a couple of pics of the wiring diagram if you need it. FWIW, my Clausing was made @ 1972E34DB6D7-2536-4E26-A953-84C728A47A6E.jpeg
 
Last edited:
If you need, I can take a couple of pics of my drum switch too. But it’ll probably be a day or so before I can do that.
 
If you need, I can take a couple of pics of my drum switch too. But it’ll probably be a day or so before I can do that.

Thanks, but all motors are different. I think I’ve got it figured out based on the Dayton and barrel switch schematics.

LOL, when I first got it, they had wired twisted together and wrapped with masking tape .

At least this does seem to have a pretty new Dayton 1 HP motor though.


Sent from my iPhone using Tapatalk Pro
 
Got most of the underdrive re-assembled. Installed the motor on these rubber vibration isolation mounts to quiet this cheap motor down.

This Clausing is the craziest design ever, took forever to get all those hanging rods lined up.
 

Attachments

  • A3AAEE35-472A-48F5-951F-FB05C966C1AB.jpeg
    A3AAEE35-472A-48F5-951F-FB05C966C1AB.jpeg
    2.8 MB · Views: 18
  • 29A1E19D-AC5C-469D-95D9-31C921B18F2B.jpeg
    29A1E19D-AC5C-469D-95D9-31C921B18F2B.jpeg
    2.7 MB · Views: 18
  • 1B5254A1-DCA0-4F92-BD33-B7922CD77AE6.jpeg
    1B5254A1-DCA0-4F92-BD33-B7922CD77AE6.jpeg
    2.6 MB · Views: 18
  • 2DE5BE80-80AC-4949-AFC7-83616220A7BE.jpeg
    2DE5BE80-80AC-4949-AFC7-83616220A7BE.jpeg
    3.3 MB · Views: 20
Got the motor mounted on rubber vibration isolation mounts, and what a massive difference. Sure quieted down the noise amazingly. Eventually I'm going to get a 3-phase motor and VFD, but just want to get it going for now.

Here's a vid of the motor running, compare this against the previous videos.

 
Back
Top