Edwards Radial 5 build thread --- PHOTOS!

Episode 18 || Rocker Brackets

Short one today.

The rocket brackets were straightforward to make. They’re attached to the heads with one #4-40 SHCS each, located (and counterbored) just beneath the rocker.

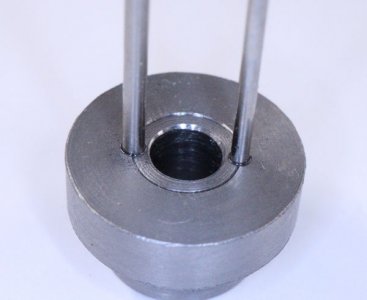
My Fusion 360 model doesn’t have the rocker shaft, but it’s a 1/8” headed dowel pin --- a so-called ‘captive pin’ --- which I purchased from McMaster. See also my post from a few days ago about why I chose to go this route.
1643431718484.png 1643431732672.png


I started with a chunk of 7075 aluminum big enough to get all the brackets. With the overall block of aluminum milled to the correct overall dimensions, I just hack-sawed a slab for each of the brackets, then milled each of those to final size.
1643431753395.jpeg 1643431772026.jpeg


Then I milled the radius (using an ‘arc’ routine on my 2-axis CNC-lite Bridgeport) and drilled/reamed the 1/8” hole for the rocker pin.
1643431793368.jpeg 1643431807977.jpeg


After milling out the middle section for the rocker, I drilled and counterbored for the #4-40 SHCS.
1643431829259.jpeg 1643431844184.jpeg


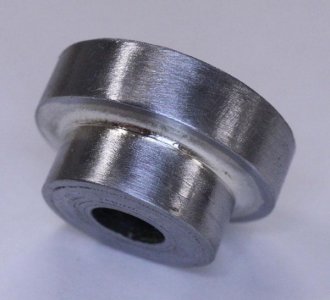
A bit of clean-up and debur and they’re ready to mount on to the heads. These are pretty tiny --- 1/4” thick x 1/2” wide.
1643431867502.jpeg 1643431881039.jpeg


As a side note, the finish on the rocker arms is atrocious. I intend on cleaning that up with some emery cloth / files at some point. But there’s a pretty fair likelihood that I won’t end up doing that. We shall see.

Also, I don’t really like the looks of how the rocker brackets extend out past the heads like they do. They just look scabbed on there to me. I’ve thought this since I started the build but figured I’d make a design change when the time came. Well. That time came and went, and I ain’t gonna change it.


TIME ON ROCKER BRACKETS: 9 hours
CUMULATIVE TIME: 353 hour
s
 
Buy the Micromesh starter sandpaper pack and polish those rocker arms to a mirror finish.


If their 12,000 grit sandpaper isn't enough they have 2 levels of polishing sanding liquid also.

One of my sons won 1st and second place a couple of years as a cub scout in the big boy scout pinewood derby contest largely due to his polished axles. I have a little Unimat lathe that would be perfect for polishing those arms.
 
What airplane will this engine go on? And I have some 20-22" props if you need one, both wooden and nylon.
 
What airplane will this engine go on? And I have some 20-22" props if you need one, both wooden and nylon.
No real plans to put it in a plane actually.

I’ve never really played around with model planes before.

Just building it for the sake of building it. Seemed like a nice project when I started, and it’s certainly turned out that way so far.

Plan is mostly to just fire it up from time to time and drink a few beers while revving it. Every man’s dream.
 
Episode 19 || Valve Spring Retainers

Another short one today. I thought about combining all the valve components into a single post, but I’d have quickly run into H-M’s picture limit, so I’m just making a short post for each.

I never bothered to model the Valve Spring Retainers in Fusion 360. None of the dimensions are critical, though I hit them dead on. I’m not in a production shop (by any stretch), so I just spend the extra few minutes getting it right. Here’s the drawing, the only challenging feature is the tapered bore, which has a tiny minimum diameter of 1/8”.
1643552162990.png

1) Turn the OD to size for a few of them at a time.
1643552187442.jpeg


2 & 3) Turn the smaller OD, then part off with a little bit of extra room. I was running my lathe at full speed (around 1300rpm I think?) when parting. High pucker factor, but worked great! They all ended up with a little tit on the back side, which was fine because I still needed to turn them to length.
1643552214910.jpeg 1643552226217.jpeg


4) I use these little split collet things ALL THE TIME. They’re super easy to make and free from the scrap pile. Just turn the OD to fit a convenient collet size, and turn the ID to fit the part you want to hold. Slit it with a jeweler’s saw and you’re in business. I used the 2-gage-pin trick to check that the ID was correct; I learned that on H-M.
1643552247117.jpeg 1643552265107.jpeg


5) Then in batches using my split collet, I faced each of them off to the same length, then center drilled and through-drilled to just under 1/8”
1643552282869.jpeg 1643552295316.jpeg


6) I used my Kuhlmann (Deckel) D-bit grinder to make up a custom 20* single lip cutter from an old reamer shank. Man, I cannot recommend a single-lip grinder highly enough. I’ve used it a bunch on this project and others, and a bunch of upcoming components will also use it. With the cutter in a tailstock chuck, I fed in until I got the requisite 1/8” minor diameter. Fantastic surface finish on the tapered bore.
1643552328501.jpeg 1643552341613.jpeg


And that’s another component checked off the list!


TIME ON VALVE SPRING RETAINERS: 5.5 hours
CUMULATIVE TIME: 359 hours
 
I want to ask you Edwards builders because I have a similar issue on my radial. What is the plan for attaching the crankshaft gear? I see what looks like a teeny cross pin through the gear? Is that so the gear can removed in order to replace the CS bearing at some point? My plans call for Loctiting the gear to CS. But if I do that, the only way to get at the bearing is to heat & crack the Loctite... and lose my timing unless its referenced. With the module gear size now, very little gear hub meat left to do a keyway.
 

Attachments

  • EDT-2022-01-30 7.48.27 PM.jpg
    EDT-2022-01-30 7.48.27 PM.jpg
    56.5 KB · Views: 17
You're right about the teeny cross pin. I'm just using a little nub of an old drill bit.

The gear should be taking very little force (it's only driving the valve train and and the oil pump), so I'd think either a small pin or some low-temp Loctite would both work fine.

EDIT: I hadn't thought about the timing issues. That's a good point. A little drive key/pin would help on that front.

Here are a few photos of mine. I've still got a little bit of filing left on my pin for the gear to fit right, but you get the picture.

1643601137938.jpeg

1643601161669.jpeg

1643601187609.jpeg
 
Thanks, I saw that partial pin detail in the plans, was just checking if you had your own idea.

While we're on a roll, what about the idler cluster. Are you going to silver solder together as plans suggest, or?
 

Attachments

  • SNAG-2022-01-30 10.18.55 PM.jpg
    SNAG-2022-01-30 10.18.55 PM.jpg
    49.1 KB · Views: 15
Here is my idler cluster. I made a few steel dummy blanks to try joining methods. This is my first go at silver solder. It worked OK but I can see potential for me messing up on the gears themselves- partial penetration, solder fillet. The dummy blank was a dull red by the time the (Harris silver solder) flowed. I don't think that will affect temper of steel but not sure.

I'm going to go with Loctite on the smaller gear boss which extends inside the larger gear. Maybe overkill but also an axial pin key also retained with Loctite. That's what those 2 test holes are about. I was worried about drift & then into the axle hole. There's only about 0.017" between big drill tangent & axle hole.

What got me thinking about the CS gear is that almost anything I use on the cluster is going to be significantly stronger than an upright pin in shear. Worded another way, the CS gear is the weak link in the chain. I haven't figured out how much force equates to pushing the rockers, it will (hopefully) be small as you say. The only thing is, bad things would happen if that pin let go.

Here is by strength calc. Your numbers will be different of course but just as reference. if you spot any errors let me know.
 

Attachments

  • IMG_4210_edited-1.jpg
    IMG_4210_edited-1.jpg
    55.2 KB · Views: 16
  • IMG_4230_edited-1.jpg
    IMG_4230_edited-1.jpg
    54.7 KB · Views: 15
  • IMG_4249_edited-1.jpg
    IMG_4249_edited-1.jpg
    52.4 KB · Views: 16
  • SNAG-2022-01-30 10.32.18 PM.jpg
    SNAG-2022-01-30 10.32.18 PM.jpg
    157.8 KB · Views: 15
Are you going to silver solder together as plans suggest, or?
I did silver solder mine together. I, too, had never silver soldered anything before, but it went really well. To be honest, I didn't know there was a difference between silver brazing and silver soldering until I started digging into the details.

I know/knew there was a difference between brazing and soldering, of course. But I just thought they were used interchangeably when it specifically came to silver soldering/brazing (figured 'silver soldering' was a colloquialism used by Brits for what us Yanks call 'silver brazing'). I didn't know that there existed such a thing as silver-bearing solder, only knew of silver brazing rods. So I was mentally preparing myself to silver braze the assembly together, when I finally got it into my head that there was indeed a difference.

Here's where I ended up SILVER BRAZING on a test batch using Safety-Silv (45% silver) brazing wire and Stay-Silv flux:

And here's where I SILVER SOLDERED the gears together in the final assembly using Stay Brite (4% silver) soldering wire and Stay-Clean flux:
Here is my idler cluster. I made a few steel dummy blanks to try joining methods. This is my first go at silver solder. It worked OK but I can see potential for me messing up on the gears themselves- partial penetration, solder fillet. The dummy blank was a dull red by the time the (Harris silver solder) flowed. I don't think that will affect temper of steel but not sure.

I'm going to go with Loctite on the smaller gear boss which extends inside the larger gear. Maybe overkill but also an axial pin key also retained with Loctite. That's what those 2 test holes are about. I was worried about drift & then into the axle hole. There's only about 0.017" between big drill tangent & axle hole.

What got me thinking about the CS gear is that almost anything I use on the cluster is going to be significantly stronger than an upright pin in shear. Worded another way, the CS gear is the weak link in the chain. I haven't figured out how much force equates to pushing the rockers, it will (hopefully) be small as you say. The only thing is, bad things would happen if that pin let go.

Here is by strength calc. Your numbers will be different of course but just as reference. if you spot any errors let me know.
I hadn't really thought about shear strength of that pin. But maybe it's a good thing that the pin is the weak link?

The Edwards isn't an interference engine (i.e., the valves when fully open do not interfere with the piston when it's a TDC), so I should think carnage would be fairly limited if the pin sheared and the valves stuck open. But even if it were an interference motor, seems the worst that'd happen would be maybe some piston damage and a bent push rod.
 
Last edited:
Back
Top