Greg's Logan 820 Restoration

Great work, G;

Your drive unit looks similar if not identical to the 200, which I guess makes sense since I've always thought they were the same, save for the QCGB. Yours is also a very early model (like mine) with the "floating" countershaft bushing holders. They are pretty touchy for adjustment, eh? I did my assembly in a bit different order, adding the drive components to the completed and mounted stand, but ended up wrestling with it anyway when I redid the mount bushings. It is pretty cumbersome, no doubt. I used hockey skate laces to tie it up to the rafters so I was sure it did not tip over whilst I was haggling with the mounts. It took a TON of fiddling and screwing around to get the whole thing lined up, especially when the lid was introduced. Be prepared to be quite patient and resolute!

Looking good!
 
Re: Greg's Logan 820 Restoration: Starting on the Headstock Overhaul

Sorry for the delay in posting this next episode. Anyhow, I started on the headstock. I realized this is perhaps the most critical phase of the whole overhaul. Expensive bearings, unknown issues with disassembly, reassembly, and realignment. I was not particularly looking forward to this, but thus far, I have completely disassembled everything down to the basic pieces. I intend to do so here, perhaps tempered by the "if it works, don't mess with it" rule to be applied where prudent.
In this and other forums, I researched others' experiences and comments on their Logan headstock/spindle/backgear work. Several good ideas and just as much contradictory information. Note: my 820 is S/N 24157, so the earlier diagrams in the the parts manual should show what I'm working with. There has been much chatter recently about the Belleville washers on the spindle. Rightly or wrongly, my machine is Belleville-less. And at least to my perception, the bearings seem in good shape. I could not feel any roughness or play in the spindle. (That was the status quo.)
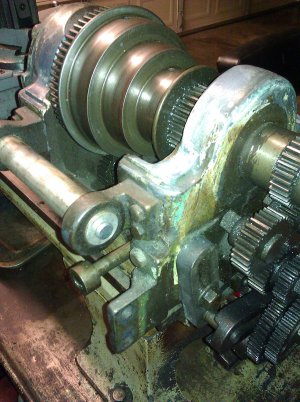
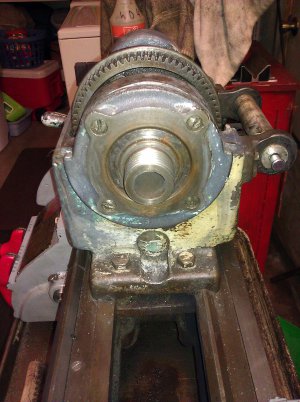
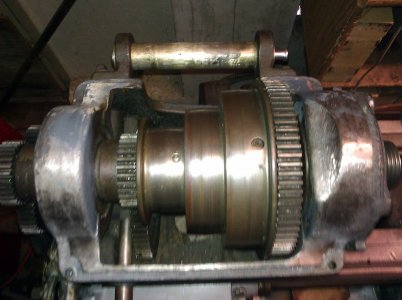
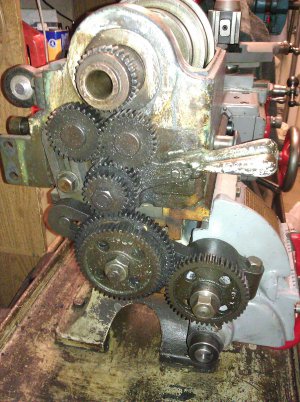
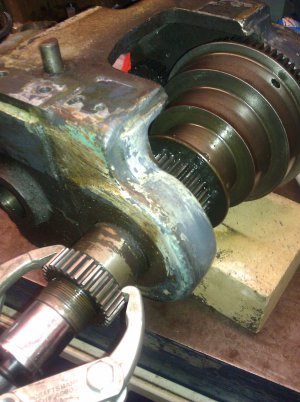
Here are photos before the disassembly work with bottom, rear, right, front and left views.
Headstock bottom view, before.jpgHeadstock rear view, before.jpgHeadstock right view before.jpgHeadstock top view, before.jpgHeadstock left end, before.jpg
Once I had the headstock on the workbench, the fun would start. But first...
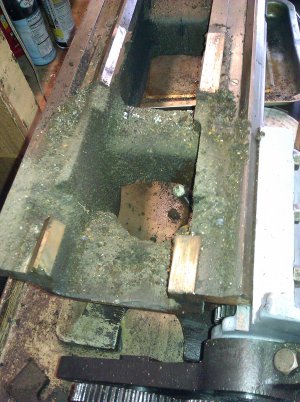
Headstock ways 70 yr dirt.jpg
Is this seventy years worth of dirt on the ways under the headstock? Probably not 70, but it's been a while, hasn't it? I bought this lathe a year ago from another home machinist who only owned it for a relatively short time. I wonder what the full history on it is?

One problem I'd known all along was that the backgear actuator shaft would not stay locked out. I expected that I would have to fabricate a replacement latch/spring mechanism. But after pulling out the actuator rack, I found the latch was there, just gummed up. Pushed out the pin and cleaned it all up and rebuilt. That was easy! But I couldn't figure how to remove the backgears themselves.

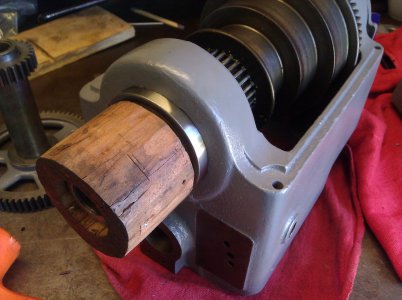
So on to the spindle. Trying to protect the bearings, I first rigged a home-made spindle puller, but it didn't work. Plan B: using a soft faced hammer and a wooden block, I tapped the spindle loose, driving out the right bearing with it. Then I turned down a piece of wooden 4x4 to fit the outer diameter of the left bearing and tapped it out. Now that the bearings and shafts were isolated, the right bearing still felt fine. But the left one was rough. I think the removal process totally ruined it. If not the original bearing, it appeared to be a Logan factory replacement. It was marked "New Departure 32707 Shield Bearing Number 77507" in the Logan Parts Catalog, it is called LA-670 Ball Bearing 77507. Amazon.com had the exact bearing, a New Departure 77507 for $13.51.
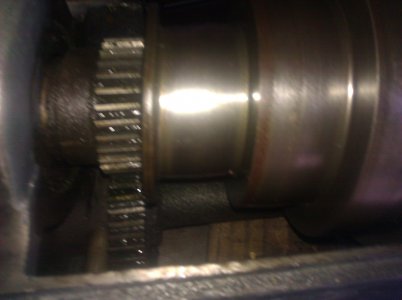
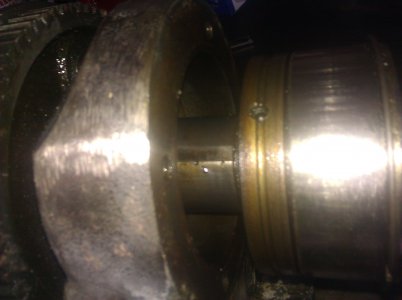
Here are: removing the gear from the left end, spingle left side, and spindle right side during the teardown. As I said up top, no Belleville washer here. (And none shown in the Parts Catalog).
Headstock pulling left gear.jpgHeadstock spindle removal left.jpgHeadstock spingle removal right.jpg
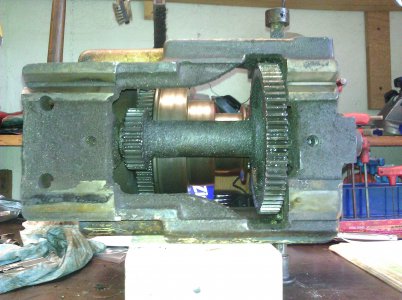
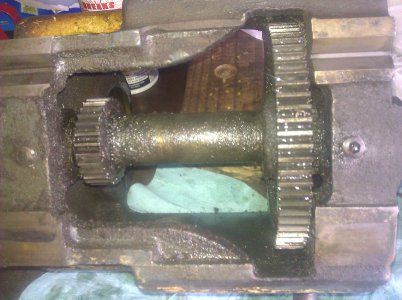
Now the only things left in the headstock were the backgear shaft, gears, and quill. Here, the dis-assembly puzzled me. I tried tapping the bushings (LA-127 and -128) from one end and from the other end without much progress. (Yes, the two setscrews were loosed.) But that's not how it comes apart. Finally, prolonged study of the parts diagram showed that I needed to tap against the exposed left end of the LA-125 eccentric shaft to get it out. This, with more PB Blaster, worked fine. I was pleasantly surprised that the bushing and shafts were not appreciably worn.
Headstock backgear removal.jpg

While waiting for the replacement bearing, I cleaned up the headstock casting and the related pieces in preparation for repainting. Now that our three days of Santa Ana winds are gone, I will get it painted and begin the reassembly. And while the various coats of paint are drying, I will cut that screwdriver slot into the end of the backgear eccentric shaft as has been discussed in other recent Logan overhaul threads.
Greg

Headstock bottom view, before.jpg Headstock rear view, before.jpg Headstock right view before.jpg Headstock top view, before.jpg Headstock left end, before.jpg Headstock ways 70 yr dirt.jpg Headstock pulling left gear.jpg Headstock spindle removal left.jpg Headstock spingle removal right.jpg Headstock backgear removal.jpg
 
'Bout time you got busy! :whistle:

If you are speaking of the tail (drive end) bearing, then yes I believe they are generic and "unloaded," and should be widely available. The head bearing is a special preloaded version, and to my knowledge can only be purchased through Logan. I am not aware that there are any special markings on any of these that designate them as preloaded, which makes it hard.

Mr. Ed's current spindle thread has some good info available. As I state there, despite all the chatter about Belleville washers, and their appearance in the later LA-108-2 schematic, I've never actually seen or heard of one! They are not shown in the earlier LA-108-1 schematic.
 
I noticed something on Greg's lathe (and I'm sure it must be all 800 series) ... the front bearing retainer/cap on his actually has 4 screws holding it in place. The 200s only have 3 screws.

I can't help but wonder why they would have designed two different setups like that, on the same size lathe. :thinking: I had always thought the only diff between the 800 and 200 was gearbox & saddle related.

These kind of questions (much like the bearing and other subjects you guys have seen me carry on about) drive me nuts.:panic:

Ed

- - - Updated - - -

Dang ... look at the positing of the oil hole/screw in Greg's cone pulleys. It is on the large pulley, not the middle one. That seems odd, given the location of the bronze bearings at each end of the cone.:whiteflag:
 
Re: Greg's Logan 820 Restoration: Spindle Reassembly

Time to reassemble the spindle.

Attn: Mister Ed - you commented on my last posting about oil holes. The hole visible in the large pulley is not the oil hole, it's for the bull gear plunger. The small pulley has two tapped holes, one marked for the "oil" setscrew, and another unmarked one. This is as shown on the parts diagram on the LA-27-1 Headstock Assembly to S/N 32777 parts diagram.
But I have questions about that unmarked one:
What is its purpose and is it supposed to be tight against the spindle or not? Mine was not tight, and I saw no scarring on the spindle to indicate anything had been tightened in the area. When the back gear is engaged, this pulley needs to spin on the spindle, so setscrewing tight would seem to be dead wrong.​
What is the correct type and size of set screw? The diagram makes it look like a dog point, but my machine had a plain setscrew. If indeed, it does not need to go tight, then that is fine. Would a dog point make any difference?​

Yesterday I reassembled the spindle into the headstock. Remember, this is an early serial number model 820, there are differences in the later S/N's and as I understand from other's postings, the Logan 200 is quite similar, but with some obvious differences. Your mileage will vary!

First image shows the parts ready to go together: headstock, spindle with woodruff key and main bearing, bull gear, cone pulley, and spacer. In the back is the replacement bearing for the left side, and a custom bearing driver for it, made from a chunk of 4x4.
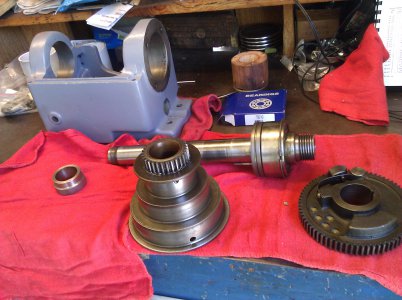
hs rb 1 parts laid out.jpg
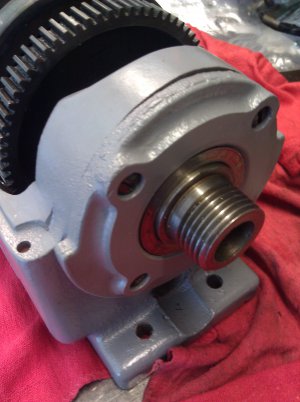
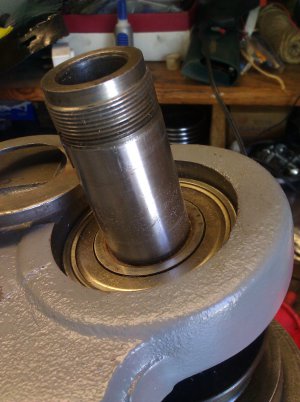
This went together much easier than it came apart! As they say, for reassembly, simply reverse the procedure! Inserted the spindle from the right, sliding the bull gear, cone pulley and spacer onto the shaft. I drove the bearing into the headstock using a PVC pipe coupler (3.5" OD) to bear against the bearing's retaining ring. In the next two pictures, first, you see the bearing in the headstock, with the retaining ring now up against the casting. The second shows the end cap in place, with its 4 fillister head screws. Again, this had been commented upon in a recent posting. My lathe certainly has 4 holes and 4 screws. But according to the parts manual for my serial number, it should only have 3.
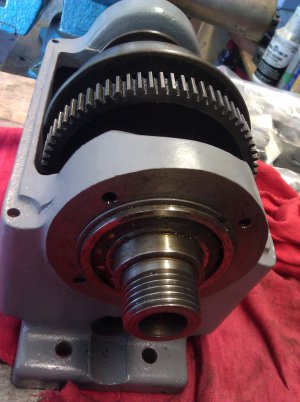
hsrb 3 spindle in.jpghsrb 4 spindle end cap.jpg
Next steps: slide the bull gear to the right onto its woodruff key. This was easy, using the cone pulley like a slide hammer to tap it into place. (I wish I had measured the exact distance between the bull gear and the casting; I think I have it right, we shall see when I put the back gears back in.)
Then tighten the bull gear's setscrew and insert the two setscrews into the small cone pulley -- yeah, the oil screw and the mystery screw (left loose) discussed above.
Before starting this restoration, I've had a problem with seeing oil on the pulley almost every time I open the cover to change belt positions. Apparently it is being flung back through the setscrew threads by centrifugal forces while running. Oil and leather belting is not a good combination. I will try a new setscrew. Does anybody have ideas on this? Maybe a bit Teflon pipe tape or silicon caulk on the threads?
Now the left side bearing and related parts. I had damaged the left bearing during the teardown. now with my custom wooden bearing driver, which will bear against both the inner and outer races, I should be able to safely install the replacement. First, insert a bearing cover, then the bearing, tapping with the wooden tool, then the outer bearing cover. It worked perfectly.
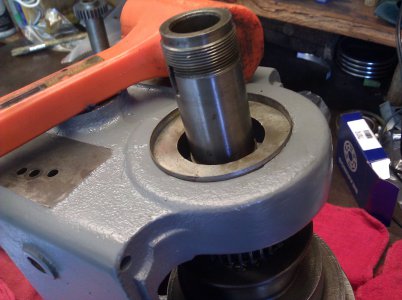
hsrb 6 left bearing.jpghsrb 7 driving left bearing.jpghsrb 8 left bearing in.jpg
And the final steps: another spacer, the woodruff key and gear, and the retaining collar.
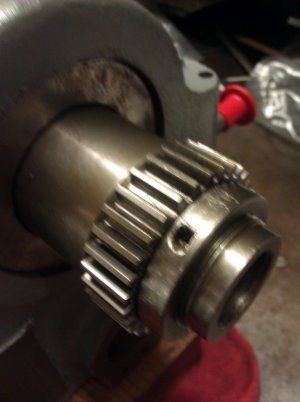
hsrb 9 spindle gear and collar.jpg
About that collar, as the photo shows, one needs a special spanner to properly loosen/tighten it. I couldn't find one, so resorted to hammer/punch and pipe wrench. This somewhat scarred collar will work for now, but once the lathe is operational again, I plan to make a replacement (unless I can find one easily. Maybe I'll make that spanner too, or machine flats for wrench.

Next task, install the back gear. I have already slotted the end of the backgears' eccentric shaft to facilitate the adjustment of the gear mesh.

Greg

hs rb 1 parts laid out.jpg hsrb 3 spindle in.jpg hsrb 4 spindle end cap.jpg hsrb 6 left bearing.jpg hsrb 7 driving left bearing.jpg hsrb 8 left bearing in.jpg hsrb 9 spindle gear and collar.jpg
 
Greg or anyone who knows
I just started putting my logan 820 lathe together, I assembled and reassemble the quick change gear box at least 4 times before I think I got it right and finally got it back on the Lathe was in the prosses of greasing the gears and the reverse tumbler bracket handle broke off . I found one on ebay and it's on its way . I am thinking do just taking the pin out of the new one and replacing the handle only . dose that sound like a wise path to take, or should I replace the whole thing. I have not powered the lathe up yet but when I Engage the quick chance box it seams like the gears are a little off . there is some play in the gears will the set in . also I examined you photo the gear box I have is slightly different where I have a bushing you have ( I do not know the term for this) gear-bushing :think1::think1:
thanks
john
 
Cadusis:
I have not yet tackled the reversing lever assembly, but I just took a quick look at the parts diagram, it looks like the bracket handle is all part of the assembly. After I get the back gear back into the headstock, I will disassemble/clean/reassemble the reversing assembly. Maybe in two days I can better answer your question on this.
On the QCGB, there are no adjustments. A bit of backlash is normal. As you probably read my QCGB adventures last fall, earlier in this thread. Really badly worn bushings and shafts might be causing excessive play, I made two new shafts and replaced several bushings.

Good luck,
Greg


Greg or anyone who knows
I just started putting my logan 820 lathe together, I assembled and reassemble the quick change gear box at least 4 times before I think I got it right and finally got it back on the Lathe was in the prosses of greasing the gears and the reverse tumbler bracket handle broke off . I found one on ebay and it's on its way . I am thinking do just taking the pin out of the new one and replacing the handle only . dose that sound like a wise path to take, or should I replace the whole thing. I have not powered the lathe up yet but when I Engage the quick chance box it seams like the gears are a little off . there is some play in the gears will the set in . also I examined you photo the gear box I have is slightly different where I have a bushing you have ( I do not know the term for this) gear-bushing :think1::think1:
thanks
john
 
Did you forget to put the automotive serpentine belt on the cone pulley while the head shaft was out? I did! Then I took it apart and put the belt on, and it was the wrong length, so I took it all apart a third time. Finally got it right, and I like it. Enjoying your re-build photos. I have a Logan 820 as well. I didn't re-build everything (yet), but have done the QCGB, head shaft, and tail stock. My back gear shaft seemed smooth and didn't have any noticeable bushing play, so I left it alone. Someday I will rebuild the apron. I didn't do the nice paint job you did. Mine is still vintage 1945 blue gray.

Yours is looking great, and will be making chips soon!

GG
 
Time to reassemble the spindle.

Attn: Mister Ed - you commented on my last posting about oil holes. The hole visible in the large pulley is not the oil hole, it's for the bull gear plunger. The small pulley has two tapped holes, one marked for the "oil" setscrew, and another unmarked one. This is as shown on the parts diagram on the LA-27-1 Headstock Assembly to S/N 32777 parts diagram.
But I have questions about that unmarked one:
What is its purpose and is it supposed to be tight against the spindle or not? Mine was not tight, and I saw no scarring on the spindle to indicate anything had been tightened in the area. When the back gear is engaged, this pulley needs to spin on the spindle, so setscrewing tight would seem to be dead wrong.​
What is the correct type and size of set screw? The diagram makes it look like a dog point, but my machine had a plain setscrew. If indeed, it does not need to go tight, then that is fine. Would a dog point make any difference?​

Ah, missed this post. I don't have that hole in the large cone, interesting.
I remember scratching my head on that set screw as well. Then I finally realized it is supposed to hold in the cone pinion gear on the end of the cone (part 119-1 on mine). The screw goes onto the collar on that gear, not all the way to the spindle shaft.
.... and the reverse tumbler bracket handle broke off . I found one on ebay and it's on its way . I am thinking do just taking the pin out of the new one and replacing the handle only . dose that sound like a wise path to take, or should I replace the whole thing. john
Ah, you broke the lever handle as well. I would think either way you want, would suffice.
Did you forget to put the automotive serpentine belt on the cone pulley while the head shaft was out? I did! Then I took it apart and put the belt on, and it was the wrong length, so I took it all apart a third time. Finally got it right, and I like it.
GG
X's 2 ... and I have a 39" and a 41" belt if anyone needs a longer or shorter one. LMAO.
 
Back
Top