Greg's Logan 820 Restoration

Hmmm...

There's nothing wrong with assembling the spindle without the belt on it the first time. It takes a few tries to get everything lined up and working properly anyway, so the trial run is good for understanding how it all needs to be. That's what I told myself...
-
-
-
-
-
Actually, I did put mine together even before I had the belt, just for kicks and to see how it worked. Even after doing it all a few times, it still needed a lot of fiddling to get everything lined up and locked down in the right place. Patience is a virtue... because memory will be useless!
 
Re: Greg's Logan 820 Restoration : Spindle and Belt

While reassembling the spindle, I did not forget to put the drive belt in place. For now, it is a non-issue, since I have a new leather belt from Logan, with the link/pin that allows it to be hooked around the in-place spindle and drive shaft. I'm afraid that if I was using a "normal" belt, I'd very likely have forgotten to put the belt in first. Don't ask me about the X cable on the torpedo tube.

BTW, for the week, I've been working full time on installing tile in a bathroom. Tomorrow I'll get back on the lathe job. This evening, look for a new posting, "A new use for machinists' parallels - floor tile gauges"

Greg
 
Re: Greg's Logan 820 Restoration - Headstock Reassembly Completion - Backgear

Okay guys, I'm back on the lathe job - after spending a week and a half tiling a bathroom. (First time I've done tiling! Two bathrooms left to go...)

To finish the headstock overhaul, all that remained was to put the backgears back in. But first, it occurred to me that it would be useful to better lubricate the backgear shaft and bushings. My first lathe was an Atlas 618 and it had a oiling port in its shaft, a screw that you'd remove to add oil. I added something similar to the Logan 820, as shown in this bottom view of the reassembled headstock. It's the screw just to the left of the larger back gear, the screw has an o-ring under its head.
hs done bottom view.jpg
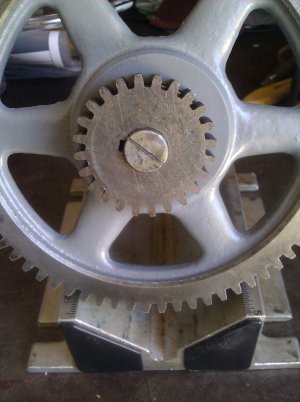
Another enhancement, shown here, is the slot I cut into the end of the backgear eccentric shaft. I thank Redlineman for his write-up on this, in his Logan 200 saga. (Looking back, I see he also did the backgear oiler mod.) This slot lets you fairly easily adjust the actuator rack and gear to get proper backgear engagement.
slotted backgear shaft.jpg
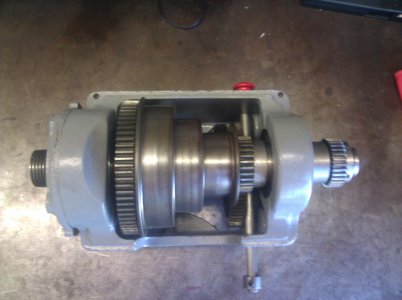
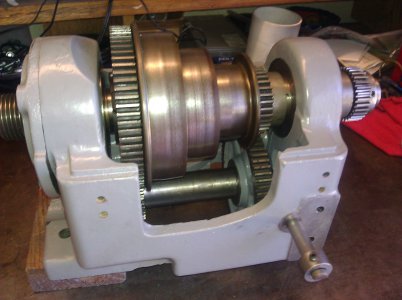
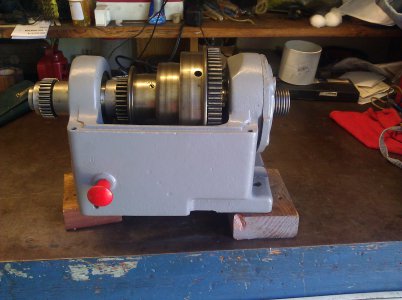
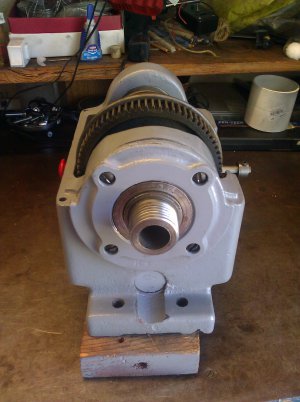
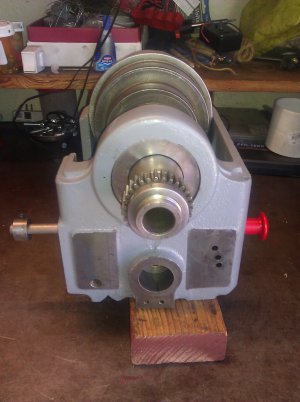
Here are the other views of the reassembled headstock. Because I am using the stock leather belt with its pinned joint that can be unhooked/rehooked, the belt is not captive on the spindle.
hs done top view.jpghs done rear view.jpghs done front view.jpghs done right view.jpghs done left view.jpg

Next, I'm tackling the reverse gear assembly
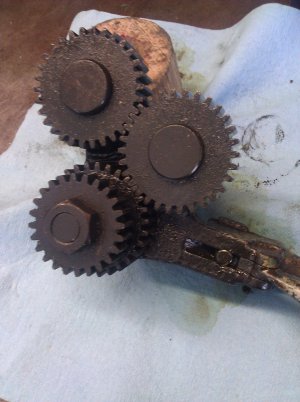
Here, for reference purposes are the before pictures from both the right and left sides
rev assy right view.jpgrev gear assy left.jpg
I disassembled it. All bushings and shafts are good. I knew there was an oiling hole in the bracket, but I hadn't appreciated that it lubricates the steel shaft-in-steel "bushing". I was lucky this was not badly worn, since the hole was rather clogged with dirt.
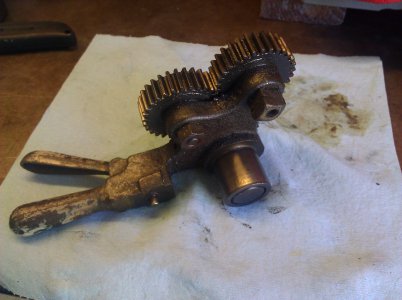
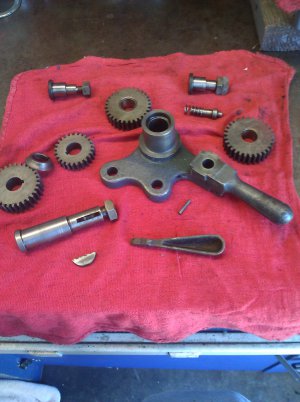
Here is the reverse gear assembly all disassembled and cleaned.
rev gear assy disassembled.jpg
Now, I'm in the process of repainting the assembly's bracket and "plunger handle" and will reassemble it in a day or two.

Greg

hs done bottom view.jpg hs done left view.jpg slotted backgear shaft.jpg hs done top view.jpg hs done rear view.jpg hs done front view.jpg hs done right view.jpg rev assy right view.jpg rev gear assy left.jpg rev gear assy disassembled.jpg
 
Re: Greg's Logan 820 Restoration - Headstock - Reverse Gear Assembly

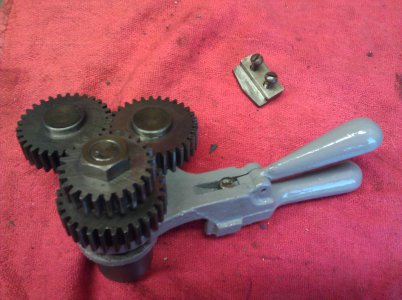
My last message showed the reverse gear assembly before and after dis-assembly. Now I've cleaned it up, repainted it, and reassembled it; ready to reattach to the headstock. I should have used my arbor press on the pinion gears/spacer/stud disassembly. It worked great to put it back together.
reverse assy, done.jpg
You can't see it in this image, but the idler studs should have a 5/16"-18 heavy hex nut. (Look in my last posting and you'll see one of the studs has two thin square nuts rather than the proper fastener.) I'll try to find one locally.

Next phase in the restoration: repaint the bed, tray, and legs.

Greg

reverse assy, done.jpg
 
Looking good, G;

You'll love that backshaft slot mod. Makes adjusting the lash SOOO much easier. I didn't get as fancy with an o-ring under my oil screw, but that does sound like a really good idea. The screw in my cone pulley leaks, so I am going to ultimately put some silicone on it and reinstall to hopefully seal the threads.

Maybe I'll get back to mine.. some day.
 
You're lucky. I was testing out my 820 after I bought it, and it seemed like it had a heavy load on it while just running. Then I saw a wisp of smoke from the reverse gear handle. Uh-oh... The oil hole on my reverse gear handle was plugged solid, and the shaft and handle were bone dry and had eaten each other.

I turned down the shaft, and bored out the handle. Then I made a bearing bronze bushing to fit in between. It works great, and is smooth and solid. Now that the oil hole works it lubricates fine.

GG
 
Re: Greg's Logan 820 Restoration - Final Disassembly Steps

Now I am disassembling the final few pieces for cleanup and repainting.

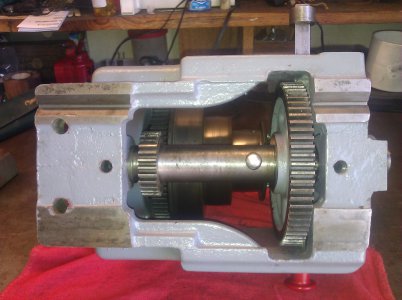
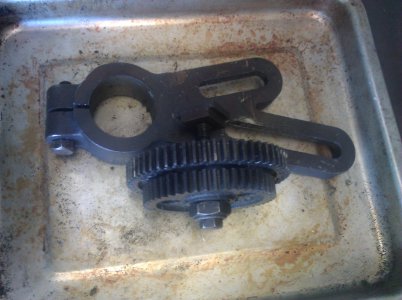
Here, for reassembly reference purposes, is the change gear assembly. The gears go into the longer slot, facing upwards.
change gear assy.jpg
Removing the rack from the bed was difficult. The six fillister head screws (#10-32 x 9/16") wouldn't budge. Repeated squirts of PB Blaster from above and below did the job in a few hours. I was just about to drill out the final screw but it finally surrendered. Several screw heads suffered wounds during this struggle. I tried to find replacements locally, no luck yet. I may have to make my own after the lathe is running again.

Likewise, a few weeks ago, I was looking for the proper 5/16" heavy hex nut", nothing locally available so I will make one out of a hex head bolt with a large enough head and mill it down.

Now I need to clean, strip and repaint the bed...
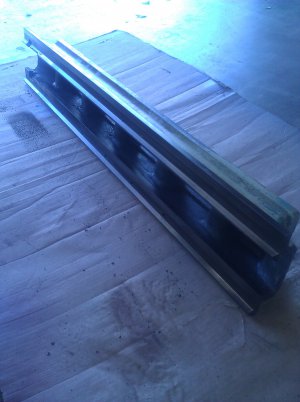
bed for cleanup.jpg
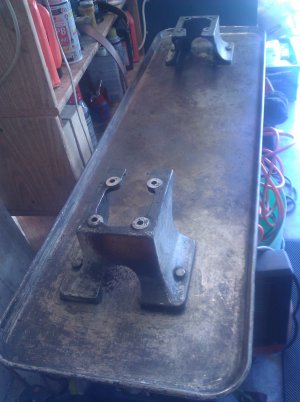
This leaves the two bed supports bolted through the chip tray, to the legs. Reminder to self: the chip tray holes are not centered, there are right and wrong ways to put this back together! The rear holes are closer to the rear than the front ones are to the front, as shown in this picture, taken from the left (headstock) end.
chip tray, bed supports.jpg
Working on these final, big pieces is going to be difficult, particularly preparing them for painting, I don't have enough bench space to work on tray, bed, or legs; I will set up a pair of sawhorses so that I don't have to sit on the garage floor.

The floor is my paint shop. I back out the car(s), put cardboard down, paint a part or two, park my car to straddle the parts and let them dry, back the car(s) out, flip parts as needed, apply next coat, ... A tedious workflow!

Greg

change gear assy.jpg bed for cleanup.jpg chip tray, bed supports.jpg
 
If you use a sealer on the oil plug (the lowest torque rated Locktite might be a better choice than silicone sealer), do NOT squirt any down the hole. Just apply a little to the screw, and none near the bottom end. If you get any of it in front of the screw, you probably will not like the consequences.

Robert D.

Looking good, G;

You'll love that backshaft slot mod. Makes adjusting the lash SOOO much easier. I didn't get as fancy with an o-ring under my oil screw, but that does sound like a really good idea. The screw in my cone pulley leaks, so I am going to ultimately put some silicone on it and reinstall to hopefully seal the threads.

Maybe I'll get back to mine.. some day.
 
Re: Greg's Logan 820 Restoration - Final Disassembly Steps

...
Removing the rack from the bed was difficult. The six fillister head screws (#10-32 x 9/16") wouldn't budge. Repeated squirts of PB Blaster from above and below did the job in a few hours. I was just about to drill out the final screw but it finally surrendered. Several screw heads suffered wounds during this struggle. I tried to find replacements locally, no luck yet. I may have to make my own after the lathe is running again.
...
Greg

I wound up using some 10x32 socket head cap screws to replace the filister heads when I re-attached the rack on my clausing. The fit in the counterbore is snug, but not too tight. I actually neede to helicoil the rack, since only 1 of the four tapped holes had any sort of recognizable threads left :)
 
Back
Top