Logan 200 - Figuring this thing out!

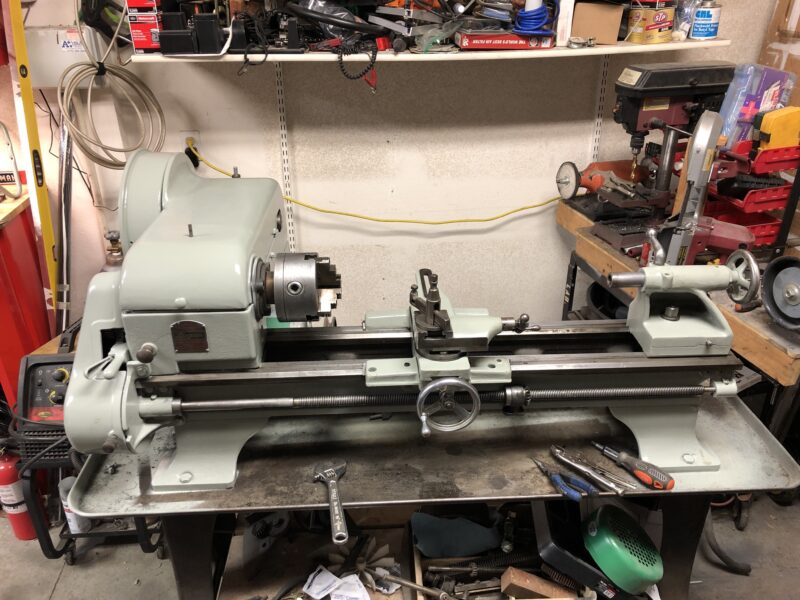
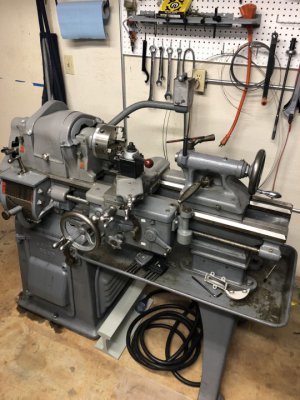
Continued my puttering around in the garage a little last night. Got my saddle lock from Logan.

img_1645-800x600.jpg


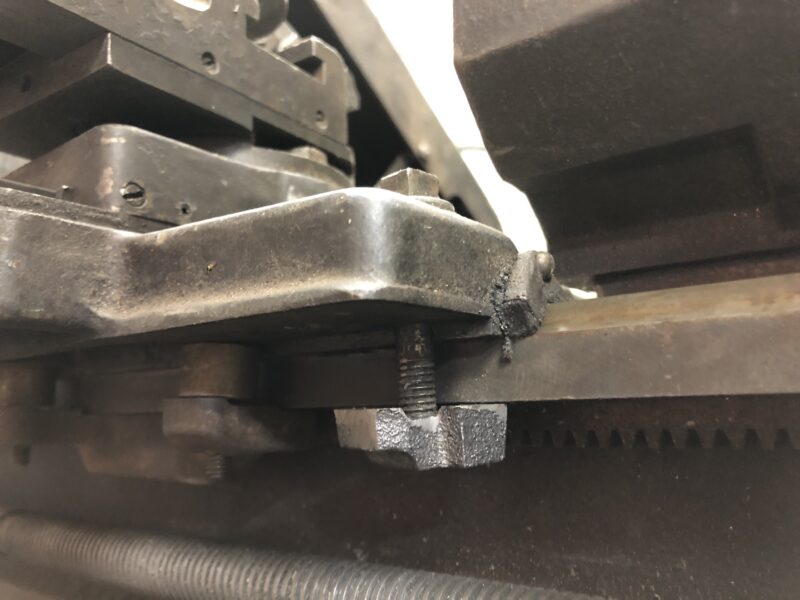
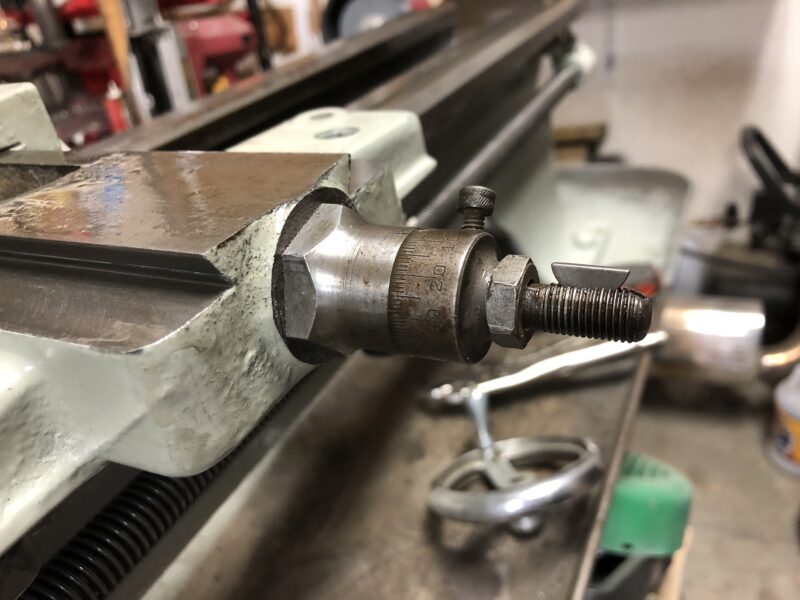
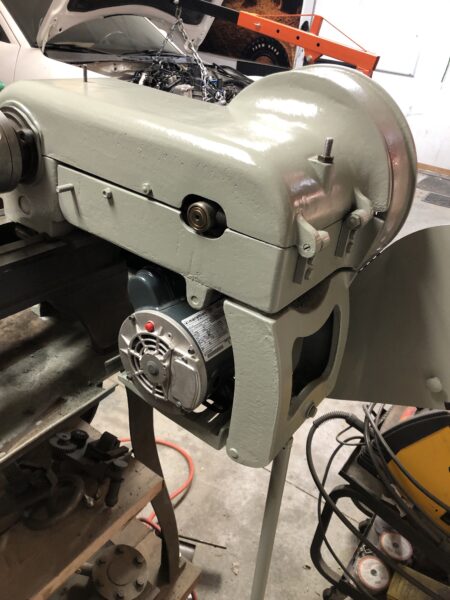
Also started figuring out what to do for a motor support pedestal. The threads for the pedestal support are a fine thread 5/8-18, which is just odd enough that the local home improvement stores don't carry those bolts, though I was able to find a 5/8-18 set screw, which got me just enough threads that I can work with it. If not, it looks like I could swing by my local Fastenal and pick some up.

Man, if only I had a lathe so that I could thread my....oh right. :)
 
I'm trying to figure out what size motor pulleys I should have to work with the existing countershaft pulley. I measured the countershaft's flats at roughly 8-5/8" and 9-3/4". I can back-calculate the primary reduction using the RPM table in the manual so I know each ratio, and from there I can calculate what I think the motor pulleys should be. I'm seeing roughly 1.65" and 4.35" for the motor pulley sizes to achieve the reduction from the manual. Does that sound right? I assume getting those motor pulley ratios right in comparison with the countershaft pulley step sizes helps a single belt work for both sizes.
 
Do you not have a motor pulley? If I remember correctly, Logan had 2 different pulleys during Model 200 production.
I asked Scott Logan about it and he didn!t know what the difference was or when they made the change. He sells
a LA349B pulley which is what I bought. When I flip the belt on mine, which I rarely have to do I have to adjust
the belt a bit. I suspect any Model 200 pulley would work fine so you might just check eBay and see if one is available.
Sorry, but with the pulley on the machine I don,t have a good way to accurately measure mine.
 
The 2HP motor came with a pulley that had been badly welded to some kind of hub, so I don't have the factory 2-step pulley.

This post claims the pulley diameters are 2.31 and 4.28.
 
Had some time over the weekend to dig in a bit more and clean things up. Looks like the ways are a bit beat up near the chuck.
219205A1-4476-43D0-AA59-1DF4163B8ACD.jpeg

I can see that I’m missing the pawl to lock in the back gears. That should be easy enough to make myself.

2921497E-BE93-47F6-9036-6B0E6BFF1A27.jpeg

I made up a quick peg leg to support the motor bracket so it’s not hanging out in space.

13F50AF1-A196-4199-9EB2-B9A709FF05AE.jpeg

And I went ahead and gave everything a good coat of Light Machine Gray paint.

99F4C0B9-91C7-4F73-92FD-D64C0DCEFCC1.jpeg
740B06FF-3E16-4D29-86CA-E35EC9B2F9B0.jpeg
1680B16E-CC86-40BA-B315-597D4E3036E4.jpeg
BC918E83-9B45-43FA-AC9D-104031062D74.jpeg

My new felt wipers and way lube should arrive today, and once my apron arrives I should be able to assemble and test everything.
 
It's looking great!
 
Yesterday I decided to swing by Fleet Farm to pick up a pulley and v-belt for the motor I'd eventually get. On my way out I swung through the clearance section for fun and what did I find? A 1HP single phase motor for 50% off!

So last night I proceeded with reassembly.

I picked up a pack of 100 3/32" Woodruff keys for the cross feed wheel. It ended up being a bit tall, so I had to grind it down a bit, but it fit.

img_1678-800x600.jpg


My cross feed wheel was broken, but I found a 4" wheel with the right bore from an Atlas. Hopefully the extra inch in diameter doesn't cause it to interfere with the apron once I get that installed.

img_1679-800x600.jpg


The motor fits really nicely on the bracket.

img_1684-450x600.jpg


The 40" belt and a 4-step pulley look like they'll work great. I just need to get it wired up and I can test!

img_1688-450x600.jpg
 
A couple of items to note. The screw that attaches the compound rest base to the cross feed nut was broken. I (poorly) ground down an allen head bolt to replace it. Making a better screw might be a nice first project.

The compound rest action is incredibly stiff. I backed off all of the gib set screws but it still takes a lot of effort to get it to slide at all. I may have to disassemble and make sure the taper is clean and that the lead screw and compound rest nut are turning freely.
 
I used the lantern style tool-post on my Craftsman 12" lathe for near 30 years and it always got the job done. When I upgraded to my South Bend 13" lathe the first thing I did was purchased a quick change tool post... and I will NEVER go back. Once you have everything running smooth and are happy with the lathe I would recommend the quick change. I think the lantern tool post will do everything you need while getting the lathe running and tuned though.

Taper attachment??? I am jealous!!!! :)
I cut my teeth on a SB 13 back in high school. I then bought an early 40’s 13.
Lost it in the fire though.
Please share a pic of your 13. Here is/was mine.
 

Attachments

  • B75BEC9E-D2AF-487D-9118-5588921DC2E2.jpeg
    B75BEC9E-D2AF-487D-9118-5588921DC2E2.jpeg
    98.7 KB · Views: 12
  • 6427357E-A760-44B1-AEBA-1F0D9B45B8FF.jpeg
    6427357E-A760-44B1-AEBA-1F0D9B45B8FF.jpeg
    95.7 KB · Views: 11
  • 68A154F7-F2B9-46B3-8167-8865C6212479.jpeg
    68A154F7-F2B9-46B3-8167-8865C6212479.jpeg
    115.2 KB · Views: 12
I cut my teeth on a SB 13 back in high school. I then bought an early 40’s 13.
Lost it in the fire though.
Please share a pic of your 13. Here is/was mine.

This is the best pic I have handy of my South Bend 13. :) The next time I go out to the shop I will try to remember to take some more pictures.

20180204_183645-jpg.257932


I believe it is a mid 70's SB13. For me the South Bend 13 has been the perfect lathe. It has been up to all tasks that I have asked for it. My biggest problem with it is I have not been able to find a steady rest for it (At least a steady rest that costs less than what I paid for the lathe).

P.S. I bought this South Bend 13 from the technology department of a high school. I had to drive 4 hours to pick it up and it was located less than 5 minutes from the house I grew up in (but I was in a different school district). It does not seem too abused for a high school lathe.
 
Last edited:
Back
Top