Making bushing & pins for a JD Dozer

Re: Making bushing & pins for a JD Dozer

usrjcro11

Why did you weld with 6010 first instead of starting with 7018?

Joe

- - - Updated - - -
Used the 6010 for the root pass for the penetration. once you heat the part do not need to let it cool to fast


- - - Updated - - -
 
Re: Making bushing & pins for a JD Dozer

Festus:

With you there, sure would like to see a button.

Joe

There is nothing fancy to toolmakers buttons. Take a piece of drill rod, for this I would use 5/8 or 3/4, cut a few pieces just over an inch long.

Face both ends and keep the length to .001 or so. Drill a hole thru the button end to end 5/16, and use a 1/4 inch button head capscrew to hold the button in place.

When you screw the button in place and indicate it so it is centered, it allows you to establish a reference point to take other measurements from. It is ideal in situations like this, where many holes are worn on the same piece. Once you have one point of reference established, you can calculate your other points.

Here are some pics of the buttons and buttons in use. Simple to make, simple to use. Make a few different sizes for different size jobs. Once you use them, you'll wonder how you got by without them.

- - - Updated - - -

Jono:

Never heard of a toolmaker's button. Got a picture or a better description. Sounds like what I need.

Joe

- - - Updated - - -


usrjcro11

Why did you weld with 6010 first instead of starting with 7018?

Joe

- - - Updated - - -


Rbeckett:

I agree that I need a line boring machine but because of the cost for a one time operation that isn't going to happen. So I am trying to see if it can be done another way.

Joe

- - - Updated - - -


Festus:

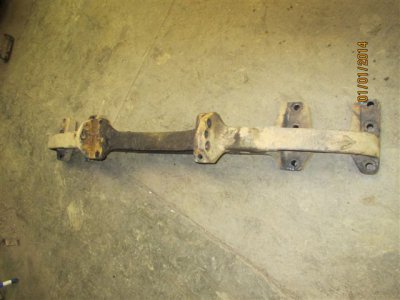
This bracket holds a pin that doesn't move. The piece that fits between the ears moves and has the bushing in it. How it is wore so bad is another question.

Joe
It is worn so badly because the bushing and pin wasn't replaced when it should have been, and/or it wasn't lubed.
 

Attachments

  • 3147-Ways%20with%20Toolmakers%20Buttons.pdf
    36.5 KB · Views: 78
Re: Making bushing & pins for a JD Dozer

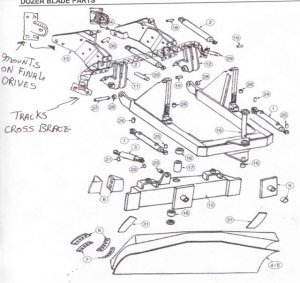
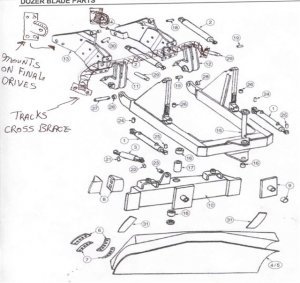
Is this a 6 way tilt blade? Need to check where item number 10 mounts to back of blade and is held into place by item 31. If there is alot of slop at these mounting points you will never be happy how the blade digs at an angle or straight pushing. Put a long straight edge over these two points on the back of the blade to see how much it is worn. If worn badly weld up the back side and grind back down to get as true as you can. My first bulldozer was a case 450 it was in terrible shape and I had build up the backside to get it to cut straight.

attachment.php?attachmentid=62471&stc=1&thumb=1&d=1382138150.jpg

Thought I'd bring in the parts diagram with that post.

attachment.php?attachmentid=62471&stc=1&thumb=1&d=1382138150.jpg
 
There are portable line boring machines that fab shops around here use on such repairs in the field. Really simplifies matters if you have one available in your area. They are used a lot around here on excavator and loader bucket repairs.
 
FWIW ...tool makers button s are great for seting the distance between holes or from an edge ...when set by vernier / indicated ,the hole can be boret true ,BUT you have to have a reference point to indicate the button .....buttons wont help till you find a away to know where th e center SHUD BE maybe measuring off the matching piece or whatever

teh advantage of tack welding bushings & inserting the bars is , lacking line boring equipment you can be sure everything is square & goes to place ...then weld up solid , SLOWLY & tapping pins in & out to avoid warpage

if you cud be sure of placement , a press fit wud be my choice...

you may be able to get close enuf by turning up a centered dummy to be a tight fit, or to the original bushing OD , in the elongated hole ??????...

best wishes
doc
 
Happy New Year to all:
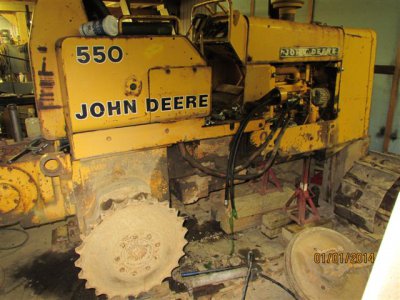
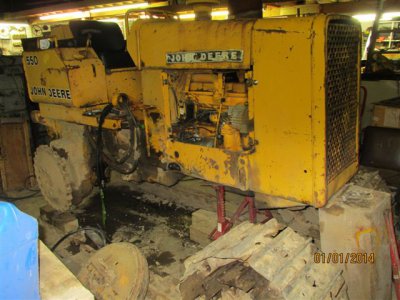
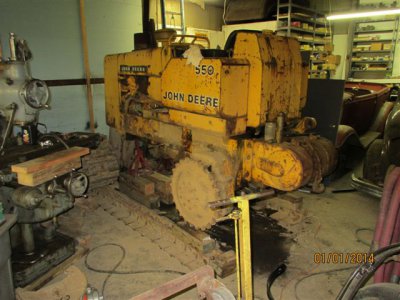
Again thanks to all that replied. Just an up date. I have a crowded shop and had to get some projects done and out of the shop to get the crawler in. Started to disassemble the crawler, of course everything is rusted and froze tight. Looks like a couple weeks before I get to machining.
Joe

IMG_0916.JPG IMG_0917.JPG IMG_0919.JPG IMG_0920.JPG IMG_0921.JPG
 
I'd go the line boring route too, here are a few pictures of the one i modified to bore out a bobtach on a Bobcat.

The way i centred the worn holes was to machine two sleeves with a taper on the ends so you slip them into the holes and it aligns the boring bar and you weld the bearings in place and remove after boring the holes out. I did it with tool steel that is held with set screws in 1" bar that slides between the two bearings.

After machining the holes, i made sleeves to bring the holes to the rite size or if it's for bushings, you machine the bushings to suit the hole.

I know it has already been stated, you need to ensure they are machined straight, there is nothing worse than them being out and they fight against each other and break things, been there done that before.

Hopefully some of that makes sense, the drive unit was an old rail drill that was used for drilling holes in railway tracks.

http://users.tpg.com.au/tazza_/Bobtach/Image090.jpg
http://users.tpg.com.au/tazza_/Bobtach/Image089.jpg
http://users.tpg.com.au/tazza_/Bobtach/Image088.jpg
http://users.tpg.com.au/tazza_/Bobtach/Image087.jpg
http://users.tpg.com.au/tazza_/Bobtach/Image086.jpg
 
Could you not just bolt both brackets close together to a flat and rigid reference bar where you could then accurately line up all relevant corresponding section/faces/edges on both brackets to ensure parallelism and squareness? That way when you start boring the holes to its proper size the two holes would be lined up true with the same pivot axis for both brackets.
 
Re: Making bushing & pins for a JD Dozer

I'd go the line boring route too, here are a few pictures of the one i modified to bore out a bobtach on a Bobcat.

The way i centred the worn holes was to machine two sleeves with a taper on the ends so you slip them into the holes and it aligns the boring bar and you weld the bearings in place and remove after boring the holes out. I did it with tool steel that is held with set screws in 1" bar that slides between the two bearings.

After machining the holes, i made sleeves to bring the holes to the rite size or if it's for bushings, you machine the bushings to suit the hole.

I know it has already been stated, you need to ensure they are machined straight, there is nothing worse than them being out and they fight against each other and break things, been there done that before.


Hopefully some of that makes sense, the drive unit was an old rail drill that was used for drilling holes in railway tracks.

http://users.tpg.com.au/tazza_/Bobtach/Image090.jpg
http://users.tpg.com.au/tazza_/Bobtach/Image089.jpg
http://users.tpg.com.au/tazza_/Bobtach/Image088.jpg
http://users.tpg.com.au/tazza_/Bobtach/Image087.jpg
http://users.tpg.com.au/tazza_/Bobtach/Image086.jpg

tazza
Thats a neat setup, thanks for the pictures. I think that will work with most of the brackets. You used a 1" bar, what was the diameter of the hole you started to bore? 1/4" square tool steel in a round hole in the boring bar with a single set screw?
Joe

- - - Updated - - -

Could you not just bolt both brackets close together to a flat and rigid reference bar where you could then accurately line up all relevant corresponding section/faces/edges on both brackets to ensure parallelism and squareness? That way when you start boring the holes to its proper size the two holes would be lined up true with the same pivot axis for both brackets.

rangerman:
Thanks for posting, I will use your suggestion on several of the brackets. Very good idea.
Joe
 
Back
Top