Next project: Craftsman 101.07301 6" lathe

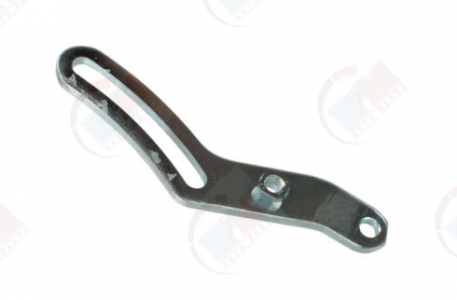
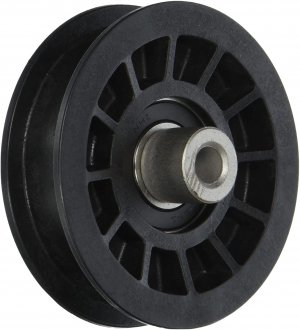
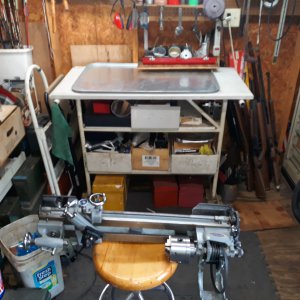
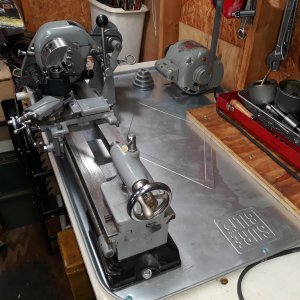
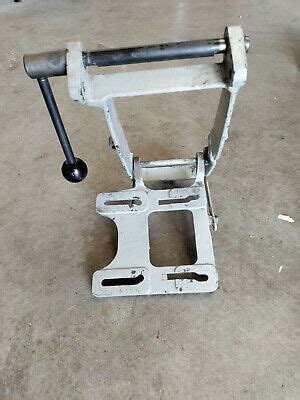
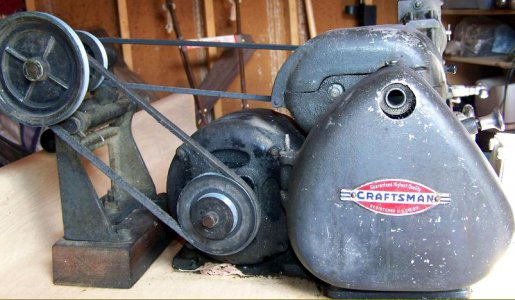
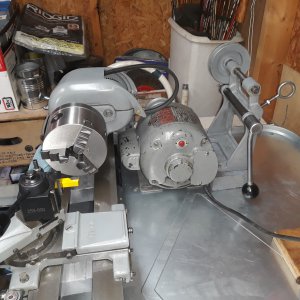
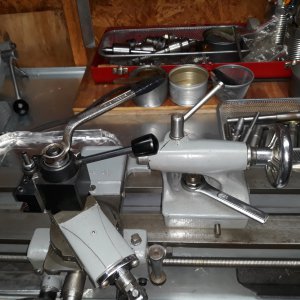
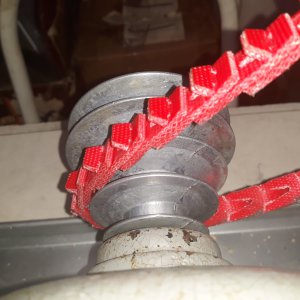
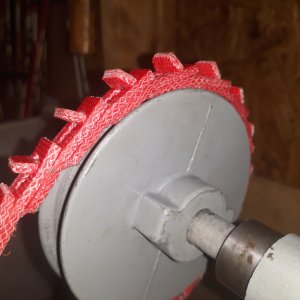
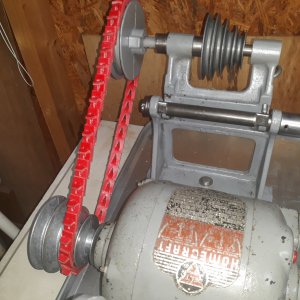
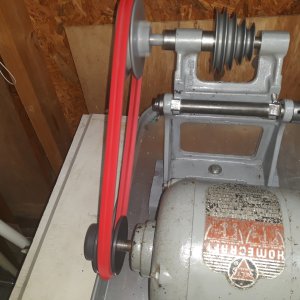
I ordered two parts to start my motor to layshaft mod. When they arrive I'll make a support mount and tensioning knob. I'll have to either move the motor about an inch closer to the layshaft or buy a little longer belt. Also need to put a swarf pan under the lathe which I had already bought. Maybe one day I'll actually make something with the lathe! L0L
 

Attachments

  • s-l500.png
    s-l500.png
    94.8 KB · Views: 20
  • 71dozciVndL._AC_SL1500_.jpg
    71dozciVndL._AC_SL1500_.jpg
    119.5 KB · Views: 12
Thanks for calling attention to the fact I have the feet reversed. I noticed the gear head rigedity is not so good with only having one screw to hold it in place. Well live and learn. Try and get them on properly tomorrow if I get a chance. Thanks again, Ron
It's a good thing you told me about the feet reversed. I removed everything off the lathe bench and started over. I discovered that I had not even tightened the 3 screws on each foot! I installed my swarf pan also which will make clean-up a lot easier. Now I'm just waiting for the 1/2" sheave bushing, idler pulley and adjusting bracket so as to install the motor.
 

Attachments

  • 20211031_123156.jpg
    20211031_123156.jpg
    2.8 MB · Views: 7
  • 20211031_145451.jpg
    20211031_145451.jpg
    3.7 MB · Views: 8
I have the 101.21400 lathe so there may be some differences. I have the OEM stand and my motor is located almost directly below the countershaft. Loosening the tension on the countershaft also loosens the belt for the motor.
 
I have the 101.21400 lathe so there may be some differences. I have the OEM stand and my motor is located almost directly below the countershaft. Loosening the tension on the countershaft also loosens the belt for the motor.
You just might be correct and I might just be chasing mods that I don't really need to do! Seems to make sense and that I might be overthinking my needs for my setup! I'm going to sit upon the porcelain alter and stink about this! "No one told me I had to be smart, just willing!"Thanks for your input! LoL

I've been thinking I needed something like in the picture below.
 

Attachments

  • download (64).jpeg
    download (64).jpeg
    23 KB · Views: 7
Note that the 101.21400 is the same except for badges and maybe color as the Atlas 618. Most of the parts on the 101.07301 are the same as on the 618 and 101.21400. The main difference is that the spindle bearings on the 101.07301 are bronze bushings whereas the other two use Timken tapered roller bearings. The other difference is that the 101.07301 always came with the second version of the 618 Countershaft. But from about 1939 on, the 618 (and the later 101.21400) changed to the third version. The difference is that the 2nd version had the countershaft proper above the belt tension pivot point and a shorter countershaft bracket. Whereas the third version was like the 10" Horizontal Countershaft where the countershaft proper hangs down from the pivot point.
 
Last edited:
This is probably the the way I should mount the motor and countershaft. With that large pully on the motor I'll bet it flys with lot's of rpm's! I'd have to be careful with belt selection so that they are both, when tensioned, the same deflection. Otherwise one would be loose and one would be tight.
 

Attachments

  • download (65).jpeg
    download (65).jpeg
    75.4 KB · Views: 10
Last edited:
I've decided to go with the motor in between the countershaft and the lathe. I ordered 3/8" and 1/2" red link belts. ($62) Could have done this cheaper but it will make my lathe so much more "sexy!" In the below pic is the way it will go together and nothing is bolted down yet. My set of carbide cutters arrived yesterday. Getting antsy to get my lathe finalized so I can enjoy making mountains of useless chips! LoL
 

Attachments

  • 20211101_135330.jpg
    20211101_135330.jpg
    3.3 MB · Views: 12
Doing a little busy work while waiting for my parts to arrive. I had an old 9/16" offset box end that I cut off and slotted the box end. After slotting I squeezed the box end together so it would be a tight fit on top of my QCTP. My tailstock locking nut and bolt was 17mm so I cut off a spare 17mm box end wrench. This way I can just leave them on all the time instead of looking for them.
 

Attachments

  • 20211102_121141.jpg
    20211102_121141.jpg
    2.8 MB · Views: 11
  • 20211102_121545.jpg
    20211102_121545.jpg
    3.1 MB · Views: 14
Well I have everything aligned and bolted down and am just waiting for two parts to arrive. The 3/8" belt and the sheave 5/8" to 1/3" adapter should be here by Friday. "THEN" I should be able to make mounds of worthless chips not known to humanity this century! LoL
 
"IF NOT BAD LUCK I'D HAVE NO LUCK AT ALL!" My shaft adapter came in so I installed into the sheave and "tried" fitting the 1/2" link belt onto the pulleys. Wouldn't you just know it don't fit the motor to cuntershaft. The pulleys are definetly not 3/8". The belt won't stay on and spins off the motor sheave. Is there a size between 3/8" and 1/2" belts that I'm not aware of? Are my pulleys metric or something??? I hope when I get the 3/8" link belt that it will fit the countershaft. Take a look at the pics and maybe someone can clue me in. Thanks

Side note: Are these type belts directional?
 

Attachments

  • 20211104_182951.jpg
    20211104_182951.jpg
    3.1 MB · Views: 8
  • 20211104_183000.jpg
    20211104_183000.jpg
    2.7 MB · Views: 8
  • 20211104_183216.jpg
    20211104_183216.jpg
    3.1 MB · Views: 8
  • 20211104_183540.jpg
    20211104_183540.jpg
    3 MB · Views: 9
Back
Top