POTD- PROJECT OF THE DAY: What Did You Make In Your Shop Today?

I like to drill and ream a 1/4 hole and fill the cavity with oil. A 1/4 rod for a piston and a solid wack with a hammer will hydraulic the arbor off with ease.

We did that all the time removing leader pin bushings from molds. I used grease as it did not spray out when the bushings came out.


Cutting oil is my blood.
 
Knocked another little challenge off the list this afternoon. I made a fork.

A few days ago a buddy brought me another old Singer machine and, long story short, while I was trying to research a couple of the attachments I got sidetracked on a technique known as “hemstitching”. You don’t see it much nowadays but I’m sure lots of you may recall grandma’s nice tablecloth or one of grandad’s pocket handkerchiefs that had it around the border, even if nobody knew what it was called.

Essentially it’s an open “ladder” of stitches that links two pieces of fabric but with nothing else in between — it’s entirely open, like a single row of mesh. There are dedicated machines to do this in a factory setting and there’s also attachments for domestic machines that allow you create it. And, you can also use an accessory called a “hemstitching fork”. So this got me curious.

The forks are few and far between and I was not going to pay what the ones that I could find were going for. Heck, it’s a metal fork, I should be able to do that! Sooo…

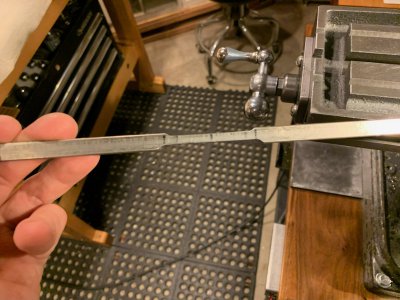
Some 1/8” by 3/8” salvage from an old filing drawer divider would be the test material. I could see from pictures the real forks looked to be made from 1/8” x 3/16” maybe, but the width of the legs didn’t appear to me to be critical so I thought my 3/8 stuff would be okay. To put the bow into it though was going to be tough so I thinned the centre some on the little miller.
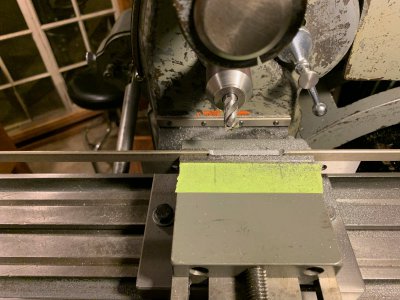
1670373851022.jpeg
1670373882592.jpeg

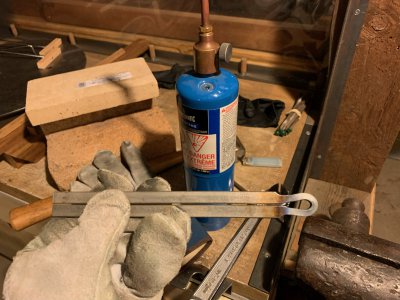
Then to the hot shop for bringing up to bright orange and wrapping the legs halfway around a stub sticking out of my vise. A little tweaking on the anvil to get things into alignment and it looks pretty passable.
1670373917667.jpeg

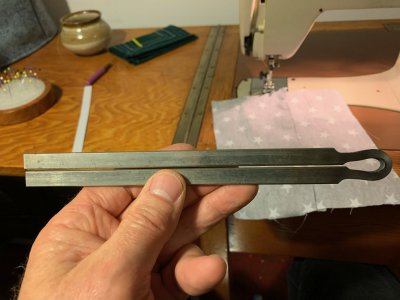
Okay so the idea here is you fold your piece of fabric once over this fork thing, hold the fabric snuggly, and then run a row of stitching down the little gap between the two legs. Then you slit the fabric, open the two halves, and turn back the narrow edges to reveal your laddered stitches. Press open and stitch down the flaps and you’re done. Got it?
1670373948664.jpeg

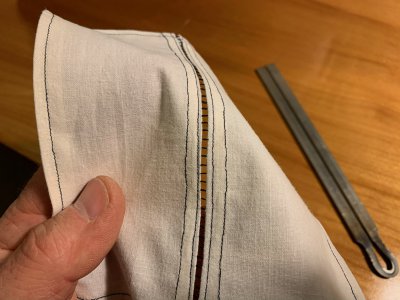
Here’s the finished product (complete with some incredibly crooked topstitching!) The two pieces of fabric are linked only by the stitches running at ninety degrees to the edge, there’s nothing else in between.
1670373985191.jpeg

Will I ever use this technique again? Nah, probably not, but it was cool to figure it out. Thanks for looking! :)

-frank
 
I use a heap of worm drive clips on my aquaponics and garden irrigation and have always been (being polite) annoyed with them.
For some reason there has been a number of wire clamp projects all over the place and heaps were recommended to me by youtube.
So I thought I would have a go and make one.
It actually wasnt as simple as I first thought, the order of work was very important.
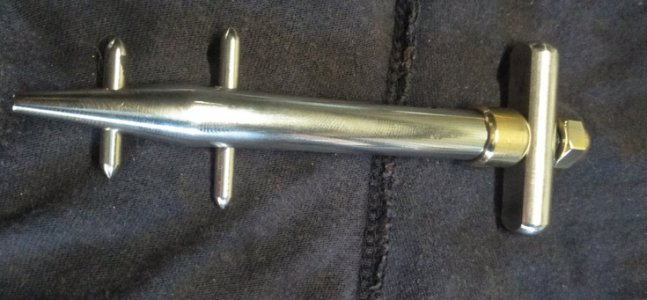
First I drilled three 4mm cross holes, one for the first cross bar and one at each end of what will be the slot in a bit of 12mm stainless.
Then I turned a taper on one end.
Then I drilled it to 8mm
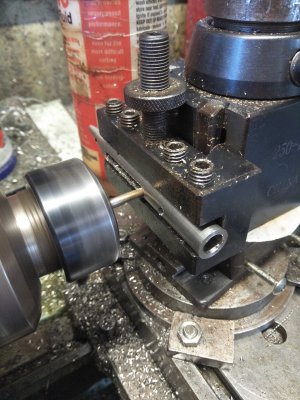
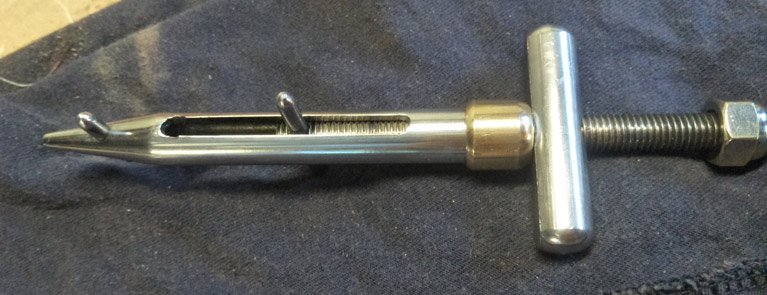
Then I set it up in a tool holder and using a 4mm end mill I milled out the slot on one side, then turned it over to mill out the other side.
wire-3.jpg
To get the end mill in alignment I passed it through one of the 4mm holes the adjusted the tool holder to the correct height but I milled each side separately. The finish was very smooth and just needed a quick touch up with a file on the edges.
The first attempt at drilling the all thread was a failure as the drill wandered slightly and the hole didnt line up with the slot so the second attempt I placed the M8x1.25 all thread in the body and clamped it in the tool holder and used the 4mm end mill to drill out the hole for the wider bar.
That worked a treat.
A brass end cap for looks and so the handle/nut wont gall and an acorn nut on the end so the handle wont spin off.
wire-1.jpg
I milled a flat on one side of the handle to sit on the brass when tightening then a (very) quick polish and done.
wire-2.jpg
 
"Fixed" my low-end adjustable parallels (you know, the ones that come in a blue case):

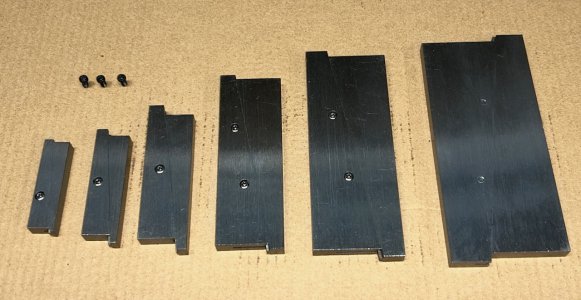
Adj Parallels.jpeg
When I first received the set two years ago I had to strip them down and flush out all of the grit left from the grinding/sanding operation, then used some Starrett M1 oil on re-assembly. Complained to the Seller who offered to exchange them, but I figured that all of them would be the same and I did get them at a good price. I also asked if I could get some spare screws since the ones used were crappy, soft POS's: no luck.

When I was using one a few weeks ago I was again concerned that the soft screws would eventually be a problem, so I ordered a handful of M3-0.50 x 6mm insert screws (I had some shorter ones than fit well, but not much engagement). The screws finally arrived and after chasing the threads in the parallels (the original screws & the holes were a wee bit undersized), cleaning out the swarf and touching the backs of the parallels on some 220 grit to remove the burrs I have a smooth operating set that I am confident using without worrying about the screws.

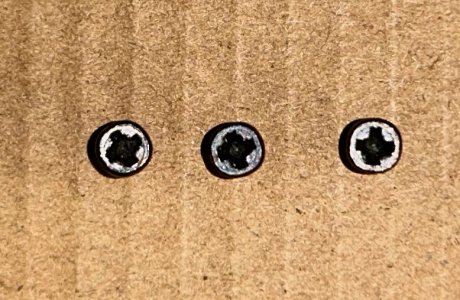
Here are what the old screws looked like:

Cheap Screws.jpeg
 
This is turning out to be a fix stuff day.

Have a small rental unit, and last night my renter texted asking for help, a part on his cross bow broke. (He's a partial quadriplegic, but has enough control to fire a bow or rifle with some extra tooling). Anyway, there is bracket where the cocking attachment hooks to the stock. It's a two piece clamp where a couple of button socket head cap screws pinch the clamp to the bow stock. Anyway, the screws broke. Quickest solution was to drill it all out, and go from a #8 button to a 1/4-20 SHCS. Quick drill and tap, and he was back in action for today.

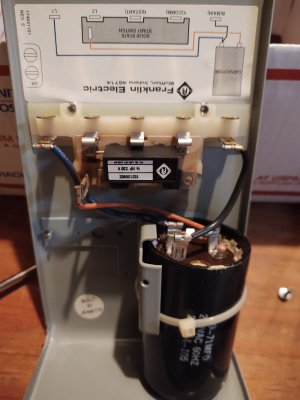
Of course, then this morning he called. The well was out. Had to leave work early to chase that down. Turned out to be the start cap in the pump controller. Luckily, I'm a packrat, and had a suitable start cap from some equipment I scrapped years ago... So, that's up and running again.
Cap.jpg
This old cap is most likely dried out. Cap meter said it was about 1000 times less than it should be!

On the way back, pulling into the garage a mouse run across my new garage floor. Off to the hardware store for 10 mouse traps. That isn't going to happen again! No way, No how. Will not tolerate mice in the new house! (A garage is way less sealed than a house, but still...)

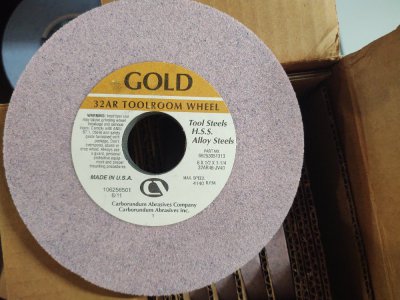
One small shop project. Stashed a box of tool room wheels for SG from on line. These are only 6" dia, but the price was good enough. Supposed to be for HSS, so we'll see how these are. I'm no expert at picking out wheels, but I can tell right a way when I picked the wrong one! LOL
Gold.jpg

On to fixing more broken stuff!
 
I use a heap of worm drive clips on my aquaponics and garden irrigation and have always been (being polite) annoyed with them.
For some reason there has been a number of wire clamp projects all over the place and heaps were recommended to me by youtube.
Maybe I'm slower than the average squirrel... How do you use these?

Or alternate version:

They look great... what are they? ;)
 
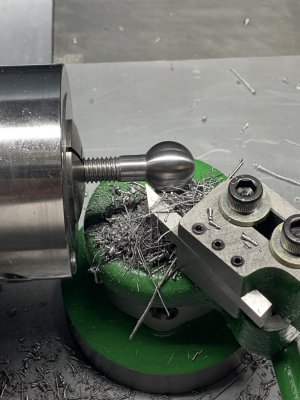
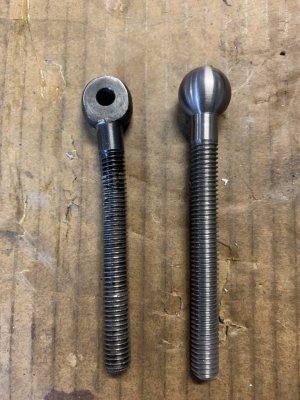
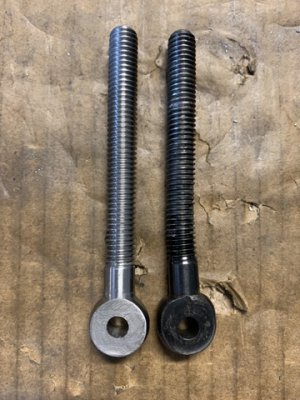
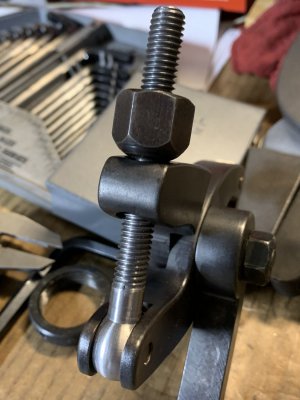
Recently bought me a used scissor style knarler. The bolt that provides the force was badly damaged. Bent and threads buggered up. I knew that when I bought it but thought it was as simple as replacing a swing bolt and done. Its always that easy right. The swing bolt was not standard, it had a .250 through hole and 3/8"-16 thread. All I could find with 3/8 threads had 3/8 through holes.
So, I chucked up a piece of .750 steel, turned down a little over 3.25" of it to .375 diameter. 3/8-16 threaded about 3" of that. Used the ball turner to put a radius on the other end.
IMG_9346.jpgIMG_9347.jpg
Milled flat the ball end leaving it .374 thick. Drilled a hole in the center and reamed to .251
IMG_9348.jpg
Now the Eagle Rock is ready.
IMG_9349.jpg
 
Back
Top