POTD- PROJECT OF THE DAY: What Did You Make In Your Shop Today?

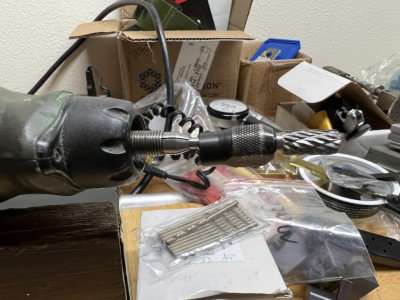
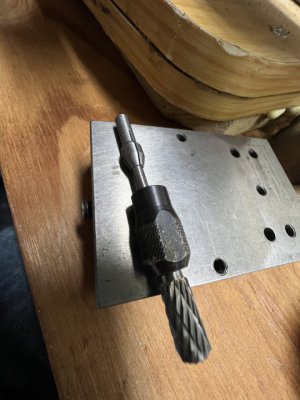
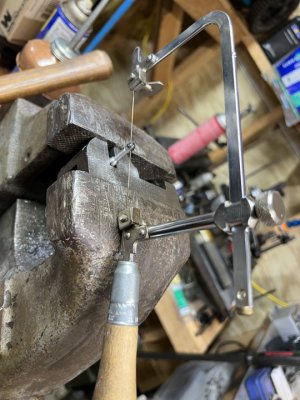
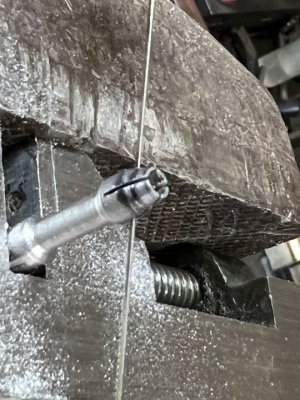
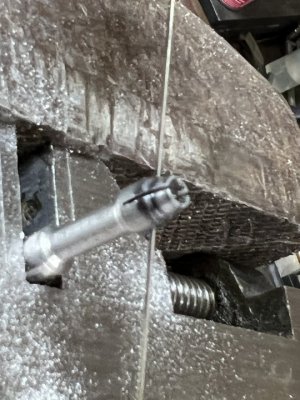
I then mounted it in a little vise and sawed using a jewelry saw.
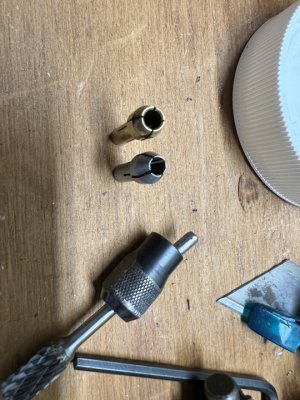
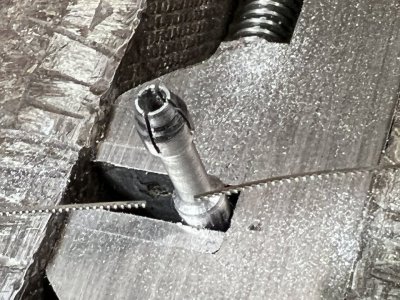
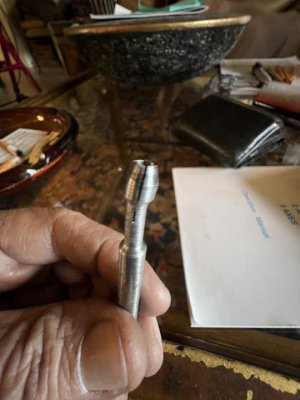
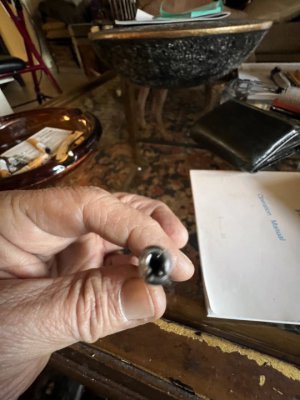
Everything was looking just great…. Took the little vise out of the bench vise… and then I dropped it. And of course, the vise/collet landed on the ground with the collet hitting the ground first. It totally bent the heck out of the collet.

I was bummed. Oh well
 

Attachments

  • D5CF80F0-0736-4857-B2D5-2C4F75109D66.jpeg
    D5CF80F0-0736-4857-B2D5-2C4F75109D66.jpeg
    89.8 KB · Views: 38
  • 0D2561C0-9286-4F75-B748-9D9E3AA299AB.jpeg
    0D2561C0-9286-4F75-B748-9D9E3AA299AB.jpeg
    199.8 KB · Views: 35
  • 83BA128E-6439-4529-9443-A85BAFDE944A.jpeg
    83BA128E-6439-4529-9443-A85BAFDE944A.jpeg
    104.4 KB · Views: 37
  • 5ABFF83D-3699-4ECC-8F53-AC34EDA1D8F3.jpeg
    5ABFF83D-3699-4ECC-8F53-AC34EDA1D8F3.jpeg
    57.8 KB · Views: 35
  • B96F66B0-8E00-461D-97E0-7D830837F40F.jpeg
    B96F66B0-8E00-461D-97E0-7D830837F40F.jpeg
    65.1 KB · Views: 35
  • A5F8BDE3-BE6E-404C-B375-C705D811AED1.jpeg
    A5F8BDE3-BE6E-404C-B375-C705D811AED1.jpeg
    93.4 KB · Views: 34
Last edited:
So, I repeated everything and finally got it done.
The middle collet is the new 3mm one, the right one is the 1/8” collet, and the left collet is a worn brass collet that has been slipping. I’m not even sure what size the worn was supposed to be. It is a rough looking collet. I’m sure it’s one of. The brass ones I made at some point.

I’m happy with the results. It’s a tight 3mm collet which should serve me well for years. And I’m not going to try to harden it because I’m afraid it will warp.
 

Attachments

  • 58810943-5116-41E2-A7CB-BC50EF3D5899.jpeg
    58810943-5116-41E2-A7CB-BC50EF3D5899.jpeg
    132.6 KB · Views: 36
  • 347774C8-9461-4C10-8EB7-C5A2A228967F.jpeg
    347774C8-9461-4C10-8EB7-C5A2A228967F.jpeg
    56.3 KB · Views: 33
  • 7722B990-3626-480D-8877-693316B1D387.jpeg
    7722B990-3626-480D-8877-693316B1D387.jpeg
    107.3 KB · Views: 30
  • 7247E0CA-3F6D-4819-9E2E-8A48AD99BC50.jpeg
    7247E0CA-3F6D-4819-9E2E-8A48AD99BC50.jpeg
    81.2 KB · Views: 30
  • F7665525-6FFE-42A8-A169-A8A06EB756C9.jpeg
    F7665525-6FFE-42A8-A169-A8A06EB756C9.jpeg
    104.7 KB · Views: 30
  • 81BDF072-DC4F-479F-990B-F0075F80A707.jpeg
    81BDF072-DC4F-479F-990B-F0075F80A707.jpeg
    95.6 KB · Views: 35
Last edited:
Today i finally managed to find some free time to get some work done in the big garage. First i did some cleaning set up a work bench and began assembling the cylinder head for the K series in the scenic. First i used a wire brush on a drill to clean the valve seats than i used a bigger brush to clean all the valves and then i gave all of them a wash in my parts washer. Then i started to grind in the valves i used course then fine grinding paste, the intake side all took little effort because they were straight and concentric. The exhaust side is always worse but this time all the seats had a low spot next to the spark plug it took an hour each to get them to seal. I fill the chamber with gasoline to test then they all seal so i moved on install new valve seals and reassembled the valve springs. I stop at this point but this is a big step forward. I write my name on the top of the valves and the number in the left corner that way i don't mix up valves 6 with 9 in a 12 valve or 16 head. Its been more than a year since i've had to rebuild a head or an engine. This being an 8 valve one is one of the easiest, i hate doing the BMW straight 6 heads, they are 24 valve with big valves, my hands hurt for days after them.
IMG_20220219_084520.jpgIMG_20220219_090234.jpgIMG_20220219_094925.jpgIMG_20220219_100550.jpgIMG_20220219_111844.jpgIMG_20220219_115715.jpg
 
In changing out my “new” bandsaw motor, the factory double pulley had a 22mm bore while the old motor was a 5/8” shaft. Somebody fixed that by making a brass sleeve, that was stuck tight on the shaft. There was very little clearance between the sleeve and the motor housing but no problem, I have a Kmart puller, use that. Except while it would grab the sleeve on the shaft, the pull literally unfolded the thin L shaped arms. I read a thread here on pullers, and ordered an OTC 1027, but it’s a few days out. Then I started thinking that maybe the OTC arms would not fit anyway with the clearance limitation, It did occur to me that with a shop full of equipment, something ought to be done. So I made the deal below. Two horizontal bars, the lower just fit between sleeve and housing, and my mill hold down kit supplied the threaded rods. I tapped two holes in the lower bar 1/2-13 and milled a 5/8” slot partway through the middle to slip around the shaft, and the upper bar had one tapped hole in the center and 1/2” through holes to the outside. I screw the rods into the lower bar, put nuts on top, and with some all thread and a vise-grip handle, it just slid off beautifully. It’s already pulled up a half inch or so in the picture.

By the way, the tapping was so easy with the Procunier tapping head and a spiral flute tap. I love that thing.

532ED3E0-CCF7-455F-BB61-375A03711597.jpeg
 
I wasn't happy with the first base I made for my sliding table saw so I decided to start over. Purchased the new steel a week ago. Got everything all cut up. Finally got really some good beads running (I was running the MIG too hot) and WHAM! The MIG stops spooling. Clean the ends, check everything out, sure enough... out of wire! ARRG!
 
Over the weekend, I finished up some MLA kit projects.

Boring/facing head.

20220219_222951.jpg


Die filer.

20220221_200808.jpg


I have to finish up the pulley for the filer. I think I'm going to use a treadmill motor and controller I have on hand. I have a belt for the stock pulley, so I'm thinking I'll use it and cut the pulley for the micro-v belt. It's a bit fast, but it's about a 1:5 reduction and has a speed control. I'll probably mount it and the motor on a board for portability.

I also need to source some files. That will work for it.

The boring head is good to go. I made a split bushing for adapting the 3/4" holes to 1/2" for my existing boring bars.

I highly recommend both kits. Very good quality and directions/drawings. The cast iron is messy, but otherwise great to machine.
 
Over the weekend, I finished up some MLA kit projects.

Boring/facing head.

View attachment 397549


Die filer.

View attachment 397550


I have to finish up the pulley for the filer. I think I'm going to use a treadmill motor and controller I have on hand. I have a belt for the stock pulley, so I'm thinking I'll use it and cut the pulley for the micro-v belt. It's a bit fast, but it's about a 1:5 reduction and has a speed control. I'll probably mount it and the motor on a board for portability.

I also need to source some files. That will work for it.

The boring head is good to go. I made a split bushing for adapting the 3/4" holes to 1/2" for my existing boring bars.

I highly recommend both kits. Very good quality and directions/drawings. The cast iron is messy, but otherwise great to machine.
I am on his waitlist for the die flier… He had to switch the source for making his castings
 
Today i was very busy but cars don't seem to care. It was my brothers Astra H the starter died and it has over 10k on the oil it needs a service. I had to remove the starter which was a struggle i only had a small hole in which to get to some of the bolts and one i had to un do from under. Then i had to take it apart it needs new brushes, i bought them complete with the holder installed, grease the gears clean everything else assemble tested it and installed it, also i changed the oil, its filter , air filter, fuel filter, cabin filter. This car sits a lot but it's been for more electrical repairs than any of the others, must be a GM thing.
IMG_20220219_195318.jpgIMG_20220219_195308.jpgIMG_20220219_194015.jpg
 
Back
Top