POTD was making another arbor for a drill chuck for the Bridgeport. Over the years I’ve picked up a number of ½” capacity chucks with R8 (and other) arbors. My BP typically has an ER32 collet chuck mounted instead of R8 tooling as I find it more convenient to change collets at the spindle than reaching up for the draw bar. One of these would be a donor for a ¾” straight arbor.
So how many R8 arbors with 1/2" capacity chucks do you need? The one on the left would be getting a new arbor
View attachment 401450
Most of my projects involve using 3/8”, ½” or ¾” collets. It’s convenient to have drill chucks with those sized straight shanks for quick changes between end mills and drill chucks without having to change the ER32 collet size. I recently made up a couple of 3/8” arbors for some small Jacobs chucks, and had 0-1/4” and 0-1/2” chucks with ½” shanks already. Time for a ¾” one to complete the set.
The donor happened to be a Jacobs ball bearing chuck. First step was removing the chuck from the arbor which created a side project. My chuck wedges weren’t thick enough to bear between the arbor and chuck. So, off to the BP to make a spacer.
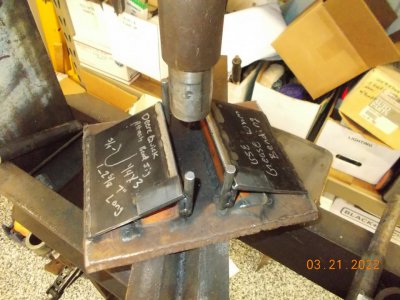
My wedges weren't thick enough to force the drill chuck off the arbor. . .
View attachment 401452
Milled a piece of 1/4" aluminum for a spacer
View attachment 401451
Couple of taps with a brass hammer and off came the chuck
View attachment 401453
Next step was matching the R8 arbor Jacobs’ taper with the compound. The arbor was chucked up and swept with a dial indicator. I rotated the lathe chuck out of curiosity and repeated; no change in the taper.
Chucked up the R8 arbor and swept the taper with a dial indicator. Tapped the compound with a brass hammer to dial in in.
View attachment 401454
Material of choice was 1” drill rod. Faced, center drilled and turned the end to the large diameter of the Jacobs taper. Then cut the taper with the compound. I don’t know its purpose, but the existing arbor had a relief groove which was cut also (stress riser relief?).
Turned the tapered end to the large diameter of the Jacobs taper (~0.825")
View attachment 401455
Taper cut with the compound
View attachment 401456
After a little polishing with a smooth file and 400-grit emery cloth
View attachment 401457
Test fit
View attachment 401458
Cutting the stress relief (?) groove
View attachment 401459
Next was turning the shank to diameter. I left a portion of 1” diameter stock at the base of the Jacobs taper for a bearing surface for the wedges in case the chuck needed to be removed from the arbor. Parted off with the band saw and faced/chamfered the end on the lathe.
Turning the shank to 3/4"
View attachment 401460
After a little polishing
View attachment 401461
Cutting off on the band saw
View attachment 401462
Faced and chamfered the 3/4" end
View attachment 401463
Then heat treated the arbor with a Thermolyne muffle furnace. After quenching, tempered to a dark orange (twist drill temper).
The Thermolyne takes about 30 minutes to get to 1550 F. Let it set for 10 minutes, then quench in motor oil.
View attachment 401464
Back into the furnace after quenching; tempered to a dark orange (~480 F)
View attachment 401465
Didn’t show it, but polished it up with a ScotchBrite wheel. Tapped it home with a brass hammer and there it is!
New arbor in the foreground
View attachment 401467
After a couple of taps with a brass hammer. In retrospect, I could have cut the taper a little smaller for deeper engagement.
View attachment 401468
View attachment 401469
Thanks for looking, Bruce