POTD- PROJECT OF THE DAY: What Did You Make In Your Shop Today?

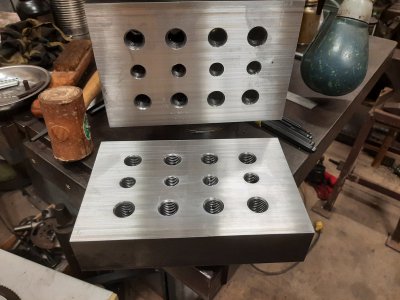
Finished grinding my set up blocks this evening. I decided not to heat treat them. I don’t think I could do them myself. There is a local heat treating place near by, but they haven’t gotten back to me.
If someone has a suggestion. Thanks
Anyways I am looking forward to using them on my horizontal boring mill.
Martin
.20230828_190433.jpeg
 
Converted my bump knurling tool to a clamp style. It's not all that fancy or refined but it seems to put a very sharp knurl on steel now!

@mattthemuppet2 - this is what i used one of those blocks of steel that i got in the box from you. This is the leftover scraps, i started by making the arms curved but couldn't figure out how to hold them in the mill so i started over with square. I used the existing hold in the block as the feature for the adjusting bolt - turned down a piece of old shafting scrap to make the semi-circle bushings on the top and bottom. It will kurl up to about 1" before the bolt hits on the back side of the slot, i may enlarge that at some point. I used my ELS to thread the 1/2 - 13 and it worked perfectly, thanks again @WobblyHand :) The more i use it the more i like it and am glad i have it. Oh and i used my arbor press to put the pins in that hold the knurling wheels - worked great.


View attachment 458287
how cool is that! I love seeing what was once scrap become something useful. Looks super stout too.
 
how cool is that! I love seeing what was once scrap become something useful. Looks super stout too.

Thanks. It's sort of bulky but stout is a nicer way to put it. If the original holes where the wheels mounted were further apart vertically then i think the geometry would be slightly better but i still haven't purchased a dovetail cutter and this seemed like an easy way to use a tool holder that would otherwise never get used.
 
These hay sampling probes
The things I don't know anything about ...

For any others also curious:

I couldn't make sense of the parts until I watched that video. Now I understand: the steel conduit in the foreground is what cuts the core sample, with the cutting end that you sharpened with a file on the right. I now see that's just a wooden dowel used as a plunger to push out the sample.

The adapters in the rear attach to the left end of the tube. The PVC is just a storage case.

Farmers tend to be the handiest people I know (necessity and inventions).
 
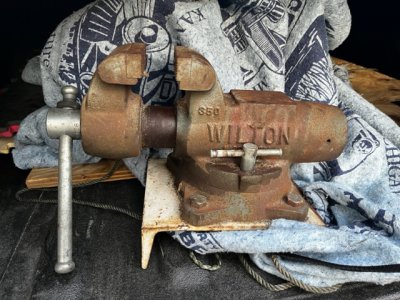
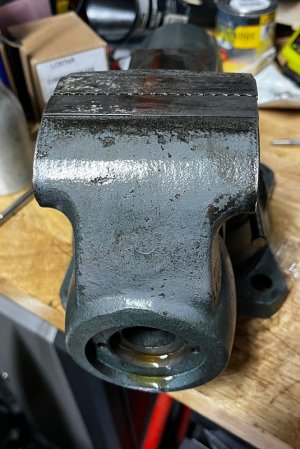
This is just from cleaning and a couple of hours bath in Evaporust... I might just leave it like that... I was planning on painting it but, as before, I can't seem to be able to find the Rust Oleum Verde Green Hammered spray paint anywhere...

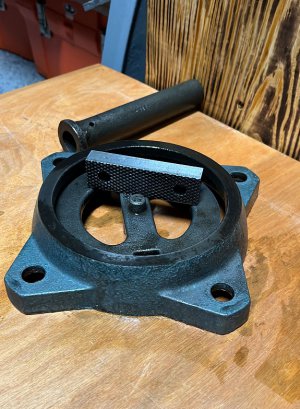
Before:

IMG_2578.jpeg

IMG_2591.jpeg

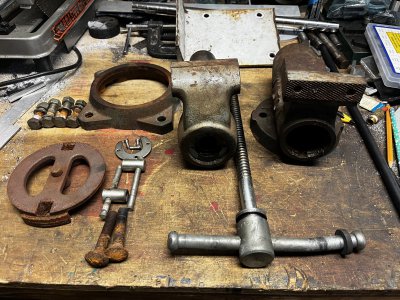
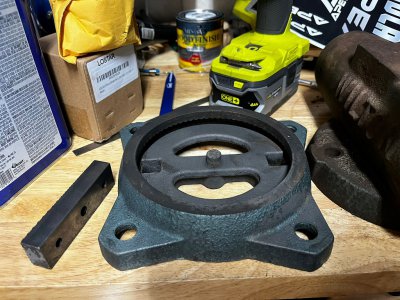
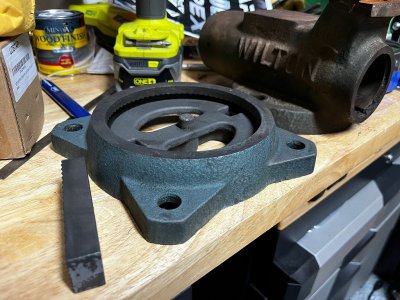
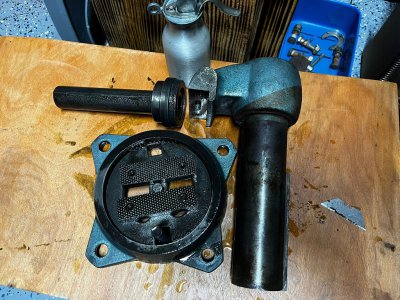
After - I only did the base, inner piece and one of the jaws...

WV-1.jpeg
WV-2.jpeg

Rinsed with water and then dried... now with a coat of way oil to protect while I finish the rest...

WV-3.jpeg

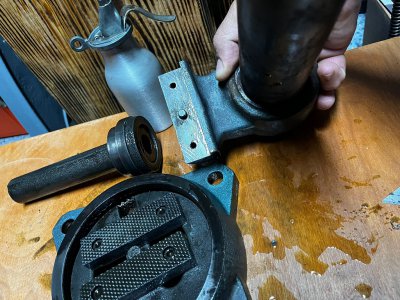
EDIT: A few more photos... I need more Evaporust and also a smaller container... For now, I am just placing some fillers to raise the level...

But look at the difference between where the line is... and how clean is the area where the jaws are installed. Again, way oil on everything after rinsing with water and drying...

WV-4.jpeg

WV-5.jpeg

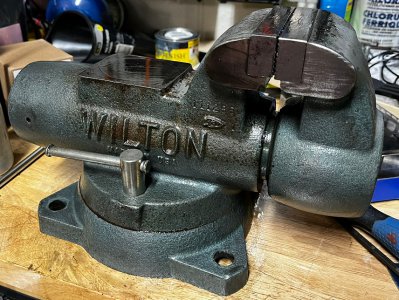
Last edit for tonight. As mentioned, need more Evaporust to be able to submerge it all. But this is how far I took it today. All that is way oil as I am not done with it. Still need to straighten the handle. So last edit for tonight:


WV-6.jpeg
 
Last edited:
Wachuko I think you’re right. That vise didn’t even need a paint job. The factory paint is completely intact! That rust remover stuff seems like magic to me. Might be time to buy some for myself. And what a great looking vise to start with! It looks like it only met one unfortunate event in its life. Excellent!
 
Wachuko I think you’re right. That vise didn’t even need a paint job. The factory paint is completely intact! That rust remover stuff seems like magic to me. Might be time to buy some for myself. And what a great looking vise to start with! It looks like it only met one unfortunate event in its life. Excellent!

Agreed, I will leave it as is... that will give me more time until I can find the paint. I do not want to paint hammered dark green like the other tools...

This is the only area where the paint has faded... everything else looks good... and I need to remind myself that it is a tool!! Meant to be used and experience some wear... lol

WV-7.jpeg
 

That thing turned out awesome!

I'm coming to the conclusion that not all tools need to be painted to be clean. You can keep 'em clean without fresh paint too.
Actually, the more freshly painted stuff I see, I start to question the quality of the tool underneath! (As in, what are they trying to hide?)
 
some paint jobs are necessary because it's a real eye sore to look at, and needs some rust protection. You need to be aware though, that a painted over job, where they don't mask, or go right over oil and stuff, is a hack job, and it's putting lipstick on a pig.
it could be hiding cracks... A quality job though usually means someone cared to do it right. So I am not usually afraid of a quality job... I've only got a few of those, the rest have been needing restoration, which I don't mind.. but all my tools are working tools, none are show pieces. I don't need show pieces..
 
Back
Top