Pratt & Whitney Model C 12x30 lathe

Hey guys,

Fellow model c owner checking in. I found mine right before I got the shipping notification on a PM lathe I had ordered, so ended up with 2 lathes in the shop. Been neglecting mine a bit, but its in really solid shape. Its got the power buttons by the gearbox, like yours @motormech1.

Do you happen to have the shoe for the taper attachment? I've got the attachment, but no shoe. The diagram I've found seems to match tailstocks, which is different than with mine (cross slide piece is round off the back), and perhaps yours too?

@tailstock4 - that is absolutely gorgeous. Looking through your resto thread now.
 
@hustlebird Unfortunately, I didn’t get any accessories with mine. I’ll look at mine when I get home to try to see what you’re describing. I’ll get some detailed pics too. Congrats on the score. Don’t feel bad, mine sat in the corner waiting on me for 8 years!
 
Right on, well if there's anything I can provide as reference let me know. Love this lathe.
 
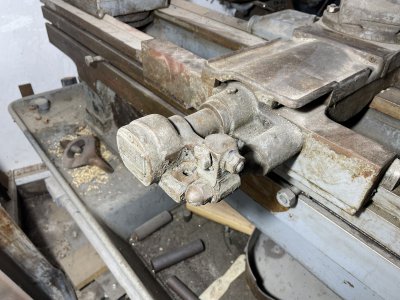
You can see in the pic where the outline of the taper attachment was during the last coat of paint it had. Finding one is pretty much impossible and I’ve been contemplating trying to reproduce one once both my machines are running. I’ve seen enough pics of the P&W and other brands plus homemade setups that I think I could make a pretty decent one. I’d like to try to reproduce the factory one as much as possible.
 
@hustlebird & @motormech1 : I absolutely think the missing taper attachment pieces could be fabricated. You’re right that the later model c’s had several revisions, but I think most of these were with the tail end of the saddle and cross slide. The biggest change was the addition of ball bearings on the slide housing on the backend of the saddle. I believe they may have made this change to make for a smoother travel when using the relieving attachment.

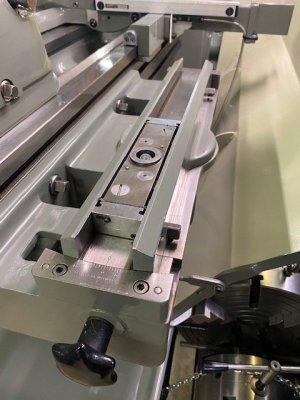
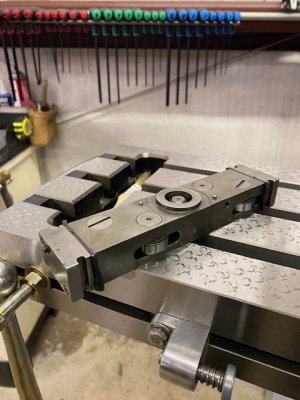
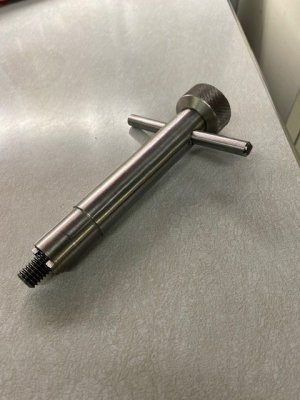
If you look at my shoe, one set of bearings at each end are stationary and the other set of bearing are staggered and on an eccentric cam. This allows it to be adjusted for clearance. In the middle of mine you can see the ACME screw that the saddle portion of the taper attachment picks up. Mine was missing the special tool for this. I’m not sure what the original looked like so this is what I came up with.

I don’t know how much all this helps with the earlier taper attachments, but I believe though some of the specifics are different the concepts are the same.

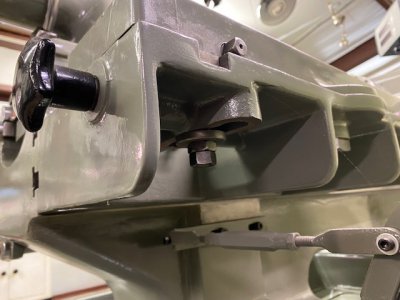
I took some pictures of mine – the shoe, the taper and the special tool. If I could help with measurements or additional pictures, just let me know.

IMG_0884.jpg IMG_0885.jpg IMG_0887.jpg IMG_0888.jpg
 
@tailstock4 Thanks for the pics. Great food for thought. My first thoughts are I could weld up plate to replicate the frame part that bolts to the lathe then mill the faces true. I’ll have to study how the end of the cross slide connects to the shoe on mine. I imagine it’s probably similar to yours.
 
@tailstock4 Thanks for the pics. Great food for thought. My first thoughts are I could weld up plate to replicate the frame part that bolts to the lathe then mill the faces true. I’ll have to study how the end of the cross slide connects to the shoe on mine. I imagine it’s probably similar to yours.
I believe the taper attachment could be a weldment. You’ll probably want to control warpage to minimize machining. I also believe the shoe when it is travelling in its ways has quite a bit of lea way vertically as it floats anyway. You could possibly make the pivoting section of the taper where the shoe rides out of Dura-bar and grind the inner two vertical surfaces and the bottom where it contacts the rigid part of the taper. These surfaces and the pivot point are the most critical. You’ll want the shoe to ride very smoothly.

There are also a couple of blocks on each end of the taper that have the register plate for the angles. These are dowelled and bolted on in place.

I think it would be a pretty fun project.

As far as the way they attach at the cross slide, the parts may be slightly different but I believe they work pretty much the same way. On mine there is an inner piece in the slide housing that has a detent and a spring. This piece rotates and when pushed down engages the ACME stub on the taper attachment shoe. The other end of this piece is threaded and has a couple of dogs. This is where on mine that the special tool grabs a hold of this rotating piece. All easier to make than to explain.
 
So while I was on break just now I was pouring over pics and the parts manual and it looks like the older version on mine has a bit simpler attachment to the shoe. Which is good for fabricating at least. The way for the shoe I thought about bolting together out of ground plate for the reasons you mentioned. I wondered if some AR400 or 500 plate I have would work for that? Durabar would be great but I have some 3/8” and I think 1/2” plate I use to make rifle targets from. There’d be minimal machining on it. What about just using cold rolled steel? As little use as it’d see I don’t think wear would be an issue. I’m quite sure I’m missing something here. Lol I’d have to find a surface grinder to use or outsource since I don’t have one yet.
 
I’ve seen enough pics of the P&W and other brands plus homemade setups that I think I could make a pretty decent one. I’d like to try to reproduce the factory one as much as possible.

If you haven't seen it, check out the @682bear thread on his Hendey #3. Here he replaces the missing bed for his clamp taper attachment:
https://www.hobby-machinist.com/threads/hendey-refurbish-3.96611/post-975740
....and does an amazing job building one that looks like an original casting.

Actually all three of his Hendey refurbish threads are worth the read.

Brian
 
Last edited:
Back
Top