2018 POTD Thread Archive

POTD was one of those take one step back before taking two steps forward . . . I have an 8' x 2' x 6' tall shelving unit in my shop which was organized about 15 years ago. Not so much now . . . So, longer term POTD is to replace some of the shelving with cabinet(s) and drawers. It'd be quicker/easier to buy a couple of HF 44" tool chests, but going the 3/4" plywood carcass, 1/2" plywood drawer route.

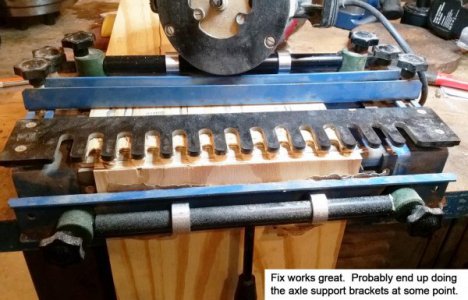
Got a 4' x 4' x 2' carcass put together and started making drawers. I use a HF dovetail drawer jig for drawer-making. Typical glides are 1/2" thick, so drawers are a little under 1" smaller than the cabinet opening. I've made drawers with interlocking rabbets, but that design makes the depth of the rabbets extremely critical because if I'm a little shallow, the drawer width is too big. Then I have to cut a rabbet on the outside where the glide attaches so the drawer doesn't jam.

Nice thing about the dovetail fixture is the drawer width is exactly the length of the front and back boards (assuming the dovetails are cut to proper depth so the sides aren't wide to the front/back). I've made hundreds of drawers with this fixture and have everything adjusted right in. Also have a dedicated router that's purpose in life is to make drawers.

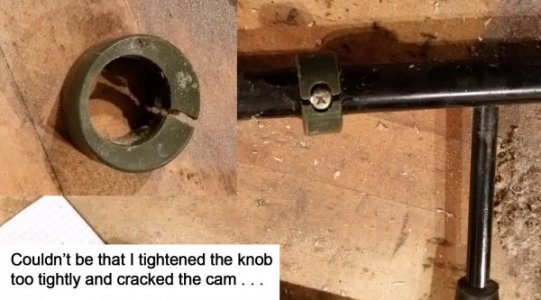
WOW, finally to the POTD . . . Threw the cam lever to lock down a drawer side and heard a "snap". Probably had a little too much clamp pressure and snapped one of the plastic clamping cams.

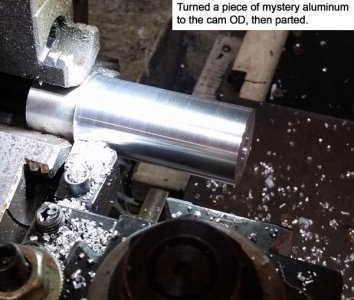
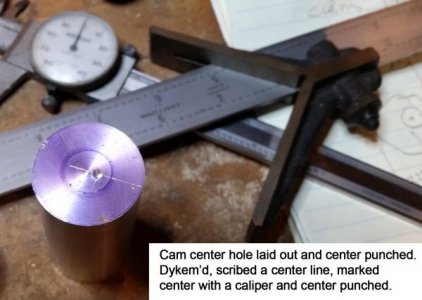
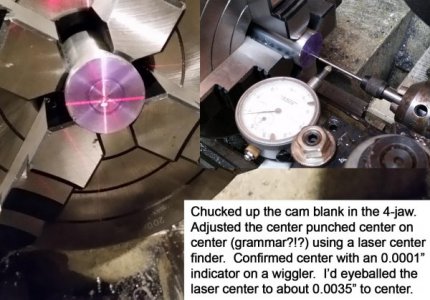
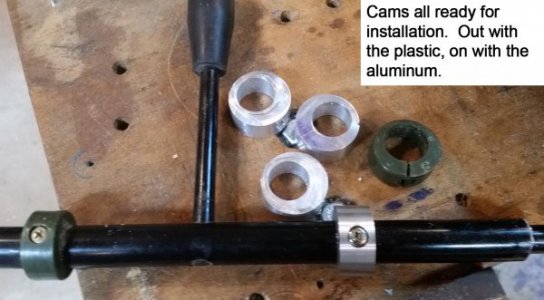
Measured up an intact cam and chucked up a piece of aluminum. Turned to the cam OD and parted off. Marked the end with Dykem and scribed a center line. Then marked the cam center and center punched. Chucked up the blank in a 4-jaw and adjusted the blank to on center using a laser center finder in the tail stock chuck. I checked center with my normal method of a wiggler in the tail stock with the point in the center punched hole and an indicator on the shaft of the wiggler point. I'd eyeballed the laser to about 0.0035" radially from center, so not too bad depending on the project.

The laser went pretty quickly, lined up the center scribed line on the blank with two jaws. Then adjusted those two jaws to put the center punched hole on center. Rotated 90 degrees and adjusted the other two jaws. Frankly, I'll probably go with the indicator method in the future since it's more accurate and doesn't take any extra time.

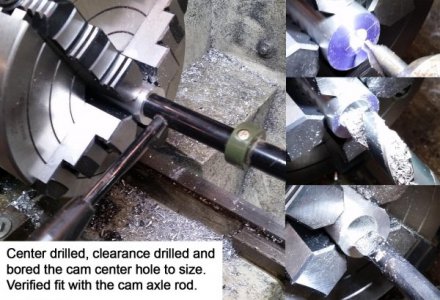
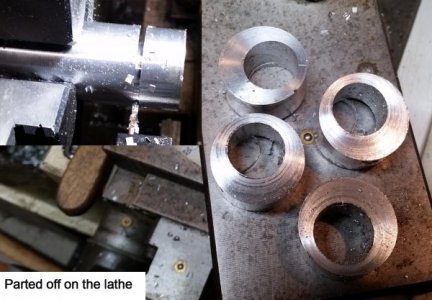
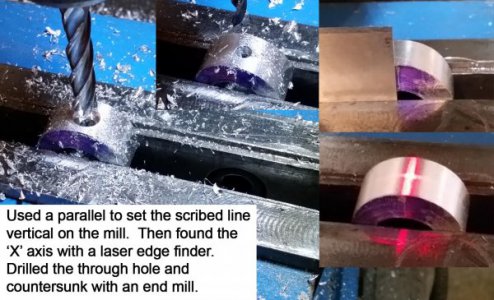
Blank was on center, so center drilled, clearance drilled and bored the cam hole to size. Verified fit with the cam axle, then parted off 4 new cam blanks. Set the blanks in the mill and aligned the center scribed line to vertical using the edge of a parallel. Then found center in X using the laser center finder. Drilled the mounting screw clearance hole and countersunk with an end mill.

Fix works great! You'll probably see another POTD in the near future when I replace the plastic clamp bearings with aluminum ones. Also a POTD of the cabinet once it's done. Thanks for looking.

Bruce


20180701_113525.jpg

20180701_113810.jpg

20180701_114912.jpg

20180701_115939.jpg

20180701_121948.jpg

20180701_125341.jpg

20180701_130601.jpg

20180701_132551.jpg

20180701_133917.jpg

20180701_141022.jpg
 
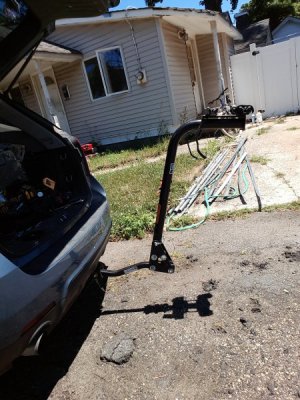
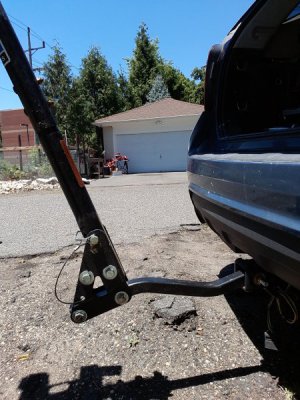
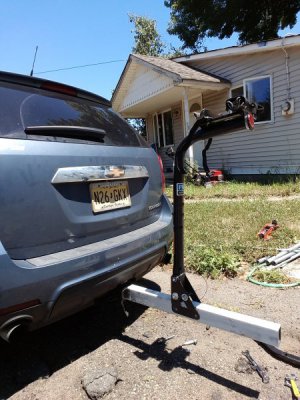
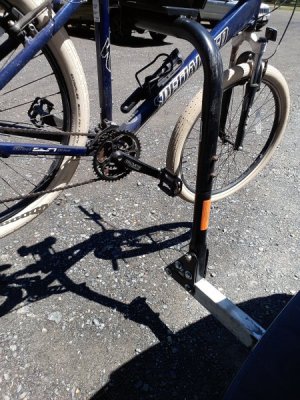
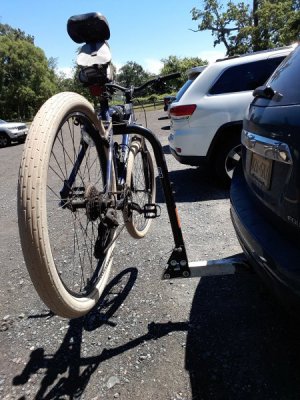
I bought a pos bike rack for my car last year. 1 year of light use and it started to bend up. I decided it was time to fix it up before it became a serious hazard
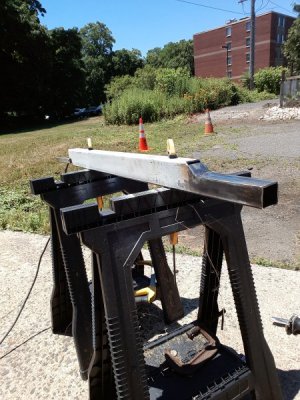
A search around the garage provided a 2"×3" 1/4" tubing. This would do just fine.
Some layout, grinding, cutting and some welding...
Bike rides solid and smooth on bumpy roads now. Solid couple hours of playing in the shop today

20180707_131315.jpg

20180707_131336.jpg

20180707_131409.jpg

20180707_132035.jpg

20180707_143844.jpg

20180707_143850.jpg
 
Last edited:
POTD was one of those take one step back before taking two steps forward . . . I have an 8' x 2' x 6' tall shelving unit in my shop which was organized about 15 years ago. Not so much now . . . So, longer term POTD is to replace some of the shelving with cabinet(s) and drawers. It'd be quicker/easier to buy a couple of HF 44" tool chests, but going the 3/4" plywood carcass, 1/2" plywood drawer route.

Got a 4' x 4' x 2' carcass put together and started making drawers. I use a HF dovetail drawer jig for drawer-making. Typical glides are 1/2" thick, so drawers are a little under 1" smaller than the cabinet opening. I've made drawers with interlocking rabbets, but that design makes the depth of the rabbets extremely critical because if I'm a little shallow, the drawer width is too big. Then I have to cut a rabbet on the outside where the glide attaches so the drawer doesn't jam.

Nice thing about the dovetail fixture is the drawer width is exactly the length of the front and back boards (assuming the dovetails are cut to proper depth so the sides aren't wide to the front/back). I've made hundreds of drawers with this fixture and have everything adjusted right in. Also have a dedicated router that's purpose in life is to make drawers.

WOW, finally to the POTD . . . Threw the cam lever to lock down a drawer side and heard a "snap". Probably had a little too much clamp pressure and snapped one of the plastic clamping cams.

Measured up an intact cam and chucked up a piece of aluminum. Turned to the cam OD and parted off. Marked the end with Dykem and scribed a center line. Then marked the cam center and center punched. Chucked up the blank in a 4-jaw and adjusted the blank to on center using a laser center finder in the tail stock chuck. I checked center with my normal method of a wiggler in the tail stock with the point in the center punched hole and an indicator on the shaft of the wiggler point. I'd eyeballed the laser to about 0.0035" radially from center, so not too bad depending on the project.

The laser went pretty quickly, lined up the center scribed line on the blank with two jaws. Then adjusted those two jaws to put the center punched hole on center. Rotated 90 degrees and adjusted the other two jaws. Frankly, I'll probably go with the indicator method in the future since it's more accurate and doesn't take any extra time.

Blank was on center, so center drilled, clearance drilled and bored the cam hole to size. Verified fit with the cam axle, then parted off 4 new cam blanks. Set the blanks in the mill and aligned the center scribed line to vertical using the edge of a parallel. Then found center in X using the laser center finder. Drilled the mounting screw clearance hole and countersunk with an end mill.

Fix works great! You'll probably see another POTD in the near future when I replace the plastic clamp bearings with aluminum ones. Also a POTD of the cabinet once it's done. Thanks for looking.

Bruce


View attachment 271353

View attachment 271355

View attachment 271356

View attachment 271357

View attachment 271358

View attachment 271359

View attachment 271360

View attachment 271361

View attachment 271362

View attachment 271363
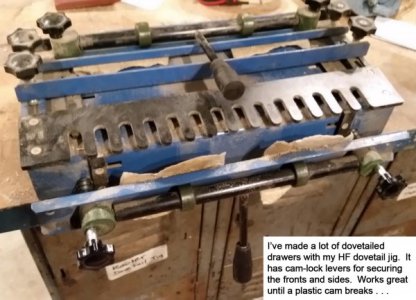
Bruce, good job. It seems that no matter what tool that one buys, you got to modify or fix it. I got the Delta-Porter dove tail jig. Nice jig, but still, I had to file one of the end guides so that boards will line up properly. And the other thing is if you got the tools and materials, why not just make it anyway.
 
My POTD was very elementary but it was a reason to use the new rotary table I put on the mill. Turned to size on the lathe then finished on the mill. Just a smaller chuck key to use with the four jaw on the lathe.
40D01F0E-76F5-403E-B908-12061DAF7E60.jpeg
 
Didn't get to use the lathe or mill, they're buried right now due to making room in the garage since I've been doing a lot of work on my truck, but I did get to use the bandsaw, drill press, & belt sander really quick.

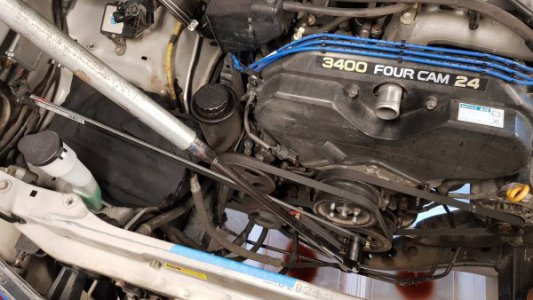
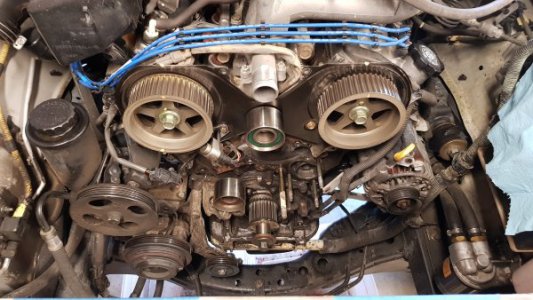
Finally got around to doing my timing belt & water pump. Toyota recommends changing it at 90-100K mi. Well I got almost 215K now. I think it would've lasted to 300K. ;)

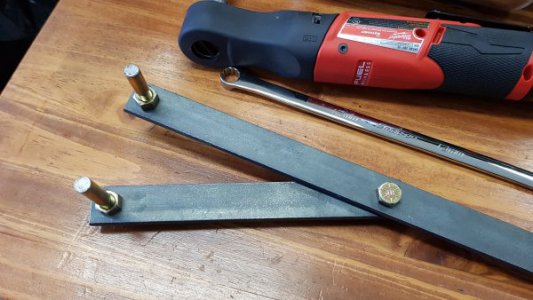
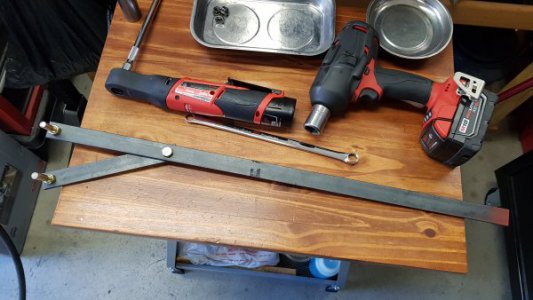
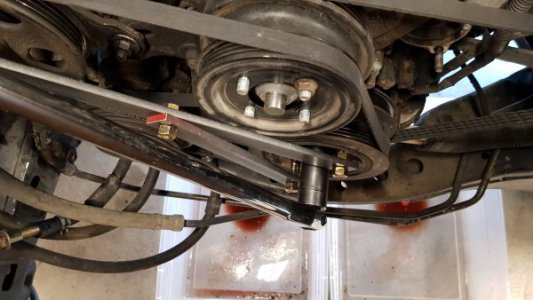
Damn crank pulley bolt wouldn't budge with either my cordless or air impacts. Crank pulley tool costs about $100 for a decent one & no one locally had one in stock. Luckily they didn't cause it only cost me less than $15 for materials from Lowes & 20 mins to make my own. Plus I needed a way to retorque the bolt back to 217 ft/lbs.


20180703_133205.jpg20180703_133241.jpg20180703_132758.jpg20180703_132747.jpg20180703_143950.jpg20180627_125945.jpg
 
Didn't get to use the lathe or mill, they're buried right now due to making room in the garage since I've been doing a lot of work on my truck, but I did get to use the bandsaw, drill press, & belt sander really quick.

Finally got around to doing my timing belt & water pump. Toyota recommends changing it at 90-100K mi. Well I got almost 215K now. I think it would've lasted to 300K. ;)

Damn crank pulley bolt wouldn't budge with either my cordless or air impacts. Crank pulley tool costs about $100 for a decent one & no one locally had one in stock. Luckily they didn't cause it only cost me less than $15 for materials from Lowes & 20 mins to make my own. Plus I needed a way to retorque the bolt back to 217 ft/lbs.


View attachment 271529View attachment 271530View attachment 271531View attachment 271532View attachment 271533View attachment 271534
I saved the images of your homemade tool. My Toyota PU is about due another timing belt as well. It’s been done twice already. Been a great truck.
 
I saved the images of your homemade tool. My Toyota PU is about due another timing belt as well. It’s been done twice already. Been a great truck.
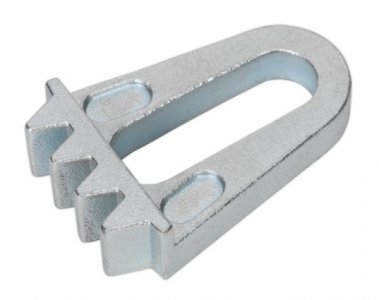
I hate this about newer cars a person needs a special tool for everything, Peugeot puts holes in the blok and the flywheel so they can be locked with a drill bit, also there is space and bolt hole to use a generic flywheel lock like this one.
VSE2395.jpg
 
Back
Top