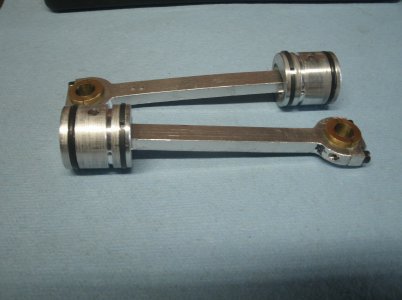
90 degree V Twin build

Today I got the throttle all sorted out and it works just great. Thanks Chris

I have ran the engine several times today and each time it is working better. I still have some adjustments to make to the carburetor, ignition and valve timing before I call it good.
I am thinking about making a different and larger fly wheel to help with the slow speed and smooth out the running.

Thanks for looking
Ray
It's been said around here ( and other places) that without pics ( more importantly VIDEO ) it didn't happen! Besides.. we just love to see well executed projects!:p
 
The good first.

This shows where I put the Off/On switch.
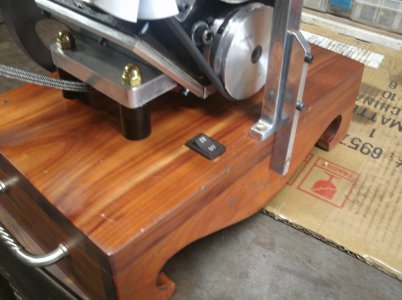
GEDC5488.JPG

Today I started with a 5 lb bar weight from Walmart to make the larger flywheel. I have used them before on another engine and was pleased with the results. At $6 and change you can't beat it.
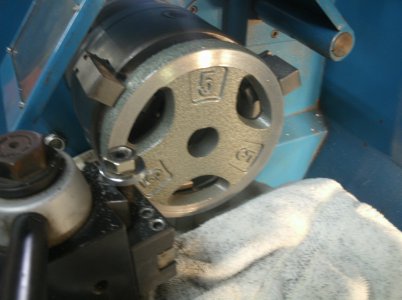
GEDC5482.JPG

After truing both sides I cut a 3 degree taper on the inside hole for the tapered bushing to fit into. I made the tapered bushing from 2" aluminum and slit the bushing so it would squeeze down onto the crank shaft when tightened. (Sorry no picture) I then mounted it on a shaft the same size as the crank shaft and finished the outer rim and cleaned it up on the lathe. I runs very true.

This picture shows it better installed on the crank.
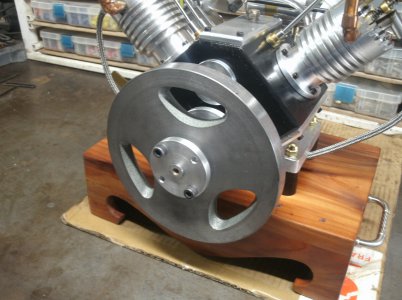
GEDC5485.JPG

What a difference I was able to start the engine by just flipping the flywheel and after some carb tuning I was almost ready to take another video.

Now the bad.
Into every life a little rain must fall and into every project there has to be an AW Sh*t.
I have been very lucky so far so I guess it was time.

I could hear a sound from the rear of the engine like something would occasionally try to catch on something else and them release and be fine.
While I was trouble shooting the problem it got considerably worse and with one chunk the engine stopped.
I suspect the timing gears to be the problem but I said that is enough for today and closed the shop.

I am going to mow the grass tomorrow and just let things set before I disassemble the engine to see what went wrong.

Thanks for looking
Ray
 
Ugg. Sorry. Flywheel looks great! Great idea.
Robert
 
OH NO! what was that line on TV? From the thrill of victory, to the agony of defeat...
I've sure you figure it out. not your first rodeo.. the new flywheel looks really more to scale with the motor.
 
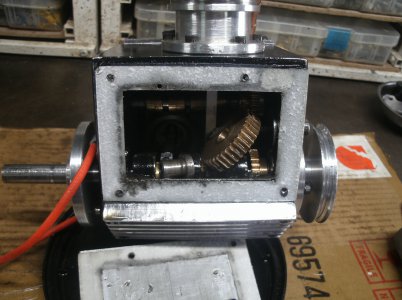
Today I mowed the lawn (over 3 acres) and then decided to take a look inside the engine. I fully expected to find all three timing gears ruined and maybe damage to a connecting rod.
This is what I found.
GEDC5489.JPG

No damage to any thing not even the gears so what happened?
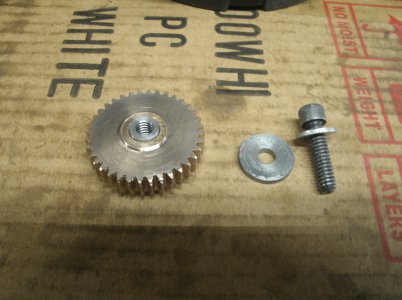
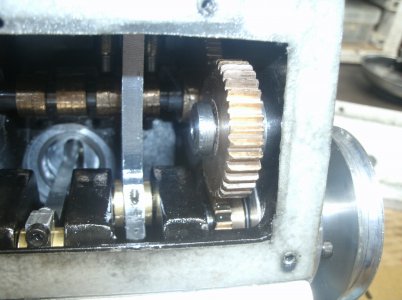
The idler gear that is between the cam and the crank gears was deprived of oil and seized up on the idler bushing. Now the bushing is held in place with a threaded bolt and when the bushing turned it unscrewed itself and fell to the bottom of the engine.
The gear was originally very close to the inside wall of the engine and had a close fitting spacer on its face. I didn't need the full width of the gear so I machined 0.050 off the face to form a small shoulder. I then removed 0.050 off the end of the bushing to leave about 0.025 end play. I took a 3/4" steel shaft and made a spacer 0.100 thick for the bushing end to press against and to position the gear away from the inside frame.
That should allow the oil to easily get to the bushing.

GEDC5493.JPG
GEDC5497.JPG

I put everything back together and at first it started and ran well but then I saw some blue smoke coming from the exhaust of cylinder #1.
It wasn't long until that cylinder stopped firing all together and so did my enthusiasm for today.
Tomorrow I will suck some of the oil out of the engine and try again as there seems to be a fine line between too much oil and not enough.

Thanks for looking

Ray
 
Well, it's good to hear that it wasn't anything worse.
Oil level being critical height.?.?.? have you seen that before?
 
34-40 on another engine if the oil level was too high it would throw the oil into the cylinder and the o-ring couldn't handle it and so the cylinder was flooded with oil. I am not sure that is happening on this engine so i will drop the oil level to see if that helps.
Maybe add an oil ring on the piston but there are not many examples of that to look at.

Ray
 
Thanks for the reply. It helps to understand what may be happening.
 
Well even with most of the oil out of the engine #1 cylinder was still not firing so on to plan "B".

I have done some research into this problem pertaining to model engines and short of installing an internal baffle there doesn't seem to be any fix. Some have run their engines with no oil and just lubricate specific parts with an oil can once in a while but that just goes against my thinking.
So I will try something else and it may not work.
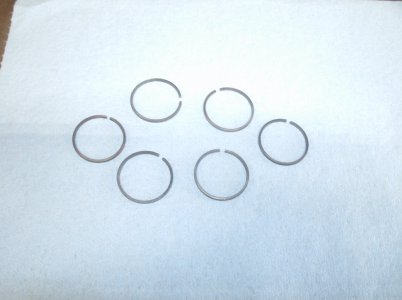
I cut some cast iron rings today that I installed on the lower end of the piston. I hope this ring will scrape off enough oil from the cylinder walls to at least help. I also made a second ring groove above the first one and drilled a couple of holes in it to let any oil that does get to this location to drain back into the engine.
GEDC5506.JPG

GEDC5509.JPG

I made 6 rings as I was sure I would break some of them but none broke. They have a face of 0.062 and a thickness of 0.045 so they are very fragile. The rings were expanded 0.150 and then heated to a cherry red color and left to cool.
If this helps some but not enough I can still try to install a second ring and see if that helps.

Thanks for looking
Ray
 
Back
Top