An Electronic Lead Screw controller using a Teensy 4.1

With the three N52 12mm diameter x 3mm thick magnets that I have, (found two more!) there's a rather high attractive force through the 0.8mm plastic. With a keeper across the magnets, through the 0.8mm plastic, it will easily pick up 1.439 kg. Without a keeper it cannot pick up the steel weights. Probably should use a pail and put in water or steel scraps to get a real difference. Of course the raw magnet side has noticeably higher force. Probably will print as is. Because my model is not truly parametric, when I change the wall thickness, there are some minor other changes.

Have to say, this plastic test piece is pretty strong. 3.6mm thick PLA, 15% infill, 77mm x 32mm. It doesn't break easily, I tried. If I put it in a vise and bent things, I'm sure it would break. Magnets don't want to come of the pockets, either! Had to use a sharp tweezers point through the 0.8mm plastic to push out the magnets.

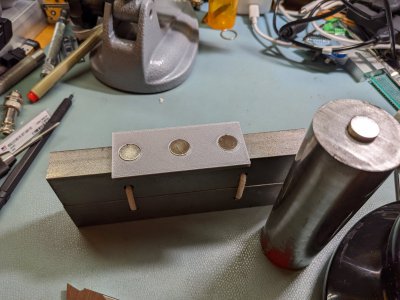
Did an experiment. Without a keeper, cannot pick up 1.439 kg. With a keeper, the three alternating magnets pick up 2.484 kg. Nearly double. This is with three alternating magnets with a steel keeper across the raw magnet side.
PXL_20221119_215655192.jpg
Will not pick up the two attached rectangular pieces of 1018 without the keeper.
PXL_20221119_215635942.jpg
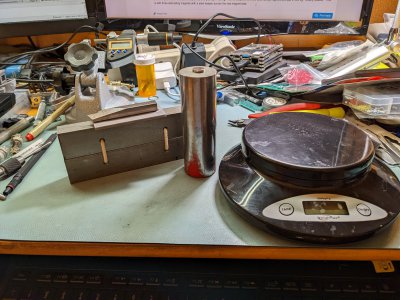
With keeper, will pick up both rectangular blocks (pipe cleanered together) and the piece of 1045 steel rod, just barely, but does pick it up. Weights measured were the two rectangular blocks without keeper, and the 1045 rod with magnet. I estimate about 7.28 lbs of retention force with 4 magnets and a keeper. The keeper is just a 3/8" key stock lathe tool model. Both cases, magnets were visible from the top, with a plastic layer underneath.

Probably print the box tomorrow. Might horse around with PETG tonight.
 
PETG proved to be a big problem. Or at least for me. I think the filament had absorbed too much water, I could hear little pops while printing. Spent about 3 days messing with it. Got ok flat prints but the vertical prints were dreadful. A test cube printed in vase mode sagged and melted on me - and this was with the recommended base settings. Had enough of this fooling around for a while, and moved back to PLA. Eventually I will figure out PETG, but not now!

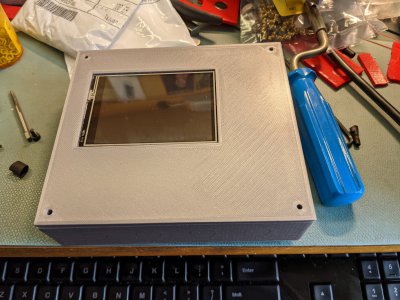
Last (afternoon) printed the bottom of the box with all my fixes to the model and PCB drawings. Mercifully, this morning, the USB cutout is exactly where it belongs now, and a USB connector plugs into the PCB when everything is in their correct place. Now printing the lid to the box, which has a cutout for the display to peek through. Hope that comes out right. At least any filing will be simple he says, crossing his fingers. The assembly drawing shows it should work, with sufficient clearance. If the lid comes out correctly, I can assemble the box and mount it to my lathe.
 
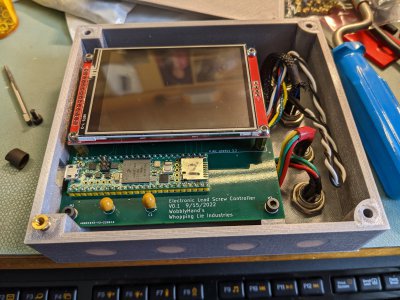
Some progress. Printed the box and lid. Came out good enough. The lid needs a little bit of pursuasion to pop on, it's very close. Probably need to loosen the PCB screws and slightly reposition maybe 5-10 thousandths. Got the box wired up. Need to install some M3 inserts in the corners for the box lid and magnets in the pockets. If the wires are all correct, I should be able to connect it up and run. Applied power to the Teensy and no magic smoke came out, so that's good.
PXL_20221123_183153657.jpgPXL_20221123_183424818.jpg
 
Got the inserts installed. Made an insert install tool out of a burnt soldering iron tip. Machined the copper into something good enough, although it fought me. It was so soft it bent when I initially applied lathe tool pressure. Took me a while to get it into a useful shape.

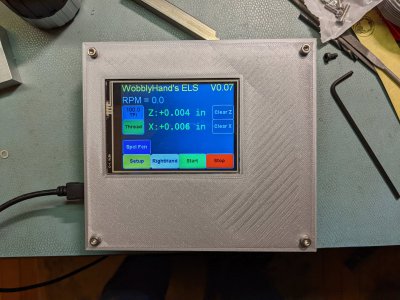
Installed the magnets into their pockets and made a 4" keeper plate out of some 1/4 x 1/8" key stock. Buttoned everything up and turned it on.
PXL_20221123_222001884.jpg
Something is wrong with the lid surface, looks like a 3d printing problem. But this is for shop use. I'm glad this box is done. This really stretched me in CAD design. There were multiple pieces with close fits in three dimensions. I'm amazed that I pulled it off.

Think I will install it on the lathe now! Woohoo!
 
Everything works except the Z DRO input. I had trouble with inserting the wires during assembly. More accurately, the connector internal plates didn't drop enough for the wire to go through without catching a strand. Have to take things apart and redo the Z input.

Once it was all apart, found the ground wire for the Z DRO had fallen out of the connector. Well, that was easy. Putting it all together again. Hope this is it.

Need to do some cable management on the lathe. For the most part things are ok, the magnets are sufficient to hold down the box. The external cables do want to move the box, but for the most part it is stable. Just need to clamp the cables so they are out of the way of any danger. Have to ponder that.

I have the display slightly rotated towards the operator, so the display is quite visible, even with the LED down lighting from above. For a first pass at this, it isn't turning out bad at all. Couldn't help myself injecting some lathe humor...
 
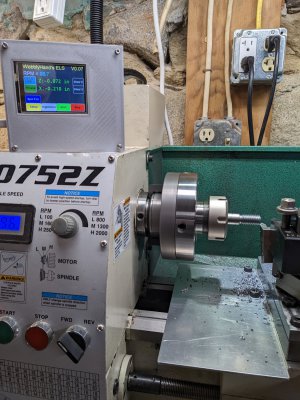
Everything is finally working! To celebrate, I cut an 11 TPI thread, well, just because I could. Chucked up some 5/8" and set the thread to 11 TPI and threaded. No freaking gears, no freaking grease, no stupid little e-clips that want to go flying, yes, I can say goodby to all that.
PXL_20221124_005857428.jpg
Picture was taken while the lathe was running, but not cutting threads. If you look closely, the thread is set to 11.0 TPI, and the RPM is about 99 RPM. Thread came out pretty nice well. I wasn't taxing anything, the stock was just 12L14.

Let's see, need to do cables and figure out how to fit the cover on the now less cluttered gear area. I was avoiding that, because, well, it wasn't fun. Think I will take a break for a day... A celebratory beer is in order.
 
@WobblyHand - You've made amazing progress. Hopefully you'll shoot another video to take us through the features. I know this is your project but i'm excited for you! Great job
 
Great Job!

Glad you got your box completed; the whole project looks awesome!
 
Last edited:
Back
Top