An Electronic Lead Screw controller using a Teensy 4.1

I can use the DRO as the basis for this, because well I have one. I will investigate using the stepper count as well, simply to see how well it works, or doesn't. The Numobams controller does this. Obviously using the DRO is better, but maybe not everyone has a DRO installed.

Haven't thought through tool offsets that much, think that might be wandering into CNC territory. My goal is not CNC, but more of a smarter lathe.
 
One of the reasons i wanted an ELS is to take some of the work out of getting it just right - like @WobblyHand i didn't want the overhead of having to do full blown CNC but at the same time it's nice to have the machine with you and do some of the repetitive tasks more accurately and easier.
 
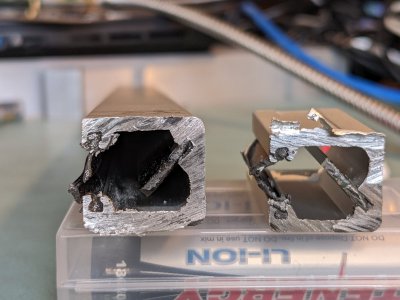
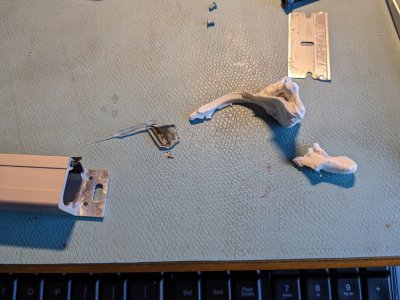
After stuffing the scale with lens cleaning tissue and modeling clay, I went out to the garage to cut off the scale. Unfortunately, my band saw was not cooperating. Blade was slipping. Due to the restricted area to work on it, I gave up. Came inside and used a cut off wheel. Didn't come out great, but it is satisfactory. The glass only chipped in the corner, far from any indicating area so that is good. Now I need to mill the step off. Beats me how to do it, but back into the shop to have at it.

Due to a stroke of luck, I chose the better end to cut off. That's because the reader pickups are about 30 mm from the end. The clay did work to keep things in place. Because the wheel hit the lens paper, it scattered some paper dust about 20mm. I will have to clean that out some how.
PXL_20230326_190435020.jpgPXL_20230326_190740535.jpgPXL_20230326_190800705.jpg
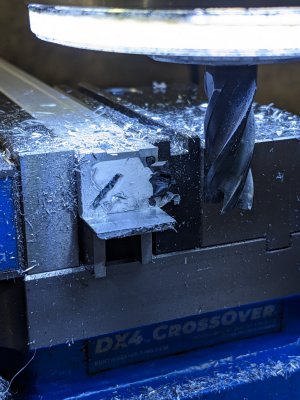
Down to the shop to put in the step.
 
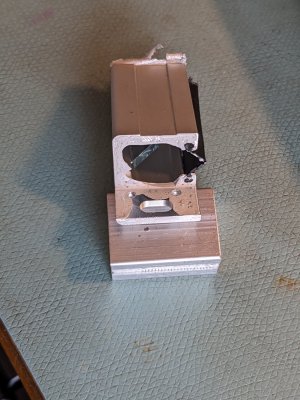
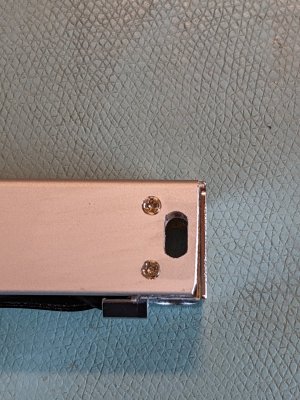
Holes are in, and I have removed the clay. Still had some breakage, but not into the readout region, that I can tell. There's some dust or glass bits inside that I need to clean out. I will use a moistened q-tip for that.
PXL_20230326_223206844.jpg
The scale fits on the 3d printed mock up, picking up the mounting holes, so that's encouraging. Need to clean stuff up, then install the read head in the scale, put on the ends and check it. If it seems ok, then I will pull the end cap and put in some RTV silicone sealant.
 
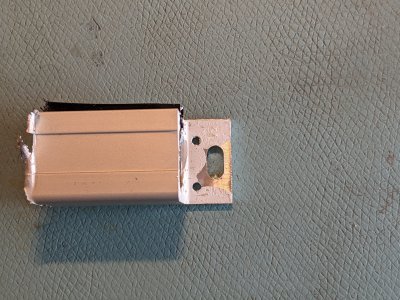
Countersunk for the flat head 2mm screws and got it together! There was a bit of debris inside the extrusion - undoubtedly from my machining the past two days. Cleaned most of it out using a Qtip and some isopropyl alcohol. Assembled the read head into the scale. That took some persuading, but eventually got the little rollers around the tilted glass scale. Next step is to plug it into my adapter cable and to test it on my spare ELS board. First I have to reflash the board, as I was using it for some testing (making a soft numeric keypad).
PXL_20230327_153657149.jpgPXL_20230327_180413754.jpg
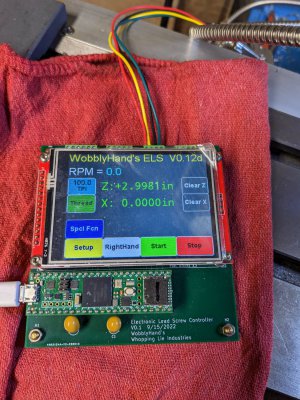
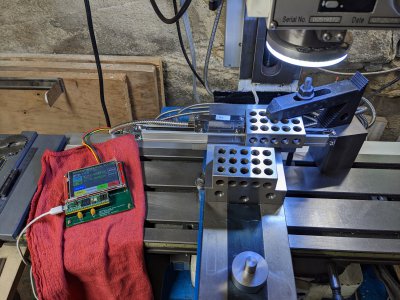
The fact that it reads within 0.002" of 3" is fine. I didn't use a hard stop on that test. I will calibrate the scale on the lathe once it is mounted. My somewhat half-hearted sanity check, where I clamped the scale, and a block, with a block in between. When the two blocks were in place, I zeroed the scale. Then I removed the unclamped block and slid the read head to touch the block. 2.9981" is ok, since the read head has a push in button on the end of the read head, and there's some play there. When I calibrate it for real, I will use the side of the read head. Pretty happy with this now. Have to hunt down some silicone rubber to seal up the end cap. I could have done a better job there and there's a gap of maybe 0.1mm. The silicone rubber will seal it and give the assembly a little more rigidity. The M2 flat head screws are not exactly heavy duty fasteners...
PXL_20230327_180432028.jpg
Once glued up (and still running!) I will attach the scale to the cross slide bracket and attempt to transfer the last hole location to mount the scale to the bracket.
 
Holes are in, and I have removed the clay. Still had some breakage, but not into the readout region, that I can tell. There's some dust or glass bits inside that I need to clean out. I will use a moistened q-tip for that.
View attachment 442567
The scale fits on the 3d printed mock up, picking up the mounting holes, so that's encouraging. Need to clean stuff up, then install the read head in the scale, put on the ends and check it. If it seems ok, then I will pull the end cap and put in some RTV silicone sealant.

Why didn't you just take out the glass and score it with some carbide. was it glued in?. they snap easily and break clean. I'm guessing your bandsaw blade isn't very happy with you.
 
While doing multi-start threads you could also implement an offset for the start like here:

He's doing a Z offset of half the depth of cut so that you don't have to mess with the compound angle and accommodate folks that have replaced the compound with a solid block.

I have some thoughts on the workflow but haven't sent them to you yet. Hopefully i'll have a few minutes tonight to send you something.
I've sort of implemented this but without a powered X. Wondering if you have thoughts on how best to do it?

Also there are several strategies possible, they are listed here in detail: https://www.cnctrainingcentre.com/haas-turn/g76-threading-cycle-many-passes/

using both flanks is best for the tool but most complex to implement.

The main use case here is for users who have a solid toolpost, no x motor, and no compound.

my thinking was:

1. pre-calculate table of positions based on initial cutting depth.
2. first cut is easy, just have to specifiy initial cutting depth.
3. when that cut is complete click on the "next position" button.
a. Controller offsets the start position, based on a bit of trig,
b. UI presents the correct depth of cut for this phase, the depths are not linear due to material removal rate and cutter engagment
c. operator sets the cross slide depth and starts the cut
4. user can run this once and click next or run multiple spring passes.
5. User clicks next, jump to #3 with new offset.

The positions would be kept in memory so if you needed to you could move back to any of the offsets, or the beginning.
 
Why didn't you just take out the glass and score it with some carbide. was it glued in?. they snap easily and break clean. I'm guessing your bandsaw blade isn't very happy with you.
Glass was glued in place at an angle. No easy way to fixture a reglue, nor an easy way to remove the glass.
 
Why didn't you just take out the glass and score it with some carbide. was it glued in?. they snap easily and break clean. I'm guessing your bandsaw blade isn't very happy with you.
My band saw was unhappy with me anyway since the blade had fallen off. Didn't use it. Oil got on the drive pulley, needs a clean up. Used a rude and crude cutoff disk. It worked, but it wasn't a clean cut.
 
Back
Top