

-
Welcome back Guest! Did you know you can mentor other members here at H-M? If not, please check out our Relaunch of Hobby Machinist Mentoring Program!
You are using an out of date browser. It may not display this or other websites correctly.
You should upgrade or use an alternative browser.
You should upgrade or use an alternative browser.
Arboga Maskiner EM825
- Thread starter rodm717
- Start date
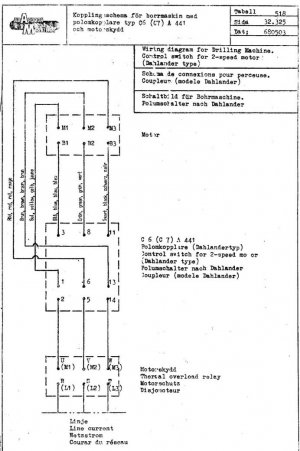
Here is motor wiring diagram and part break down of gearhead. There are english descriptions. I couldnt find an index for the parts breakdown.
From what im reading, I should be able to use a 240v 1ph to 240v 3ph vfd. I'll take pictures when i unhook it, but it is probably hooked up to 240v 3ph where it is located. Im curious to see if it will be best to use the gearing in the head or vfd to control speed. I'm sure using the gearing will provide more torque, but the soft start of the vfd and possibly a braking resistor, would provide a nice touch.

From what im reading, I should be able to use a 240v 1ph to 240v 3ph vfd. I'll take pictures when i unhook it, but it is probably hooked up to 240v 3ph where it is located. Im curious to see if it will be best to use the gearing in the head or vfd to control speed. I'm sure using the gearing will provide more torque, but the soft start of the vfd and possibly a braking resistor, would provide a nice touch.
Attachments
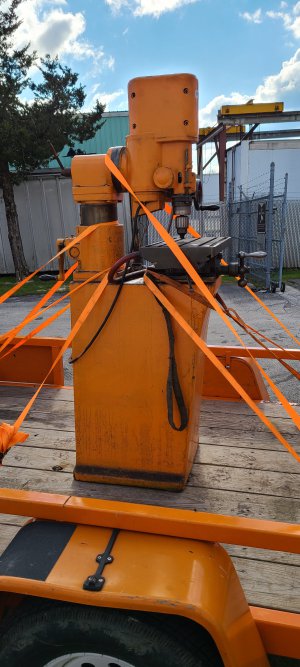
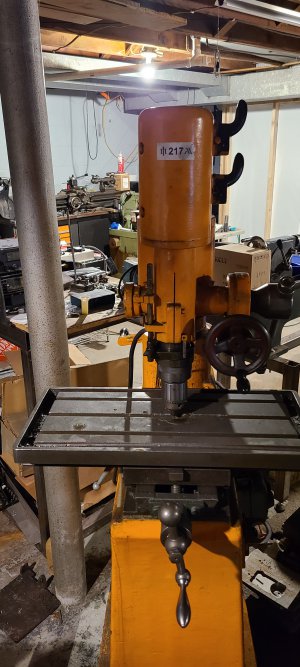
Picked up the mill today. And in the shop. Still rearranging and organizing.
The mill itself is in generally good condition. Missing a few knobs and a couple marks on the bed, but pretty smooth motion. It was connected to 240v 3 phase. Still question if a vfd will work as is or need to wire direct to motor. My Rawyler acts finicky off a analog vfd through stock controls. Not sure which would be better in this case. Newer digital vfd or older analog style?? I do have both.
The mill itself is in generally good condition. Missing a few knobs and a couple marks on the bed, but pretty smooth motion. It was connected to 240v 3 phase. Still question if a vfd will work as is or need to wire direct to motor. My Rawyler acts finicky off a analog vfd through stock controls. Not sure which would be better in this case. Newer digital vfd or older analog style?? I do have both.
Attachments
Last edited:
- Joined
- Oct 18, 2016
- Messages
- 2,872
Painting the trailer to match the color of the machine is a nice touch...
Congrats on the new machine.
Congrats on the new machine.
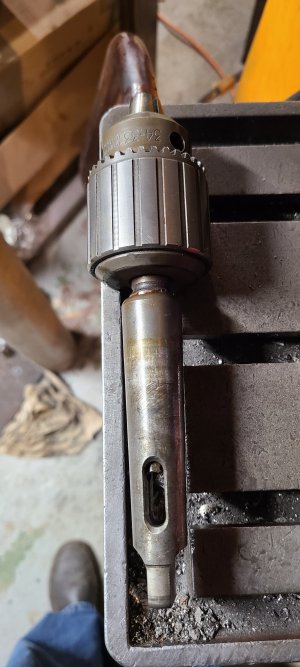
It looks like the original spindle chuck retaining assembly is gone. The knurled ring is there and some sort of spacer, but the chuck was a plain jane mt3 adapter with a Jacob's mt2 chuck in the spindle and popped right out without having to remove the knurled ring.
I am most likely going to use this for milling, as I have a decent drill press, and will be employing a ER32 Collet system. I would like to machine something to replicate and stiffen the collet to spindle. If anyone has some dimensioning on origininal retainer assembly or a link to that information, it would be much appreciated. I'm sure the MT3 interface would be fine, but imagine some extra holding would be better.
Also will be fabricating a new lighting assembly / cover. Pretty simple layout to employ some newer LED technology and light the work area. Open to ideas.
There was also a drain port and hose already mounted to the table and opens the possibility for some active cooling.
The more time I spend looking at this, the greater the possibilities seem.
Attachments


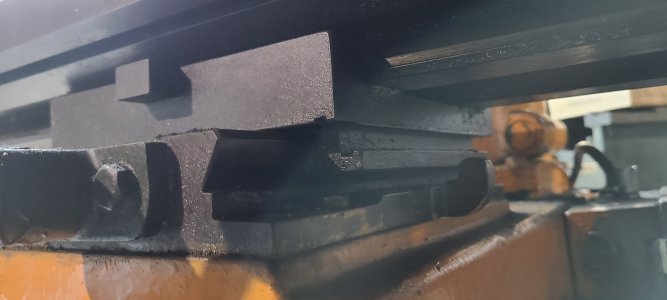
I've noticed there are also some slots on the longitude and cross of the bed for stops, I imagine, and would lend itself greatly to installing a DRO system if desired. Really liking this little guy more and more.
Really a great alternative to a full size Bridgeport in tight quarters. Very comparable to a Clausing 8520, but with more travel and a compact euro design.
Really a great alternative to a full size Bridgeport in tight quarters. Very comparable to a Clausing 8520, but with more travel and a compact euro design.
Attachments

- Joined
- Nov 24, 2014
- Messages
- 3,164
Picked up the mill today. And in the shop. Still rearranging and organizing.
The mill itself is in generally good condition. Missing a few knobs and a couple marks on the bed, but pretty smooth motion. It was connected to 240v 3 phase. Still question if a vfd will work as is or need to wire direct to motor. My Rawyler acts finicky off a analog vfd through stock controls. Not sure which would be better in this case. Newer digital vfd or older analog style?? I do have both.
No VFD expert has answered your question yet, so I'll try to help.
I'm not a VFD expert. You may want to open a new thread in the appropriate sub-forum to get the attention of a VFD expert.
However, AFAIK, when using a VFD, you need to control the load (motor) using the VFD control functions. You could rewire the machine so any machine control switches interface with the VFD control functions. Implementing a VFD does not exclude using the machine's gear change capabilities. Use both in cooperation to achieve any desired spindle RPM within motor/gear train range.
- Joined
- Dec 15, 2018
- Messages
- 785
I have my drill press running with a VFD. I rewired the start stop to activate the VFD and wired the output of the VFD to the 2 speed switch (techs at Automation Direct confirmed it would be a problem). DO NOT switch speeds while the VFD is powering the motor. Works fine but need to replace the stop button, its a little finicky, the control signal for the VFD draws so little current and low voltage that the switch contacts have to be perfect. I didn't bother with reverse for the drill press but could activate it on the VFD itself.
I never bother to use the variable frequency option, leave it set at 60 Hz as the machine has enough gears and the 2 speed motor to cover anything I've ever needed.
Greg
I never bother to use the variable frequency option, leave it set at 60 Hz as the machine has enough gears and the 2 speed motor to cover anything I've ever needed.
Greg
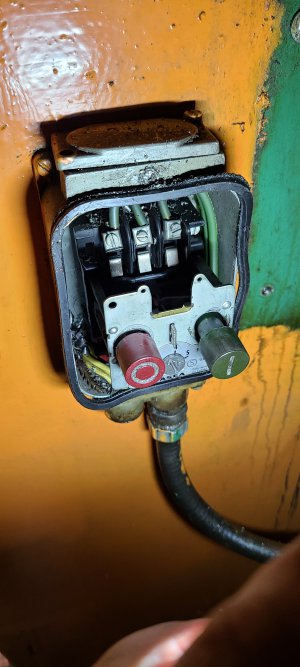
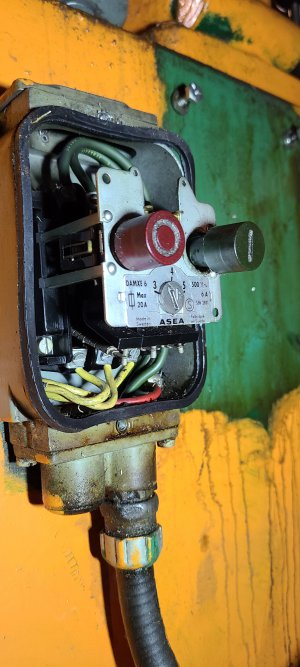
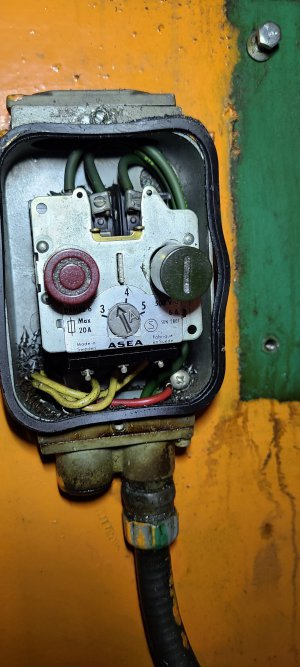
I guess this is the thermal overload relay shown in the diagram above. I do
not remember seeing anything like this before. I assume the different settings on the dial relate to overload threshold or point at which the circuit/relay would trip.
Pretty neat analog component.
There was a fused disconnect in front of it that I will not be using as i am not wiring in hard and will be corded via vfd.
The question is, do I wire the vfd before or after the relay in the circuit. Normally I would place a fusible disconnect or breaker in front of the vfd. The vfd has thermal overload built in.
Attachments
- Joined
- Dec 15, 2018
- Messages
- 785
You won't need or want the overload. The VFD handles all that.
Wire directly from the VFD output to the two speed switch. And remember, don't switch it while the motor is running or you may well fry the VFD.
Greg
Wire directly from the VFD output to the two speed switch. And remember, don't switch it while the motor is running or you may well fry the VFD.
Greg