G0704 CNC Conversion (yes, another thread on this :) )

Stuff that happens when you let a project just sit... I installed the computer and the case with the electronics. All hooked up to make sure everything was still working... Quickly noticed that I installed the E-Stop to the case, but never connected the wires :mad:... no matter, just a test, let's keep going...

IMG_1376.jpeg

Everything moves... slowly... not sure how to increase the speed. I need to go back and learn everything again about the setup, wiring, using the software... sigh... :(


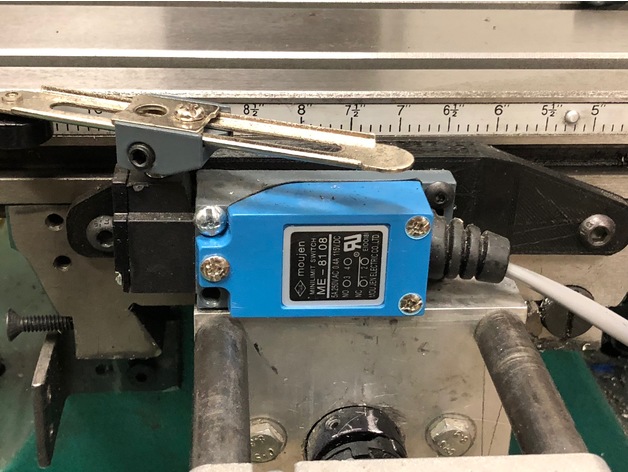
I also need to install (well, need to find them first, lol) the limit switches and do the wiring for those...
 
Received the Y axis cover... made the holes already to get it ready for install. Since I was ordering, got a spare plastic double gear to keep as spare. I believe this is the one that folks see getting damage with heavy use... so figured to better have it ready to go when needed.

IMG_1389.jpeg
 
Installed....

IMG_1391.jpeg

And now printing the correct mounts for the limit/home switches... ran out of black ABS filament in the first try, so yellow it is...


IMG_1400.jpeg

IMG_1401.jpeg

IMG_1405.jpeg
 
Last edited:
Note to self... never, but I mean, never! place the 3D printer in the switched outlet... because after running out of filament the first time, and being 2am in the morning... the last thing you need is to switch off the printer as you head out to bed and switch off the wrong switch on the wall :mad::p

So I got to print them a third time...

IMG_1409.jpeg

And thank you for the recommendation on the youTube channel for Blondihacks ... Besides mill and lathe skills, I am learning a lot in other areas. In one of her videos she talks about using the Norton white aluminum oxide wheels (I got 60 and 150 grit). Went ahead and replaced the crappy grinding wheels I had and got the diamond thingy to clean them.

Nice and balanced and everything! For balancing, I thought I was going to have to buy some sort of accessory that shift bolts to off-set the weight...

Balance Grinding Wheel.jpg

But there was not need for that! It was as easy and flipping them around... I used this video for getting it to run smoothly.

This thing has not worked so smoothly as it is working now!!!

IMG_1406.jpeg

Apologies for the off-thread/topic comments... I just had to share!!
 
Last edited:
Installed.... Need to do the wiring next.

IMG_1416.jpeg

On this one I need to cut the angle aluminum stock to make the stops... and just realized I need to flip it around. Needs to point in the other direction...

IMG_1414.jpeg

And on this one I need to make the stops that bolt to the factory t-bolts on the side. A lathe to make those would be amazing...lol... I want a lathe!

IMG_1413.jpeg
 
Last edited:
Not much done... I need to go into the software. I move 9" on the X-axis and the computer is telling me that I moved 24".... Some setup needed...

Not wanting to do that now, I instead flipped the Y-axis switch and installed the knobs...

IMG_1436.jpeg

IMG_1437.jpeg
 
So when I started testing I was using Mach3... Downloaded Mach4 and came to the thread to look for what I needed to do to make it work... I did not document this step... Darn it! :mad:

Let me try to do that now:

  • Download and install Mach4 software
  • Download and install Mach4 Warp9 plugin for ESS. This is a two step process.
    • Download the Plugin and drop the files in the Mach4 Plugin folder
    • Install SCU Application and follow the instruction to perform the PC Configuration

Let me do that... will be right back to finish the documentation of these steps.
 
Man! When they say that it is the first thing to go, they were not kidding! :D

I had Mach4... this was discussed early on and that was the recommended version I went with... uff.. Both the Mach4, SCU, etc... need updating... so I will grab a better notebook this weekend and trash this old one... I just can't work with this one... it is sloooooooooooooooow beyond belief... I will do a fresh install of all the software and start again with the configuration. I tried using my work notebook but backed out as soon as I saw all the modifications it wanted to make... this needs a dedicated computer... so I will do that instead... I have one, but not here. More on this next week.

Since I needed to feel like I had done something at least, to progress the build... I opened the case for the controls and will finish all the pending tasks in there... need to connect:
  • the second fan in the front - I left the wiring there ready to connect and never installed the plug!!
  • the emergency/panic switch
  • the Handwheel MPG pendant for the manual control...this one will be a lot of fun to figure out...
IMG_1439.jpeg
 
That's very clean and organized. I can't wait to have funds to convert mine. Following yours closely. Thanks!
 
Back
Top