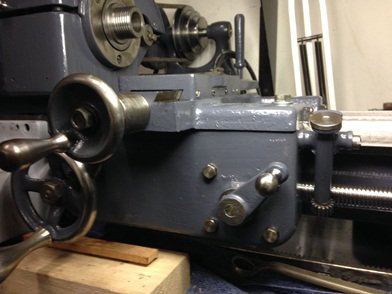
Logan 400. Headstock. (Total Logan 400 Rebuild)

Redlineman,

The new nut fits great on the original shaft. I did notice more yaw & pitch motion when installing the shaft into the nut free than i thought i should have but the axial lash is gone. I used have probably .020" lash.

I did investigate what i would do if i had to replace the screw as well. Likely i was going to buy some left hand ACME threaded rod and splice it into the old shaft. Glad i did not have to tackle that.

As for the stripped hole. I here you. I went to get a longer bolt because there were a couple of good threads at the bottom of the hole but as soon as i engaged those threads they let go too. I likely will just buy the $12 tap....

Mr. Ed. Curse you. :))
I found myself looking on Ebay this AM for a larger dial for the crossfeed. Now i am compelled to ask what you all have "upgraded to".

Matthew
 
Mr. Ed. Curse you. :))
I found myself looking on Ebay this AM for a larger dial for the crossfeed. Now i am compelled to ask what you all have "upgraded to".

Matthew
LMBO!! I still have original dials on my 10". I have seen a couple of write-ups on making new ones for the Logan ... will have to look. I'm not real good at drawing and planning things out like that ... once I have a plan to work off, I do OK. I'm also not sure on my abilities (and equipment) to be able to mark accurate graduations on a dial, if I made one.
 
Hvontres & I were talking about how we could make the dials and accurately index for the lines. Last thing i need right now is another side project so that will have to wait. Will look at a spin jig and a mill with stamping the numbers or see if we could use a laser marker. A project for another day.

The only update i have is that a STI tap arrived on Saturday. I can move on with the apron.

Well was home with "the crud" today, so I pulled my cross feed apart. I have some ideas, but will probably end up purchasing the dials. Right now I'm trying to decide how to extend my crossfeed screw. I do not want to loose any working capacity due to the cross slide hitting the bigger dial.
 
Hey guys;

Take a look at Tom's Techniques on the web, or his video series on YouTube. Beyond being a cracker jack machinist and offering tons of great advice, he recently made a carriage stop micrometer, and discusses creating the graduations and the stamping at length. A larger x-feed dial is definitely something I would be interested in, but I too doubt my ability to create one that is accurate enough. I have a mill and a rotary table, but not a dividing head.
 
Re-drilled and tapped the apron mount bolt threads yesterday. Cast iron is so much fun to work with. :))

I do not have the proper instal tool for the insert. Used a 10mm one to get things started but today i think i will need to make a insert tool from a 3/8-16 bolt. I think i will have it all done by tomorrow and the apron installed.

That is a good thing as i need the apron to make progress on the Quick Change Gear Box adaptation i am doing.
 
Apron installed. All is good.

IMG_1001sm.jpg

At this point, aside from aligning the head stock and tail stock this part of the project is more or less done. There are parts that are off the lathe right now but that is to accommodate the QCGB i am adapting.

I will post again once i get that done and things aligned.

IMG_1001sm.jpg
 
If you have not been following my other thread this little lathe has undergone its surgery to accept a Logan 9B QCGB and came out looking good.

Last night i spend some time dialing in the tail stock. I had not centered it to the spindle when i started on the gear box project.

IMG_1209sm.jpg

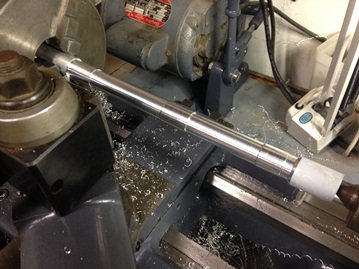
Using a 12" piece of aluminum i put a center into one end and proceeded to turn the OD. I made some steps in the OD so that i would just be adjusting things using 2 or 3 small areas and not the entire length. That saved some time. Over the course of an hour i fine tuned the tail stock so i was able to measure the near and far end to a few tenths of each other. Probably .0003". That is good enough for me right now.

I also noticed that as i turned down the diameter using the new gear box that i would get hick-ups in the chips as it went along the length of travel.

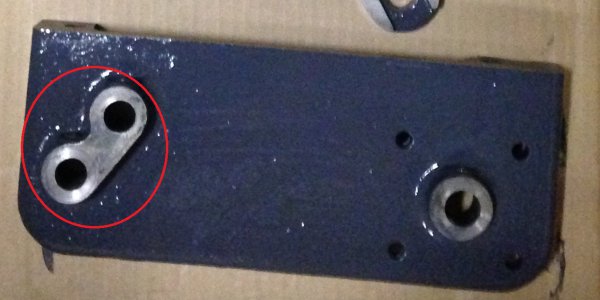
I think i have traced it to my sloppy apron rack & pinion system. I did not re-bush either bores in the apron for the two rack & pinion shafts. (Red below) I should have.

IMG_0735sm.jpg

The actual shafts may also have issues too. Hmm...

How well should the pinion gear should engage the rack???

Basically, each time the handle comes over the top if flops and again as it goes through the bottom. All the slop in this system causes the half nut to momentarily jump or use up the lash on the nut. This also may be an indicator that my half nut is worn out.

Need some advice here What do you guys think?

IMG_1209sm.jpg IMG_0735sm.jpg
 
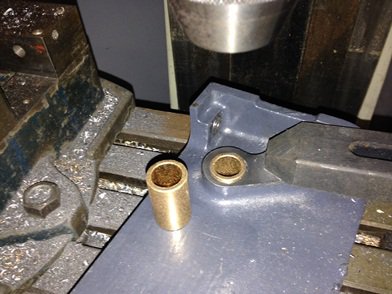
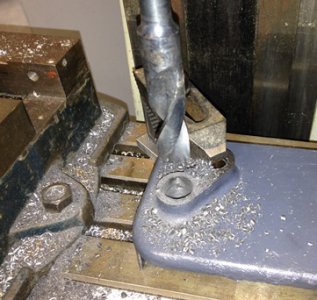
Nothing super exciting but i started the process of re-bushing my apron last night. Indicated the very oval hole the best i could. Drilled out the cast iron to 23/32" and then bored out the rest of the way to .7495". Pressed in the bushing. Shown below it is almost all the way in.

IMG_1228sm.jpg

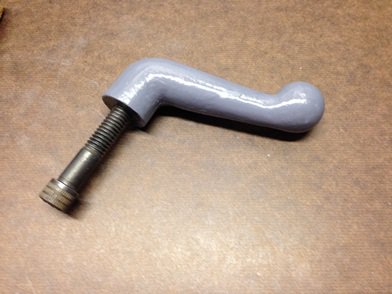
The other exciting progress is i finally painted the lock handle for my tail stock. Anyone know if the 5/16-18 screw that goes into this is just a long piece of all thread? Seems like it is. What length? I know i can figure that out but why not ask....

IMG_1229sm.jpg

I am currently searching for a power apron from a 9B. That is the ultimate goal right now. Till then we will repair this one and wait.

That is all.

IMG_1228sm.jpg IMG_1229sm.jpg
 
Steeping forward to only wonder and step back again.

IMG_1249sm.jpg

Got bushing #1 installed....or so i thought. turns out i set my bore depth wrong and had a ledge at the bottom which is why i could not get the bushing to press all the way down. "It's OK" i said. It was only 1/8" out of 1-1/4". Still plenty of engagement for the shaft. Will mill the top off.

Second bushing went alot better. Second bushing i am happy with. Nice and tight.

(Sometimes i hate working at home at night as i am always rushed. Rushed = mistakes.)

Went back to bushing #1. I took it all the way out as i was not happy with how it was recovering from my 1/8" error. Interesting when you drill out one of these bushings. It just totally exploded as i drilled through it.

Second attempt went better and i was happy until i test fit the shaft. It just does not feel any better than before. Wobble is still there. I bored the hole ~.001" larger than the shaft. That is i was stepping the boring head out and once i could get the shaft to go into the bore with some force i went .001" more. (I do not have any ID bore gauges)

Hmmm....:thinking:

- - - Updated - - -

Oh yes. Half nut rebuild time so it is back apart again so i can find someone to re-build it.

I am not going to try and do this myself.

3/4-8 ACME thread. The tap is crazy expensive and i am not sure how to get the new brass to stick into the old housing and for that matter i am not sure how the process would go either.

Maybe:

- Build jig to mount half nut so the threads are centered.
- Bore old threads out.
- somehow afix a piece of brass into the unit.
- Drill and tap for ACME threads
- Slice in half.
- Mill faces flat
- Deburr.

Something like that....

IMG_1249sm.jpg
 
Back
Top