Newbie and the Bridgeport

Wow! It is hard to believe that worn, mis-formed thread came from a machine with such low wear on the dovetail slides......

You are making such quick progress. Congratulations.

-brino

Theyre pretty huh? The more I learn about the machine and how it wears, the more I think this thing was used as a giant drill press with limited movement of the table/knee.
 
Ya, its just bound up. When you have the dial nut tight, you should see daylight between the dial and the bracket. Shims arent always needed, and they arent always not needed. Just shim it so that there is sunshine between the two and you will be fine.

Jon

thanks Jon. I’ll shim her out a bit and give it a go.
 
Day 15...

Well, had to basically dismantle everything on the knee to pull that back apart. I was really dissatisfied with the knee lock and felt something was off. And it was. I'm glad I broke it back down. Basically when I disassembled the knee lock handle (by removing the pin), I re-installed in 180 degree out. Because of that, what I felt was the unlocked position of the handle, was locked. I only found this out by removing the knee, installing all of those components and feeling the knee lock push out and retract as I cycled the handle. I got that fixed and reassembled and all is right with the knee lock now. Operates smoothly and locks hard.

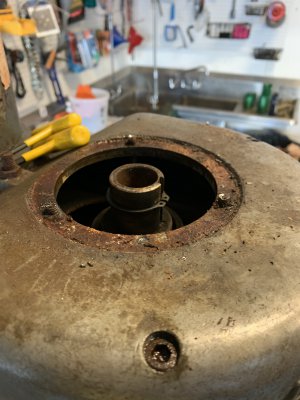
Got a call from H&W today. Turns out their supplier for the elevator shaft is at least 3-4 weeks out for the shaft. Damn. So I went ahead and reinstalled what I could for the elevator shaft assembly and got that moving nice and smooth. Basically everything can go on it with exception of the dial nut, dial, and clutch. The key for the clutch is so mangled up that I don't want to put the new clutch on it. So for now I'll turn it with a pipe wrench until my new shaft arrives.

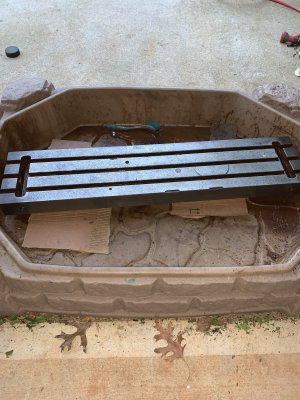
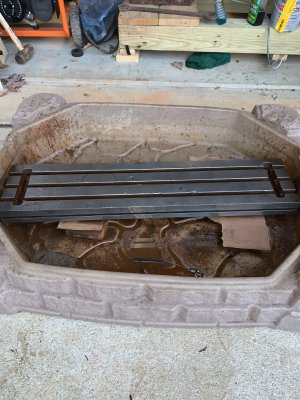
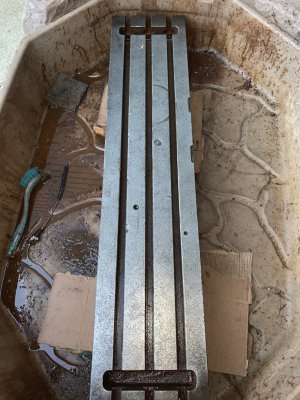
Spent about 2 hours working the table today also. Also surfaces, except the ends, are cleaned and have been hit with a medium and fine files to remove the burs and any dings. As you can see from the pictures, the top has been abused. Surprisingly, my file didn't hit many high spots with exception of some upset areas on the corners where the table took an impact from a tool or material.

Got an order in for 10x #1 oil meters and those should be here Friday. I really wanted to get the table in place today, but forgot I need to get that lube tubing installed in the saddle before I can do that. So tomorrow I'm going to get the garage back in shape and then move in to the head of the machine.

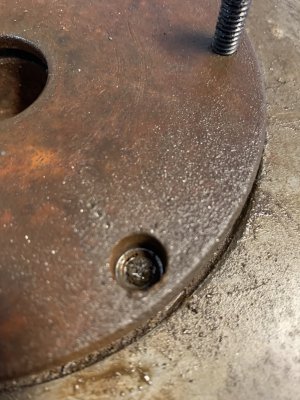
One issue that I can't fix is the gib on the saddle. It must really be warn because I'm bottoming out with the gib hitting the wiper plate in the back of the saddle, and I still have play in the saddle. So I have 2 options, replace or shim. @hwelecrepair do you know if I can just buy a gib that will fit in the machine or do those have to be custom fit? I see a gib available for purchase, but not sure if its a plug and play type part.
 

Attachments

  • IMG_2345.jpeg
    IMG_2345.jpeg
    2 MB · Views: 18
  • IMG_2346.jpeg
    IMG_2346.jpeg
    2.2 MB · Views: 15
  • IMG_2347.jpeg
    IMG_2347.jpeg
    2.3 MB · Views: 22
On a different note, I've been watching this precision machine shop auction that happened to be 10 minutes from my house. It was scheduled about 2 months ago and we're finally coming up on the date of the auction. As fate would have it, I was rolling down the street on my new garage (office) chair drinking a beer (because who wants to walk when you can sit in an office chair) and I ran in to a new neighbor that lives behind me. We start talking about my hobby because she's saw the forklift and machines and mentions her dad owns a machine shop and is auctioning everything. It's the same one. Ive actually talked to her dad a while back asking a few questions about some of the lots. Small world!

Anyhow, the reason I'm posting is if anyone is interested in any of the smaller lots that can be boxed up, and since I'm 10 minutes down the road, I would be happy to assist in boxing up and shipping anything you want. He's got some REALLY nice tools! Here's the link...


PS, don't bid on the surface plates....I want one of those!
 
There is no such thing as a pre-fit gib. If you get a new gib, you would be having to cut, grind, scrape it all to your machine. It would be easier to just shim it. How much rock do you have with it bottomed out?

Jon
 
There is no such thing as a pre-fit gib. If you get a new gib, you would be having to cut, grind, scrape it all to your machine. It would be easier to just shim it. How much rock do you have with it bottomed out?

Jon

I'll put an indicator on it today and let you know.
 
Wow! A documented case of an easy-out actually working rather than just making the situation worse by lodging broken-off harden metal into the hole.

I think I can count on one finger the number of times I have heard about it working......including this case!

Great progress!

-brino

PS: this is only partially in jest, but my experience with them (of many different styles and manufacturers) is very poor.
However, I do not think I have ever tried one under power, except in a handheld drill.
I always thought the name "Easy-Out" was meant to be ironic.
 
There is no such thing as a pre-fit gib. If you get a new gib, you would be having to cut, grind, scrape it all to your machine. It would be easier to just shim it. How much rock do you have with it bottomed out?

Jon

Hard to say with 100% accuracy. I have an indicator on the back side of the saddle, but when I twist the saddle, I’m getting some movement because of lead screw backlash. When I try to take up the backlash and only twist the saddle vs pushing it along the axis of the ways, I see about .005 in the indicator. So let’s call it .005 play in the saddle with the gib bottomed.

here’s a video
 
Last edited:
Day 16....

Dove in to the head today and immediately hit issues. Was following Barry on YouTube to break it down. When we got to the part about removing the top cap, i quickly realized those 1/4-20 socket head cap screws were disintegrated to the point that light pressure on my hex wrench just rounded the off. I took some time to get a game plan together and decided the best approach would be carefully center drill the socket heads staying as concentric as possible. Started with a bit slightly larger than the original hex slot and started working my way up towards something just slightly larger than 1/4". I was focused on not going too deep as to blow through the top plate and render it useless. When I got to my last drill bit size, the plan came together and the remaining aspect of the socket broke free and came out attached to the bit. Good...now the socket head cap screws had no sock heads. From there I rounded up a few more 1/4-20 to use as jack screws (since I had just ruined mine). After about 5 minutes of working it slowly, it came free of the remaining threads. I'll get those out later.

Everything else came apart as expected on the top half of the machine. Although I did find a random key sitting in one of the castings. Haven't yet discovered what that might belong to.

Fast forward to the quill housing. That was going along find until I tried to remove the downfeed clutch. I removed the 2 screws holding the outer housing and it appears, based on the H&W video that the whole clutch assembly should just pull out. It's not. It felt like something was holder the cover on and then after doing some investigating, looks like that cover has a pin of sorts that allows the cover to hinge. It also appears that you can't free that cover unless you can get that pin removed from it's location. I can't pull the clutch out. It's not budging at all. All videos I've seen have that clutch just sliding out freely once the 2 screws are removed from the cap. So I called it a night there. Shot it was some lube with hopes there some rust or something in there holding it in.

If anyone has any ideas for that clutch that wont come up, I'm all ears. I'm also having trouble removing the collar on the front of the quill that has the set screw for the key, and then the slotted screw that holds in the spring and ball. That bushing will no pull off the shaft. Im trying to give it some light prying, but no movement. Shot this with lube as well and will hit it against tomorrow.

If anyone has any ideas, those would be greatly appreciated.
 

Attachments

  • IMG_2361.jpeg
    IMG_2361.jpeg
    1.4 MB · Views: 19
  • IMG_2362.jpeg
    IMG_2362.jpeg
    1.6 MB · Views: 17
  • IMG_2363.jpeg
    IMG_2363.jpeg
    1.2 MB · Views: 16
  • IMG_2364.jpeg
    IMG_2364.jpeg
    1.7 MB · Views: 17
  • IMG_2365.jpeg
    IMG_2365.jpeg
    2.9 MB · Views: 19
  • IMG_2366.jpeg
    IMG_2366.jpeg
    1.7 MB · Views: 17
  • IMG_2367.jpeg
    IMG_2367.jpeg
    1.6 MB · Views: 17
  • IMG_2368.jpeg
    IMG_2368.jpeg
    1.7 MB · Views: 14
There should not be a pin in the cover. If you take a dead blow/soft hammer and tap the top/bottom (up/down) it will eventually come free.

Barry said if you get stuck in a process, feel free to call the shop with any questions.

Jon
 
Back
Top