- Joined
- Feb 14, 2020
- Messages
- 166
Day 17...
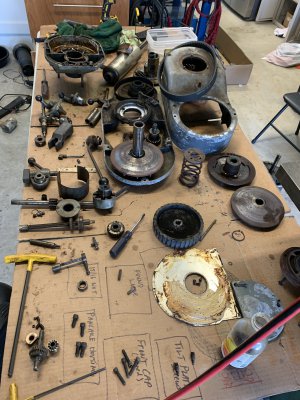
Got the head completely torn down to include the quill housing. So the clutch housing that I was having a problem with just needed a little more encouragement. I used a pry bar and just pulled on it between the housing the the lever that goes towards the front of the machine. Came out pretty easily with some pry bar encouragement.
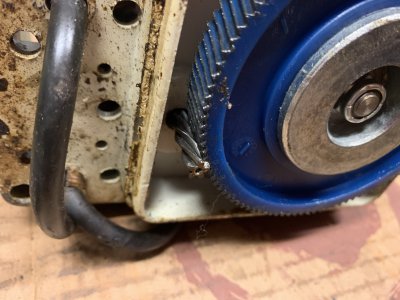
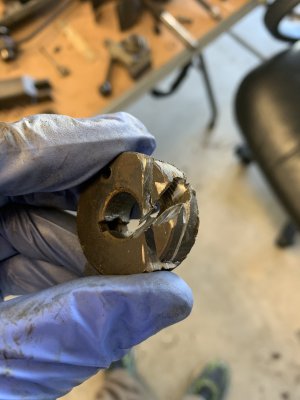
From there I went back to the front of the machine to make a run at that bushing that has the slot head screw, spring and ball in it. Come to find out, the ball was jammed so firmly down in to the ball's recess in the shaft that it would't come out. So basically when trying to pull that bushing off, it was being retained by the ball sticking half way out of the hole. I tried to free it with some picks, some light taps to rattle it loose, but it wasn't coming. So, instead of stopping in my tracks and trying to find an easy solution I felt probably didnt exist, I just went ahead with cutting the bushing with a pneumatic cutoff wheel. Sucks, it was a perfectly good part, but I wasn't going to be able to dismantle further without getting it out of the way. Once I had it compromised to the point that it had some give, I pried it over the ball bearing stuck in the hole.
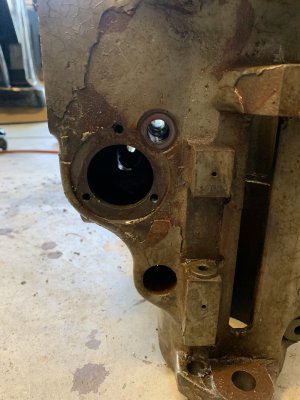
Now on to the shaft with the stuck ball bearing in it. The ball wasn't coming free no matter what I did. So I ended up using that same pneumatic cutoff wheel and scoring the edge of the hole just deep enough to get a pick under the ball and pop it out. It worked. I looked up the cost of that shaft with worm gear assembly at the end that drives the clutch and it's like $200. So I'm going to use a little JB weld to fill in that recess and then sand it smooth. Should work fine again.
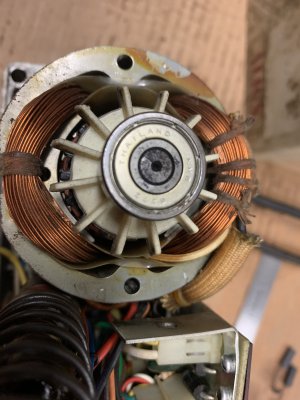
After those two items were tackled, I just moved around the head without issue. The entire head is sitting on the bench now and I have the pulley's soaking in evaporust. I did find out where that random key came from that was sitting near the motor. The stationary side of the disk attached to the motor shaft was missing the key, but still had the set screw. Either it worked itself out, or someone didn't tighten the set screw.
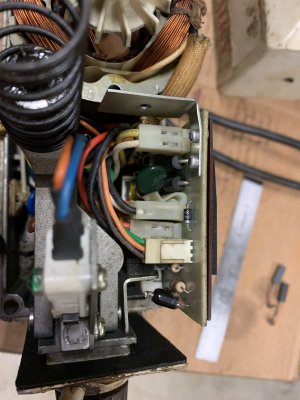
I also decided to tackle the power feed today as well to see if I could figure out why it wasnt working. I'll attach a video instead of writing that up.
I'm placing another order to H&W for the parts I need for the head. Assuming they ship as quickly as last time, I think I should have every part I need to have this machine 100% back together by middle of next week.
Got the head completely torn down to include the quill housing. So the clutch housing that I was having a problem with just needed a little more encouragement. I used a pry bar and just pulled on it between the housing the the lever that goes towards the front of the machine. Came out pretty easily with some pry bar encouragement.
From there I went back to the front of the machine to make a run at that bushing that has the slot head screw, spring and ball in it. Come to find out, the ball was jammed so firmly down in to the ball's recess in the shaft that it would't come out. So basically when trying to pull that bushing off, it was being retained by the ball sticking half way out of the hole. I tried to free it with some picks, some light taps to rattle it loose, but it wasn't coming. So, instead of stopping in my tracks and trying to find an easy solution I felt probably didnt exist, I just went ahead with cutting the bushing with a pneumatic cutoff wheel. Sucks, it was a perfectly good part, but I wasn't going to be able to dismantle further without getting it out of the way. Once I had it compromised to the point that it had some give, I pried it over the ball bearing stuck in the hole.
Now on to the shaft with the stuck ball bearing in it. The ball wasn't coming free no matter what I did. So I ended up using that same pneumatic cutoff wheel and scoring the edge of the hole just deep enough to get a pick under the ball and pop it out. It worked. I looked up the cost of that shaft with worm gear assembly at the end that drives the clutch and it's like $200. So I'm going to use a little JB weld to fill in that recess and then sand it smooth. Should work fine again.
After those two items were tackled, I just moved around the head without issue. The entire head is sitting on the bench now and I have the pulley's soaking in evaporust. I did find out where that random key came from that was sitting near the motor. The stationary side of the disk attached to the motor shaft was missing the key, but still had the set screw. Either it worked itself out, or someone didn't tighten the set screw.
I also decided to tackle the power feed today as well to see if I could figure out why it wasnt working. I'll attach a video instead of writing that up.
I'm placing another order to H&W for the parts I need for the head. Assuming they ship as quickly as last time, I think I should have every part I need to have this machine 100% back together by middle of next week.
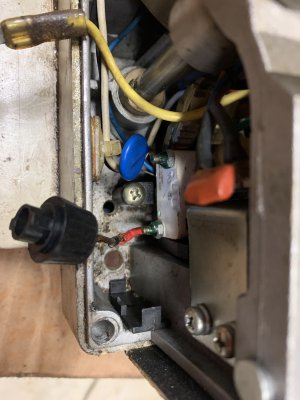
 lol Ya, that is not normal. That fuse (if you want to get it back to original and properly working) has gots to go now. Again, I am trying to type as I watch the video. I have to agree with your inner monologue, it probably isnt the safest trying just to touch those two together...