POTD- PROJECT OF THE DAY: What Did You Make In Your Shop Today?

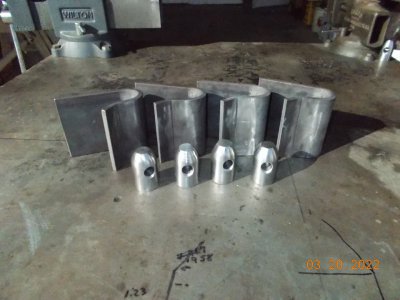
This week I worked on a paying gig to fab up some bushings. 6" long turned od and id with two thru holes 90 degrees apart. The only economical material is 2 1/2" heavy wall pipe. This pipe is no fun to work with, it is not round, has a seam and is generally nasty. I ordered a "pipe" or "bull nose" live centre, but the customer moved up the delivery date on me so I made my own. It is simply a slug of steel with a turned area (with tapered lead area) that is a "hammer it in" fit to the pipe on one side and a centre drilled hole on the other. It actually work quite well.
20220317_193944.jpg


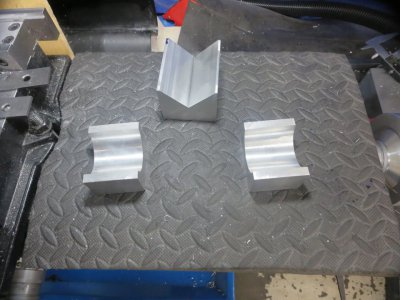
Here the ods have been done setting up for the ids
20220319_082415.jpg

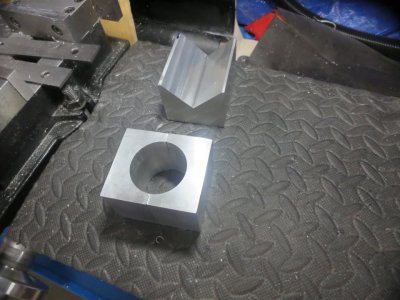
Turning the ids with my custom boring bar.20220319_105253.jpg

Here is a shot of the mill setup to drill the two 90 degree offset holes. I again fired up the Bostik260 to attache an indexing fixture to the end of the work. (I hot melt glued a 123 block to the end of the work).

* sacrificial parallel on the vice (also glued in place)
* work stop on left end
* square in position for indexing

20220319_183327.jpg


All in all I'm glad to be done working with pipe for a while.
Thanks for looking.
Enjoy your shop time!
 
Nothing fancy just a semi novice making tools I have been missing. When I worked in a motorcycle shop we had u blocks and and v blocks for straightening forks or shafts. You rest the forks in the u blocks and use the v block to protect the fork on the top side as you press out the bend. Press a little, release the press just a little and rotate the shaft to see if you got it out or went too far, or multiple bends. Repeat as necessary. Pretty easy to see as you roll it. I had someone want me to straighten a shaft last week and I got it done just using the press rails, but I remembered the good old days, and I needed a project.
IMG_0974.JPG
 

Attachments

  • IMG_0975.JPG
    IMG_0975.JPG
    127.2 KB · Views: 22
  • IMG_0976.JPG
    IMG_0976.JPG
    116.3 KB · Views: 31
Picked up this Williams threading tool some time ago. Guessing it was designed for use in a lantern tool post. Was really awkward to impossible to use with a quick change tool post. So we made a straight shank for the cutter. Could dress up the front end but probably never get to it. lol
IMG_4580.jpeg

IMG_4578.jpeg
A quick try on some cold roll.

IMG_4579.jpeg

Greg
 
Picked up this Williams threading tool some time ago. Guessing it was designed for use in a lantern tool post. Was really awkward to impossible to use with a quick change tool post. So we made a straight shank for the cutter. Could dress up the front end but probably never get to it. lol
View attachment 401187

View attachment 401190
A quick try on some cold roll.

View attachment 401189

Greg
nice looking threads. The nice thing about that tool is you only need to touch up the top and you have a new cutting edge.
Nicely done on making it work.
 
Guide pins and hangers for a quick change fork frame set up to fit a JD utility tractor.

Looking good.

I'd like to see how you formed the hangers. Is that 1/4" x 3" HR?
 
Yeah, I made brass washers since I wanted something harder than plastic but not too hard. They seem to work good so far. I made them with 1/2" OD to match the arms width with a 1/4" ID to match the screws.

Overall, I'm very pleased how it works so far. The official Indicol isn't sized for my PM25 mill. I have a Noga holder and an Edge Tech holder, but this one seems be the best. The Edge Tech clamps on the spindle also, but seems to be not rigid enough. The Noga needs to be inserted into a 8mm collet.
Have you tried indicators with a swivel spigot like the Verdict Metrinch - https://www.mscdirect.co.uk/VDT-83001B/SEARCH:CATEGORY/product.html
Fitting the indicator in a chuck allows it to be moved back and forth on the spigot with the stylus point remaining on the spindle centreline. It's ideal for small holes to tramming heads.
Another quick use is to hold horizontally it in the lathe tailstock chuck to indicate the top - bore or face of a part quickly by tilting up or down.
They have a nice tight pivot that is extremely stable and benefits from being close to where it is clamped.
 
Needed a clutch plate alignment tool for engine for the wood chipper , found a 1 1/4” square head bolt from the scrap bin . Cut down the threaded end even though it clean up the existing threads . Getting closer to getting this chipper back together 796F8C61-2472-441A-821A-FFA9527EB7A9.jpeg
 
Well, my whole sunday was a wash. Started the cylinder rack project for a customers trailer, my portable rig wouldn't energize, it does that occasionally and a restart is usually the cure. Shut down and tried to restart, no start, investigate and the fuel solenoid is going to shut off when the start switch is pushed. Anyway, need to get to work so use the shop welder, get the basics done and customer comes by later with a different idea that takes up more room on the trailer, IDK, gonna try and convince him on my way later in the week as I wasn't thinking clearly at the time, and didn't want my frustration to come out. Went to feed hay and the parking brake cable broke on the big tractor, so there's that. But hey, 6 new calves this week, all born unasisted and healthy! 20220320_102254.jpg
 
Last edited:
Looking good.

I'd like to see how you formed the hangers. Is that 1/4" x 3" HR?
Just a simple deep rectangular die is all.
Something Les welded up in his shop.
Uses a length of 1/4 x 4 hot roll and a short piece of round rod to press into it after first making the "lip" bend.
 
Back
Top