- Joined
- Nov 23, 2014
- Messages
- 2,609
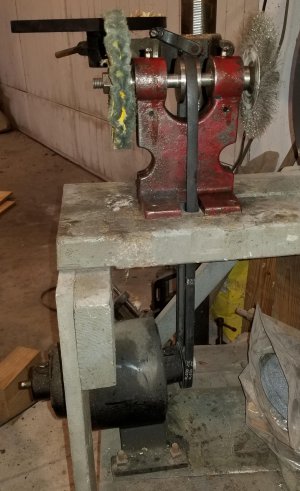
POTD was repairing a bench grinder. My dad made this grinder in shop class back in high school in 1953/54. He’d left it with his dad after high school, and it made its way into my shop back in 1998 after my grandfather passed away. I already had 2 or 3 grinders but wanted it because my dad had made it.
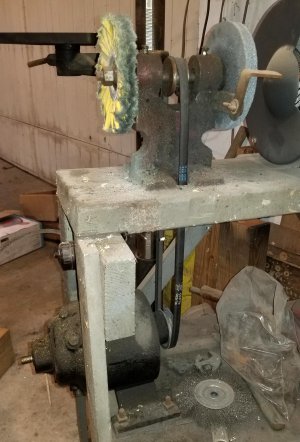
Bench grinder made by my dad in HS shop in 1953/54. Cast iron base with a 5/8" / 1/2" arbor, brass bushings for support.
My grandfather had a wire wheel and a 60-grit wheel on it. I fired it up 20+ years ago and noticed the arbor was a bit jumpy. Unit of measure for “bit” was greater than 1/8”. . .
A "little" wear in the bushings is an understatement
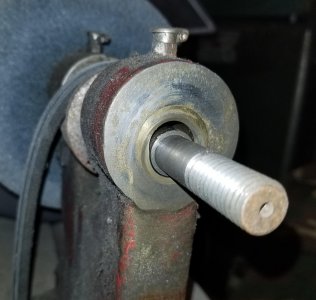
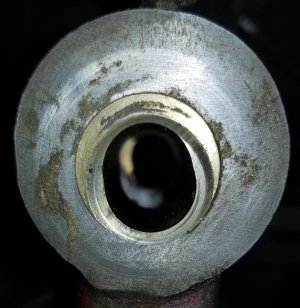
Well, not wanting to rush into a project, 22 years later it was finally time to work on the grinder. It was pretty obvious what was off and needed replacing. The design was a couple of bushings that supported the arbor. The bushing OD was 1”, ID 5/8”. You can see from the pictures that there was some significant wear. In fact, one bushing was worn completely through.
I pressed the bushings out with my HF 20-ton press. I’d guess by the color and ease of cutting with a file that dad had used 360 brass for his bushings.
The bushings were 1.5” long, 1” OD probably originally 0.625” ID, or maybe a little larger for some clearance to the arbor shaft with measured 0.625” in the middle. We lost my dad in April 2019, so couldn’t ask him if he recalled turning the arbor down at the bushings, they now measured 0.615”. I figured they were worn, so chucked up the arbor and trued up the bearing area. I realized after the fact I didn’t have my phone in the shop, so no pics of that. I did the arbor first so I’d know the ID needed on the new bushings.
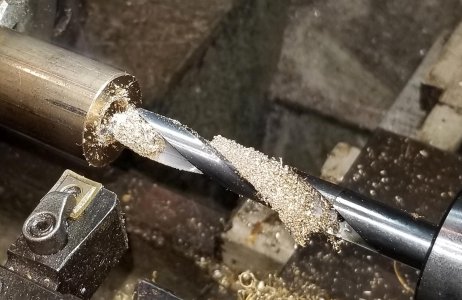
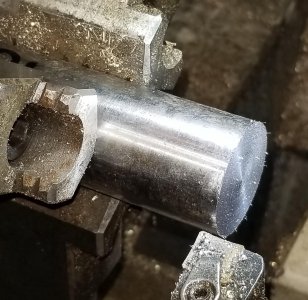
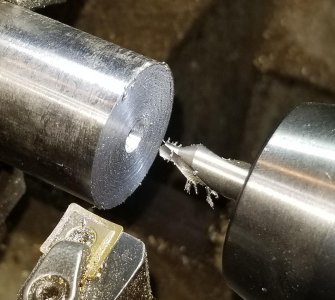
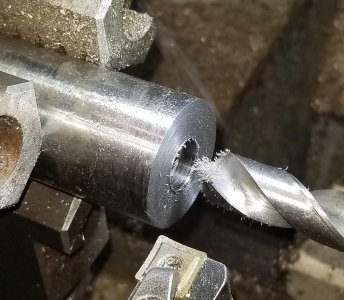
Grabbed some mystery bronze that was faced and center drilled. Then I tried drilling a clearance hole for boring with a ½” HSS drill bit. I’ve drilled drill rod before and never had this much problem. Don’t know what the bronze has it in, but high speed steel was not going to easily cut it. Ended up using a sharp solid carbide drill bit which had no problems.
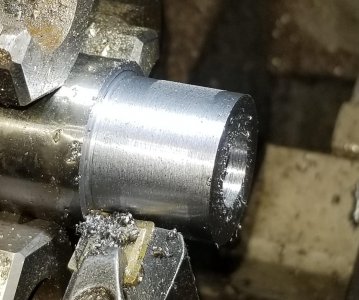
Faced, center drilled and clearance drilled for boring. Turned the OD to size for pressing in the grinder base.
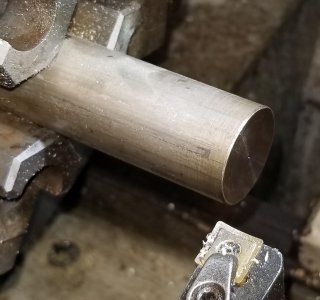
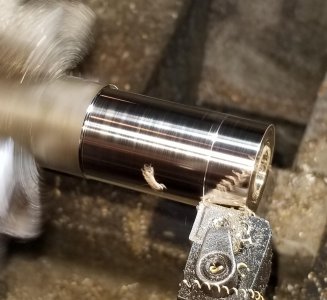
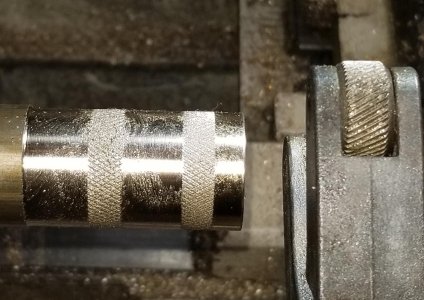
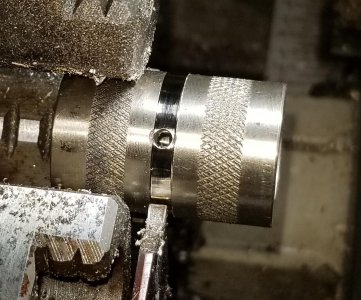
Bored to 0.615” (had turned the arbor to 0.612”) and turned the OD to 1.000”. Knurled a couple of rings to create an interference with the holes in the grinder base.
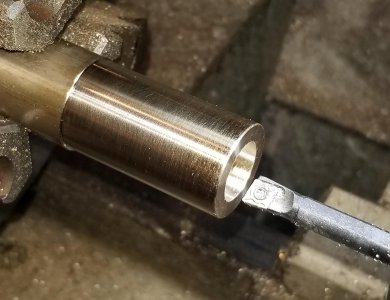
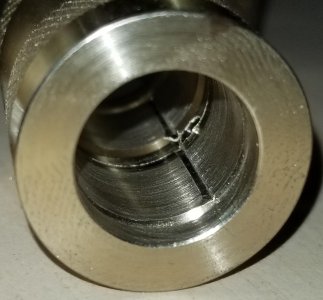
One problem with dad’s bushings was there were no galleys to carry oil along the surface. I used a carbide boring bar to cut an internal groove about 1/8” in from the end of the bushing. Then ground a HSS bit to cut a groove at the center under the Gits oiler. Also planned on turning the bit 90 deg. in the boring bar and hand broach a groove to carry oil from the center groove to the outer groove. I had a pretty sharp edge on the HSS, but no go on cutting that bronze. Ended up using a carbide inserted boring bar instead.
This HSS boring bit barely scratched the bronze
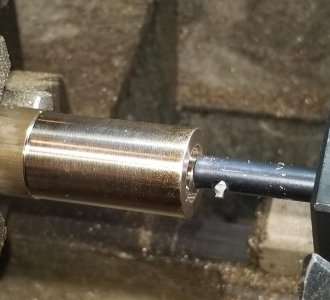
Used a carbide boring bar to cut an oil groove near the end of the bushing
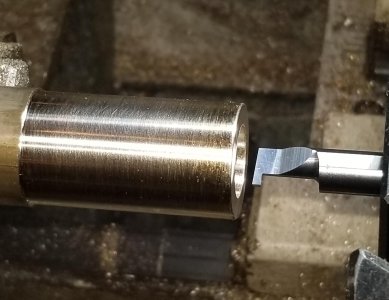
Used this carbide insert boring bar to cut an oil groove in the middle and broach an oil galley from the center groove to the outer groove
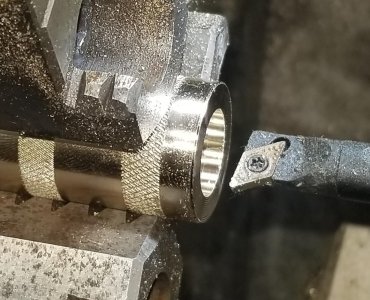
Parted and flipped to face the opposite side and cut the opposite side outer oil groove.
Spot drilled and drilled a hole for dripping oil from the Gits oiler in the base to the oil grooves
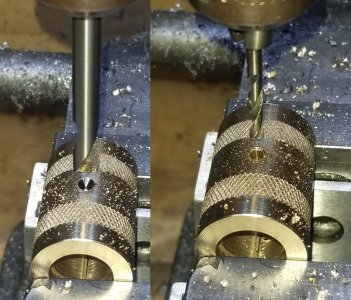
Cut a groove at the center of the oil inlet hole in case the bushing rotated during pressing.
New up front, old in back
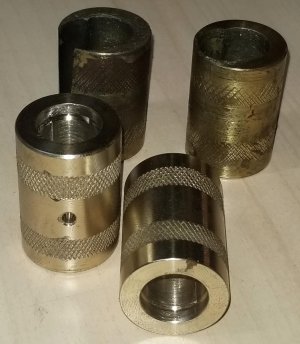
View in one of the new bushings, oil galley grooves should help prolong the bushing life
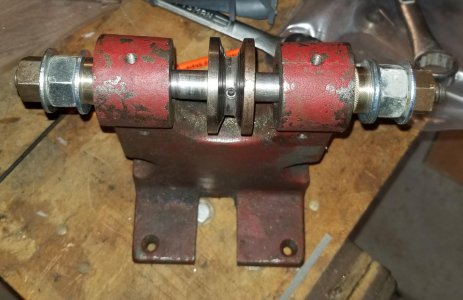
I pressed the bushings in place using the arbor with washers on the ends in place of a wheel. Turned the nuts to squeeze the bushings in place. Dad had turned a couple of taper-face on one side washers for mashing the wheel on the arbor. About this point I realized another problem in the design. The bushings should be just carrying the arbor, so just radial contact. However, the grinder design used the face of the bushings as a thrust bearing also.
Held the pulley in one hand while tightening the arbor nuts to press the bushings in.
I thought about remaking the bushings out of some larger diameter bronze; would leave a flange on the outside of the grinder housing which would be a thrust bearing that the clamping washers would bear against. Instead, decided to pin the arbor on either side and turn a thick washer as the bearing surface for the clamping washers.
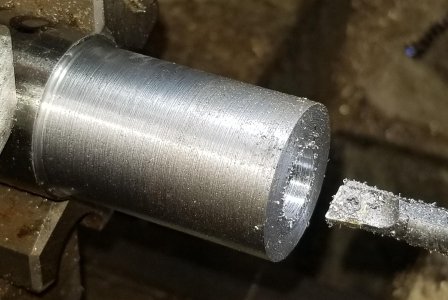
Chucked up a piece of CRS, faced and drilled a clearance hole for slipping over the arbor. The arbor is ½” OD where the wheels set. I drilled a ½” hole, then bored an extra 0.010” or so for a little clearance. Turned the OD from 1 ¼” down to 1 1/8” as that’s my largest 5C collet. I could have left it at 1 ¼” and held the round in a V-block on the mill, but hindsight is 2020. Instead, put the 1 1/8” steel in a 5C collet block in a square collet block.
Faced, center drilled, clearance drilled, turned to diameter and bored the washers
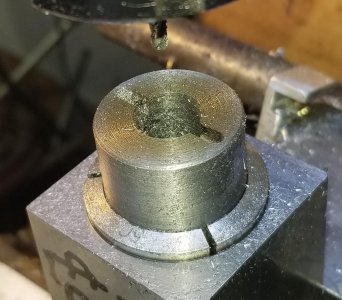
Used a 1/8” ball end mill to cut a groove in the round. Idea was for the washer to slip over a 1/8” dowel pin to capture the pin. Could have just used a spring pin and a flat washer as an alternative.
Went 0.150" deep with a 1/8" ball end mill to capture a 1/8" dowel pin
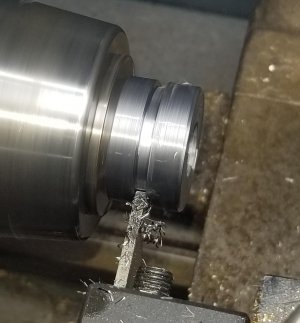
Back to the lathe for parting and facing the parted side. I’ve had pretty good luck truing up thin work (washer was ¼” thick) in a collet by tightening it to just starting to snug, then carefully touch the face at the edge with the cutting tool. This does a pretty good job getting the round squared up in the collet. Shut off the lathe and tighten the collet before facing.
Parting a washer
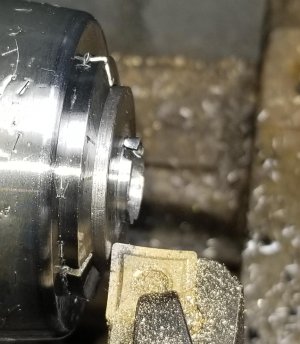
I've had good luck truing up thinner stock in a collet by just starting to snug the collet, then lightly touch the work with a tool. When it's running true, shut off the lathe and tighten the collet.
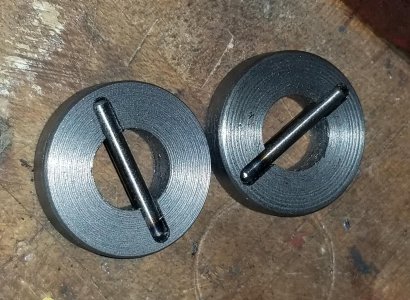
Couple of washers and dowel pins
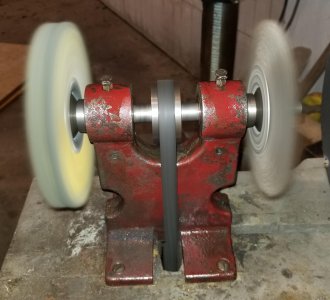
Put it all back together and it runs like a grinder again. It almost sounded like a horse trotting down the road before with the arbor bouncing up and down when powered up. You never know, might be a post from my grandson in 50 years giving a long, drawn out rendition of his repair on this same grinder!
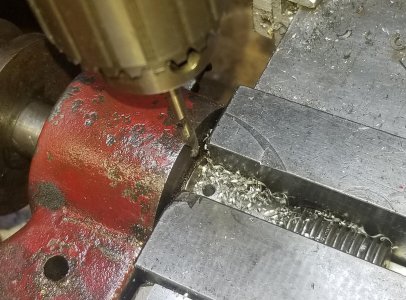
Drilled a 1/8" hole in the mill for a dowel pin. Would have been easier with the arbor loose, but the bushings were already in place.
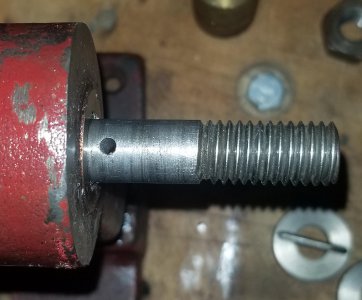
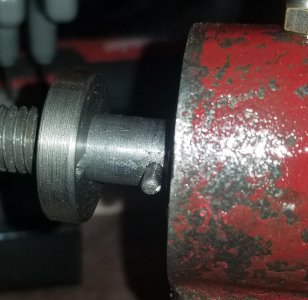
Dowel pin in the arbor, washer slips over the dowel to retain it. When tightening wheels on the arbor, they'll press against this washer and pin. Back side of the washer is about 0.050" from the bushing.
Good as new (lots better than it was!)
Thanks for looking,
Bruce
Bench grinder made by my dad in HS shop in 1953/54. Cast iron base with a 5/8" / 1/2" arbor, brass bushings for support.

My grandfather had a wire wheel and a 60-grit wheel on it. I fired it up 20+ years ago and noticed the arbor was a bit jumpy. Unit of measure for “bit” was greater than 1/8”. . .
A "little" wear in the bushings is an understatement


Well, not wanting to rush into a project, 22 years later it was finally time to work on the grinder. It was pretty obvious what was off and needed replacing. The design was a couple of bushings that supported the arbor. The bushing OD was 1”, ID 5/8”. You can see from the pictures that there was some significant wear. In fact, one bushing was worn completely through.
I pressed the bushings out with my HF 20-ton press. I’d guess by the color and ease of cutting with a file that dad had used 360 brass for his bushings.
The bushings were 1.5” long, 1” OD probably originally 0.625” ID, or maybe a little larger for some clearance to the arbor shaft with measured 0.625” in the middle. We lost my dad in April 2019, so couldn’t ask him if he recalled turning the arbor down at the bushings, they now measured 0.615”. I figured they were worn, so chucked up the arbor and trued up the bearing area. I realized after the fact I didn’t have my phone in the shop, so no pics of that. I did the arbor first so I’d know the ID needed on the new bushings.
Grabbed some mystery bronze that was faced and center drilled. Then I tried drilling a clearance hole for boring with a ½” HSS drill bit. I’ve drilled drill rod before and never had this much problem. Don’t know what the bronze has it in, but high speed steel was not going to easily cut it. Ended up using a sharp solid carbide drill bit which had no problems.
Faced, center drilled and clearance drilled for boring. Turned the OD to size for pressing in the grinder base.


Bored to 0.615” (had turned the arbor to 0.612”) and turned the OD to 1.000”. Knurled a couple of rings to create an interference with the holes in the grinder base.


One problem with dad’s bushings was there were no galleys to carry oil along the surface. I used a carbide boring bar to cut an internal groove about 1/8” in from the end of the bushing. Then ground a HSS bit to cut a groove at the center under the Gits oiler. Also planned on turning the bit 90 deg. in the boring bar and hand broach a groove to carry oil from the center groove to the outer groove. I had a pretty sharp edge on the HSS, but no go on cutting that bronze. Ended up using a carbide inserted boring bar instead.
This HSS boring bit barely scratched the bronze

Used a carbide boring bar to cut an oil groove near the end of the bushing

Used this carbide insert boring bar to cut an oil groove in the middle and broach an oil galley from the center groove to the outer groove

Parted and flipped to face the opposite side and cut the opposite side outer oil groove.
Spot drilled and drilled a hole for dripping oil from the Gits oiler in the base to the oil grooves

Cut a groove at the center of the oil inlet hole in case the bushing rotated during pressing.

New up front, old in back

View in one of the new bushings, oil galley grooves should help prolong the bushing life

I pressed the bushings in place using the arbor with washers on the ends in place of a wheel. Turned the nuts to squeeze the bushings in place. Dad had turned a couple of taper-face on one side washers for mashing the wheel on the arbor. About this point I realized another problem in the design. The bushings should be just carrying the arbor, so just radial contact. However, the grinder design used the face of the bushings as a thrust bearing also.
Held the pulley in one hand while tightening the arbor nuts to press the bushings in.

I thought about remaking the bushings out of some larger diameter bronze; would leave a flange on the outside of the grinder housing which would be a thrust bearing that the clamping washers would bear against. Instead, decided to pin the arbor on either side and turn a thick washer as the bearing surface for the clamping washers.
Chucked up a piece of CRS, faced and drilled a clearance hole for slipping over the arbor. The arbor is ½” OD where the wheels set. I drilled a ½” hole, then bored an extra 0.010” or so for a little clearance. Turned the OD from 1 ¼” down to 1 1/8” as that’s my largest 5C collet. I could have left it at 1 ¼” and held the round in a V-block on the mill, but hindsight is 2020. Instead, put the 1 1/8” steel in a 5C collet block in a square collet block.
Faced, center drilled, clearance drilled, turned to diameter and bored the washers


Used a 1/8” ball end mill to cut a groove in the round. Idea was for the washer to slip over a 1/8” dowel pin to capture the pin. Could have just used a spring pin and a flat washer as an alternative.
Went 0.150" deep with a 1/8" ball end mill to capture a 1/8" dowel pin

Back to the lathe for parting and facing the parted side. I’ve had pretty good luck truing up thin work (washer was ¼” thick) in a collet by tightening it to just starting to snug, then carefully touch the face at the edge with the cutting tool. This does a pretty good job getting the round squared up in the collet. Shut off the lathe and tighten the collet before facing.
Parting a washer

I've had good luck truing up thinner stock in a collet by just starting to snug the collet, then lightly touch the work with a tool. When it's running true, shut off the lathe and tighten the collet.

Couple of washers and dowel pins

Put it all back together and it runs like a grinder again. It almost sounded like a horse trotting down the road before with the arbor bouncing up and down when powered up. You never know, might be a post from my grandson in 50 years giving a long, drawn out rendition of his repair on this same grinder!
Drilled a 1/8" hole in the mill for a dowel pin. Would have been easier with the arbor loose, but the bushings were already in place.


Dowel pin in the arbor, washer slips over the dowel to retain it. When tightening wheels on the arbor, they'll press against this washer and pin. Back side of the washer is about 0.050" from the bushing.

Good as new (lots better than it was!)


Thanks for looking,
Bruce
Last edited:

